Paul’s Canoe Part Twenty-six. The launching of Paul’s Canoe

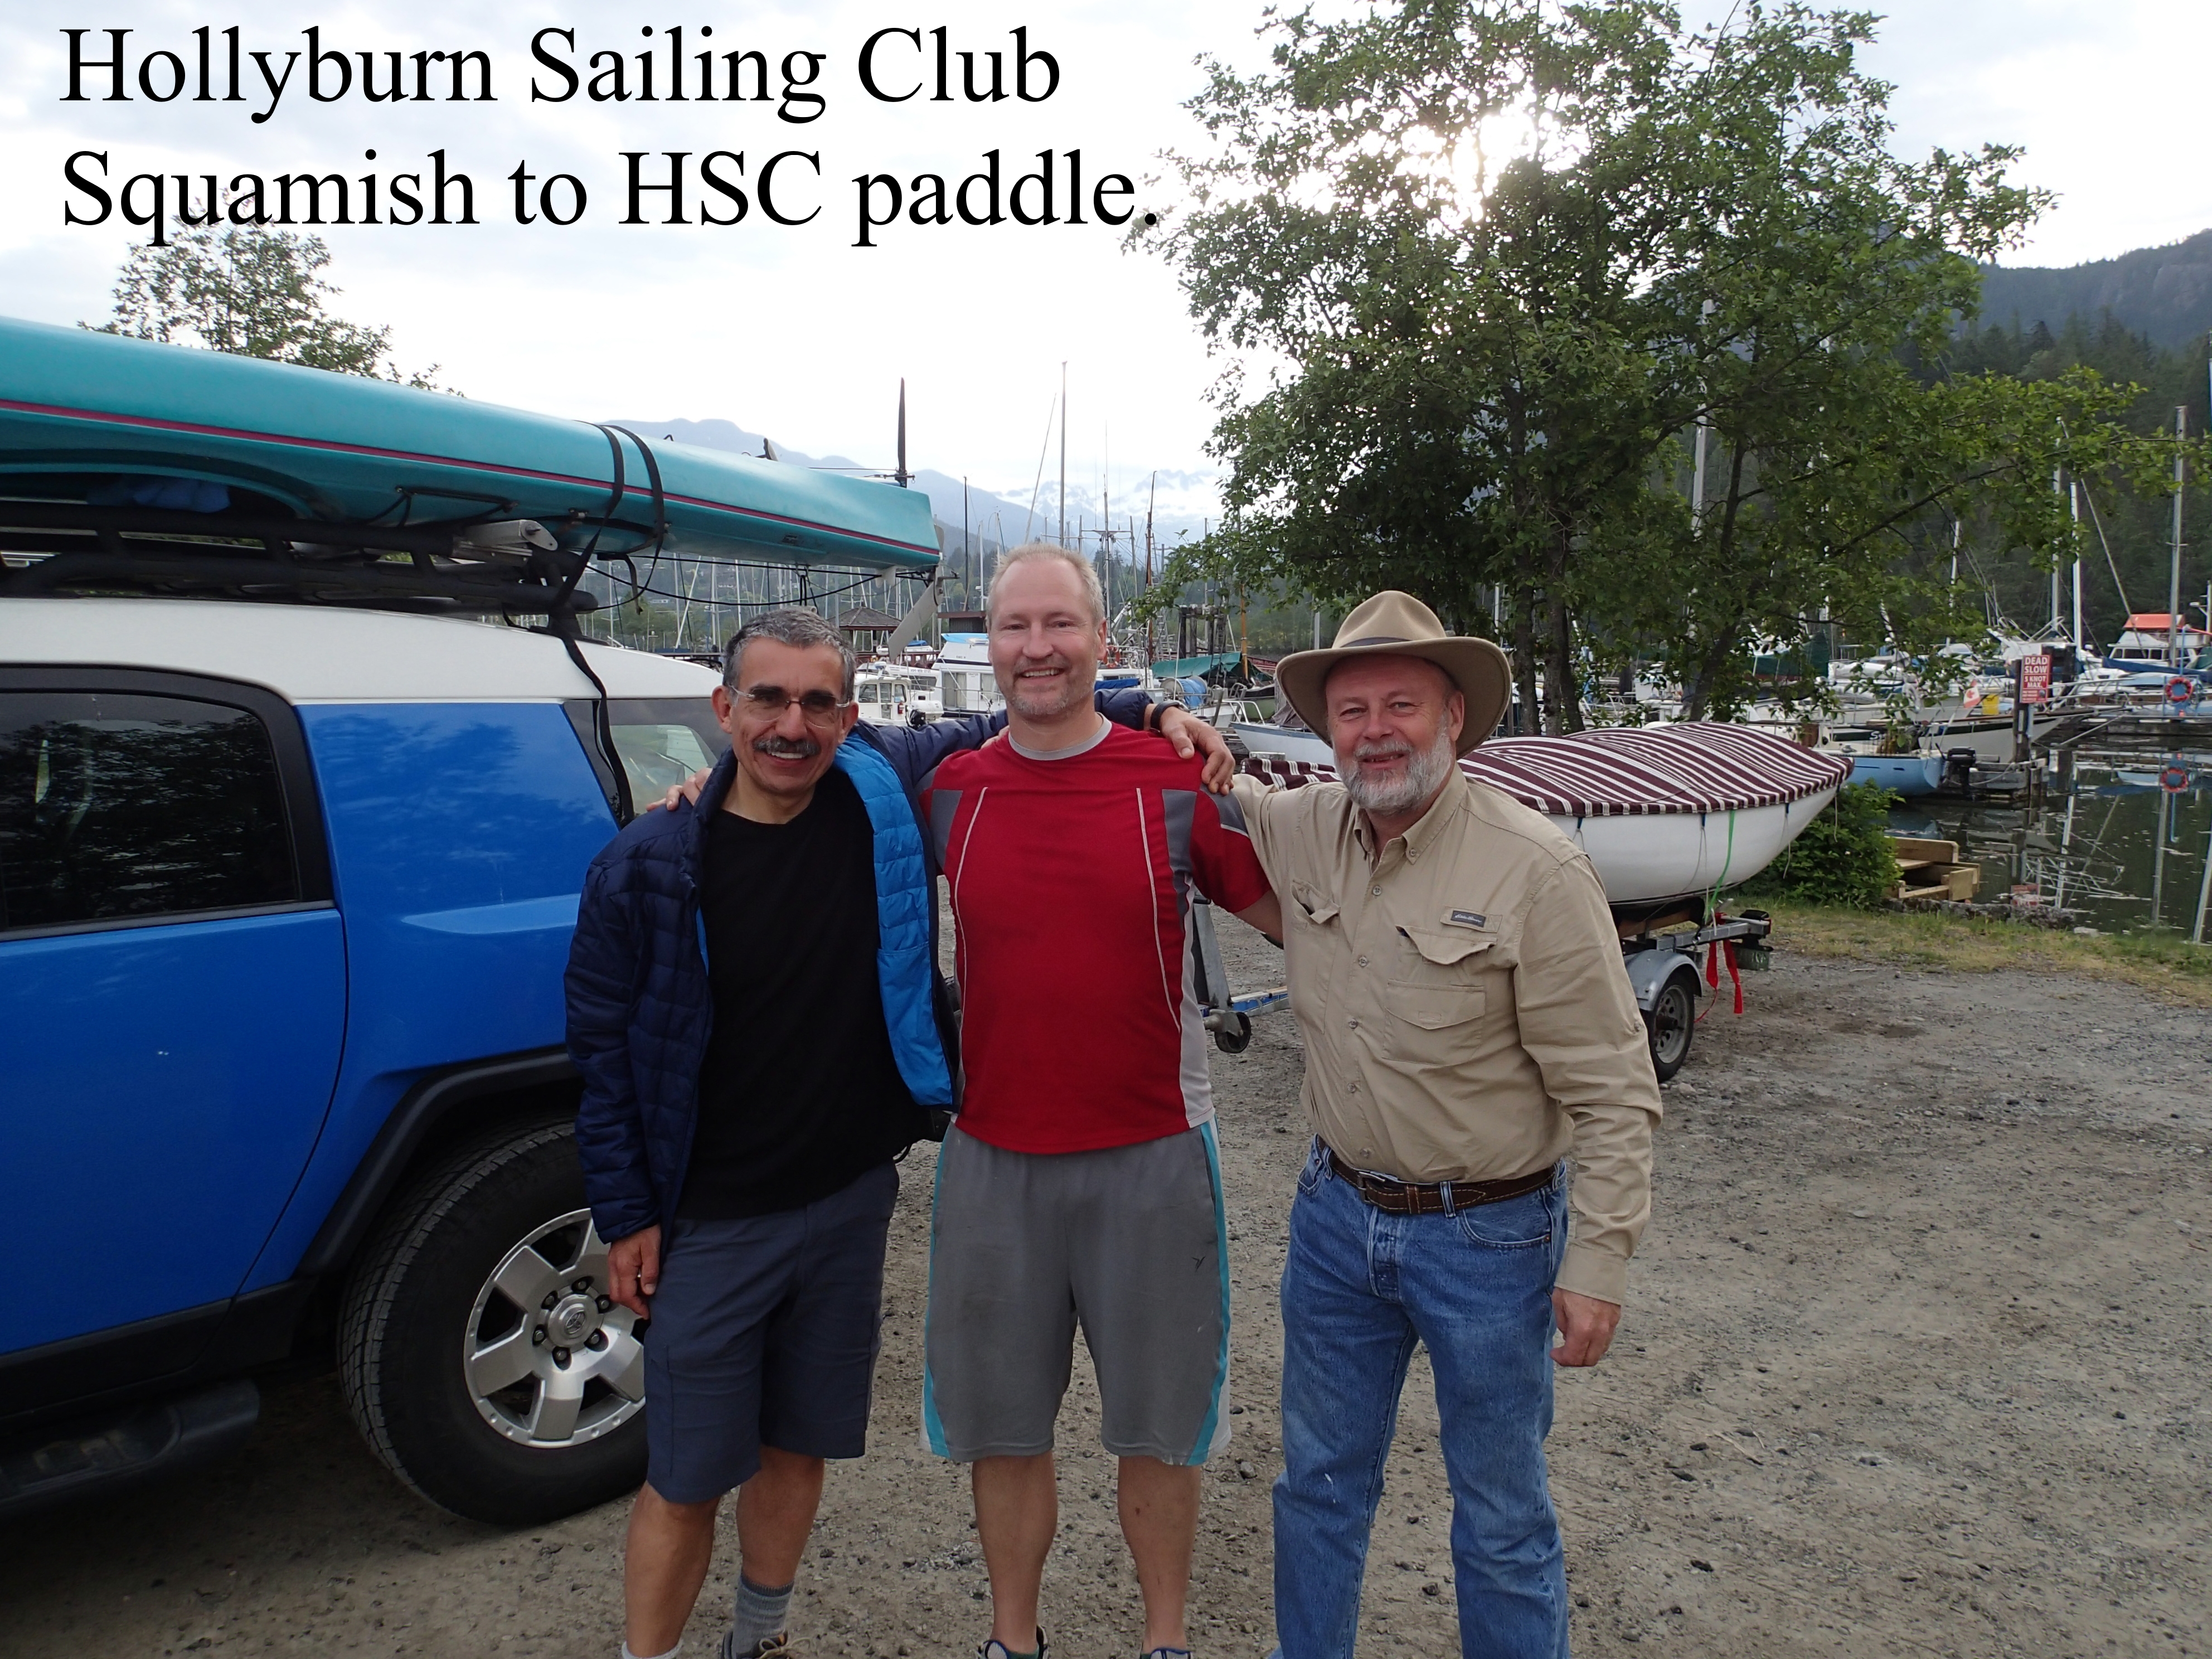
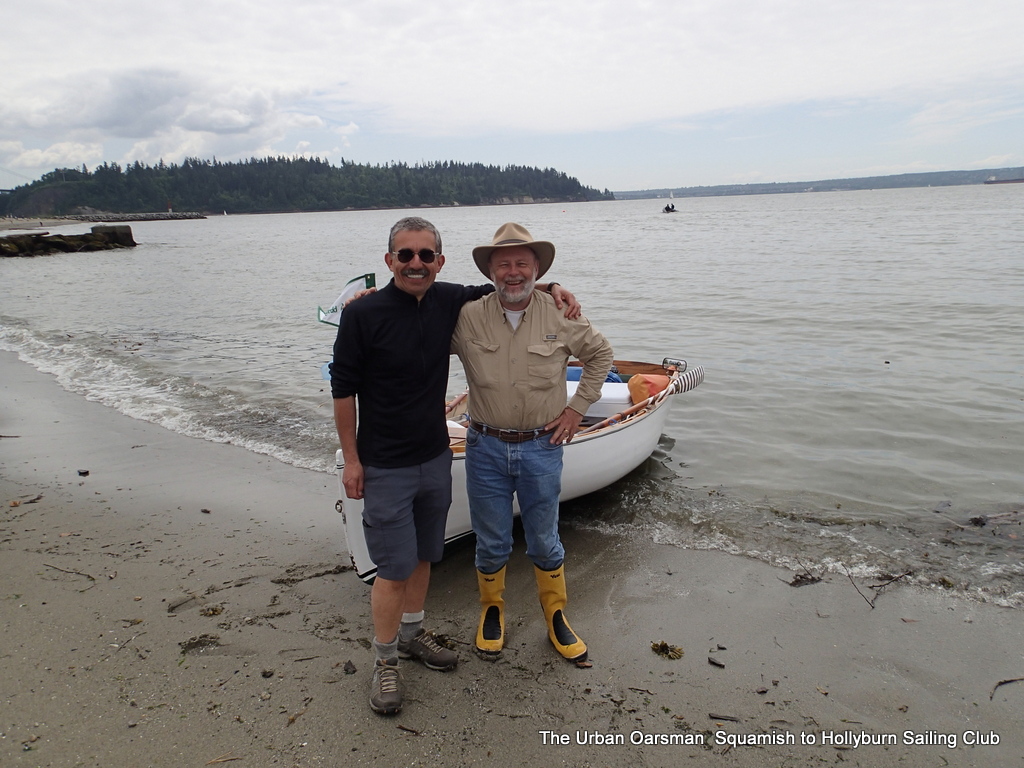
The canoe launch is today, Father’s Day, June 17th , 2018, at the Hollyburn Sailing Club.

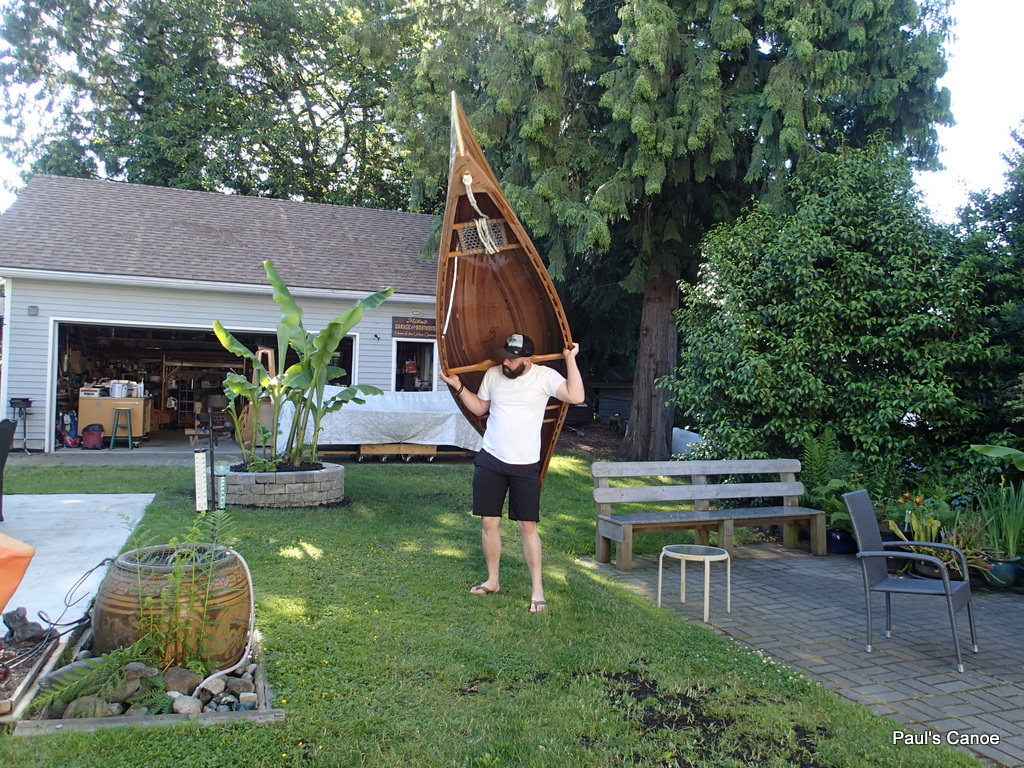
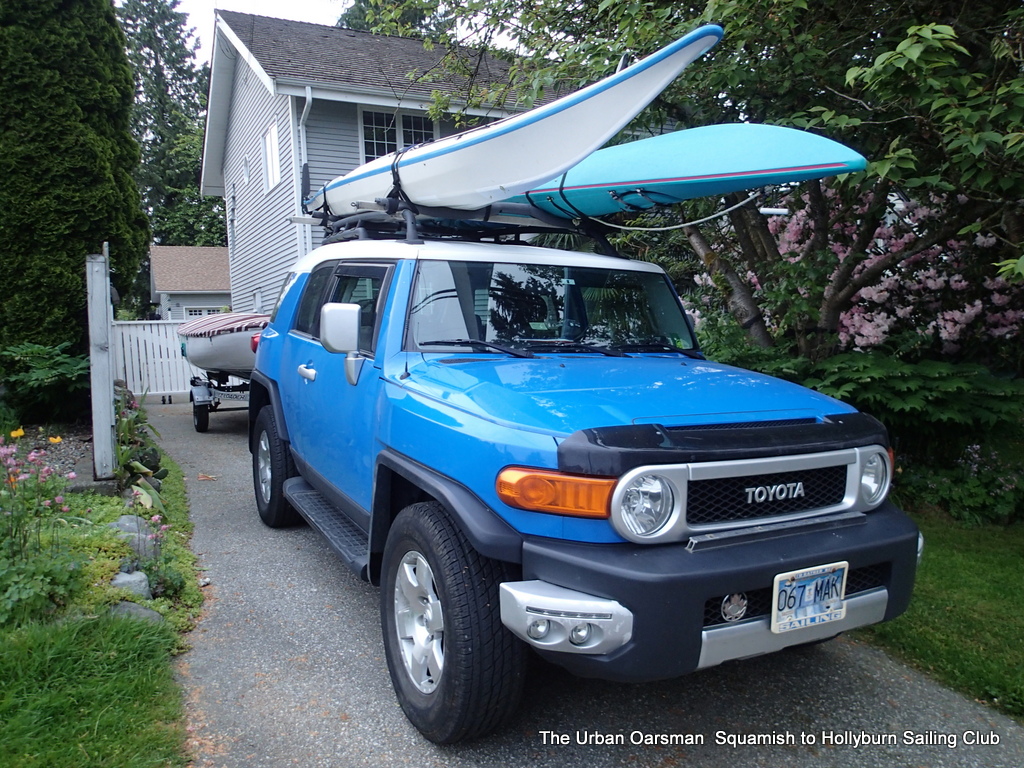
Paul carries the canoe to load onto the FJ.

Paul easily picks up and carries the canoe.

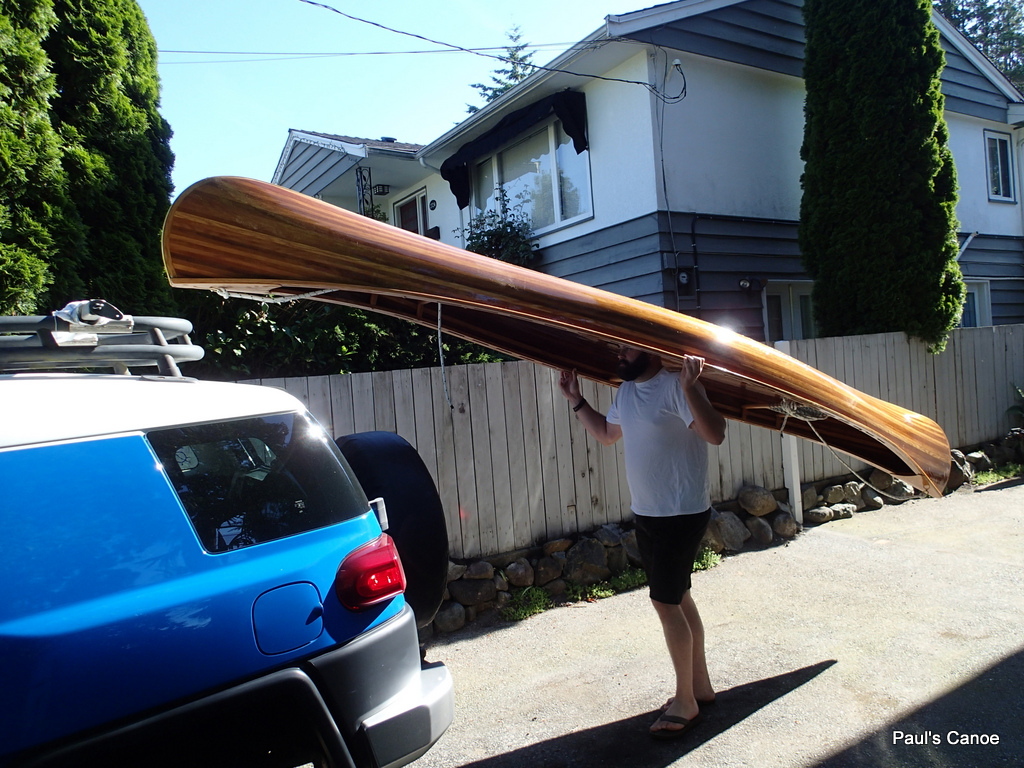
Onto the roof racks.

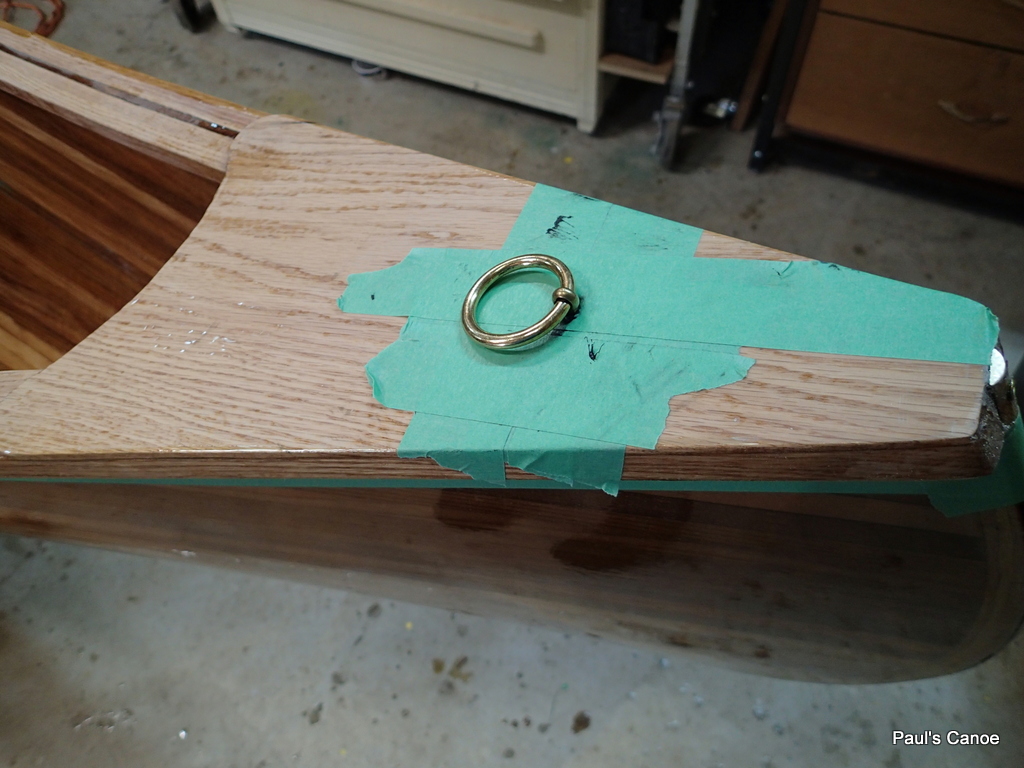
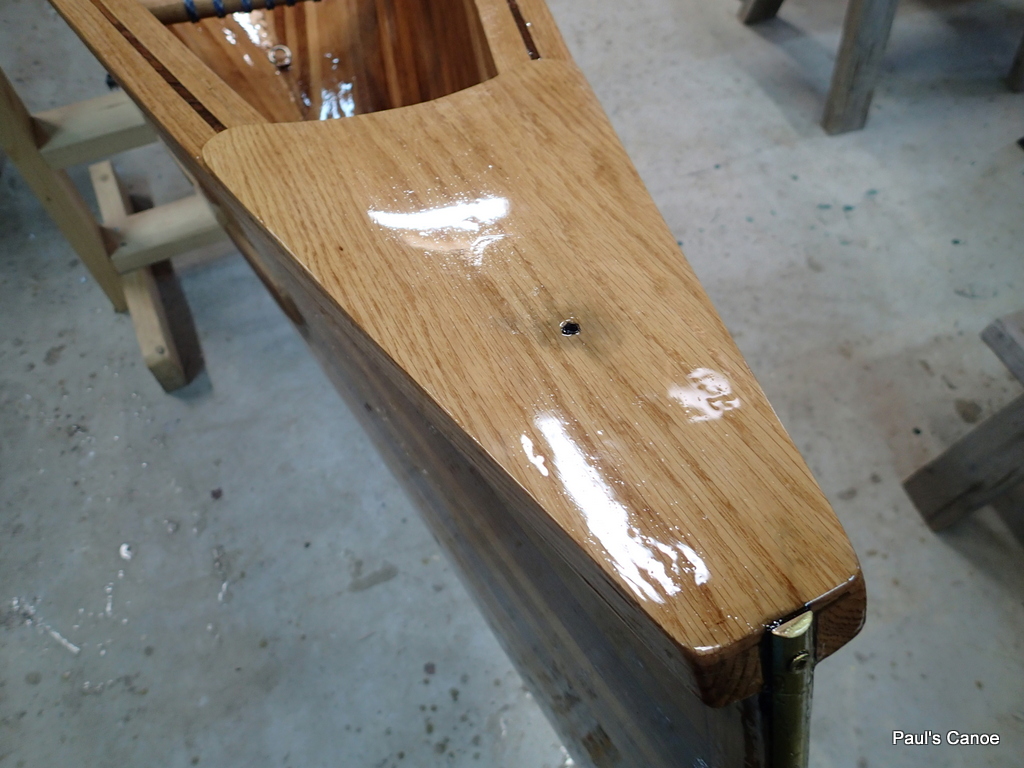
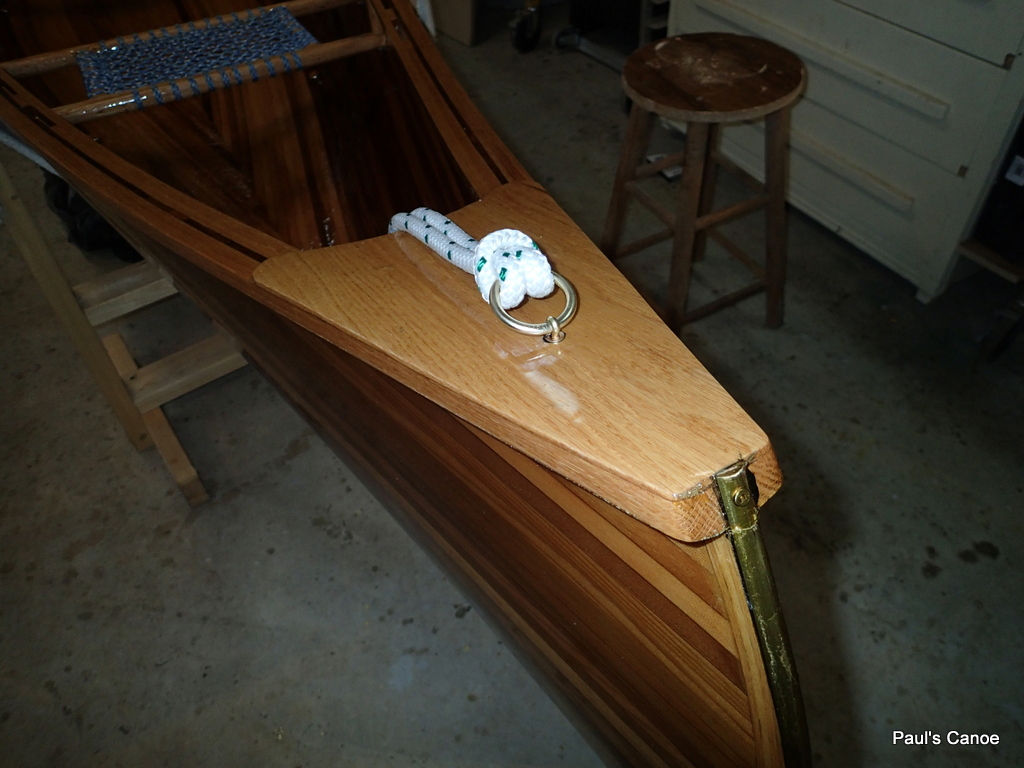
I have taped towels onto the roof rack crossbars.  We centre the canoe and I tie it down.  The now bolted-in bow and stern rings work well..  Feel very secure.

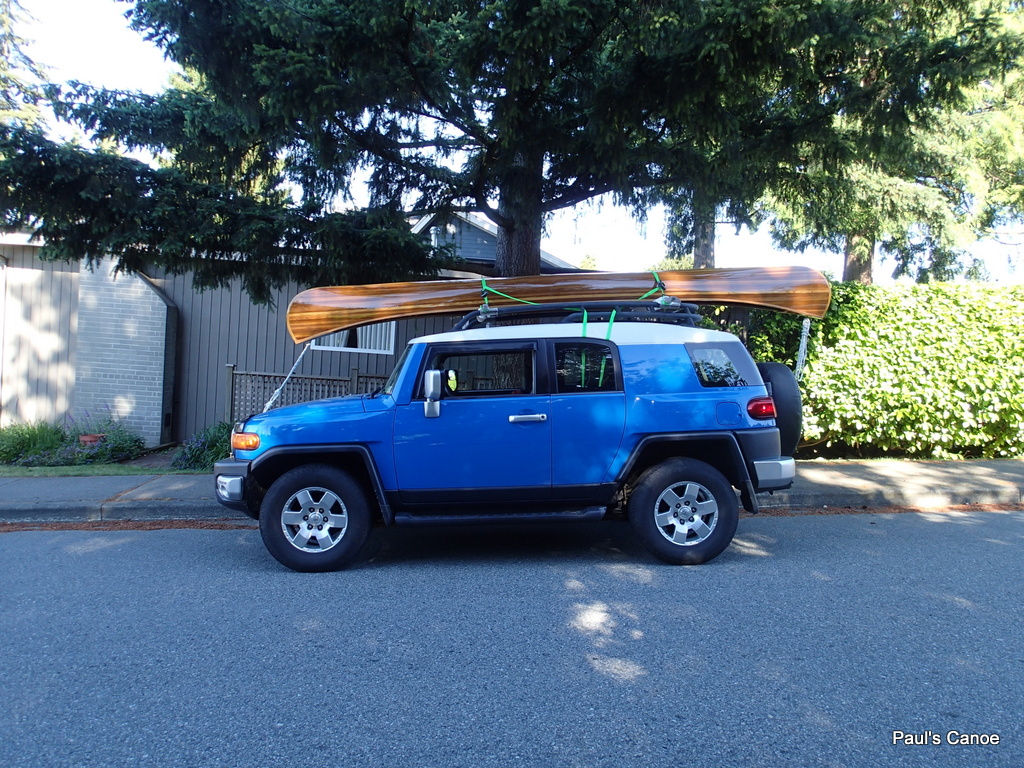
The bow and stern lines are just the right length to tie to the FJ.

Two green ratchet straps, (the ones used to hold the strips to the station molds) secure the canoe….It could be a little further forward?

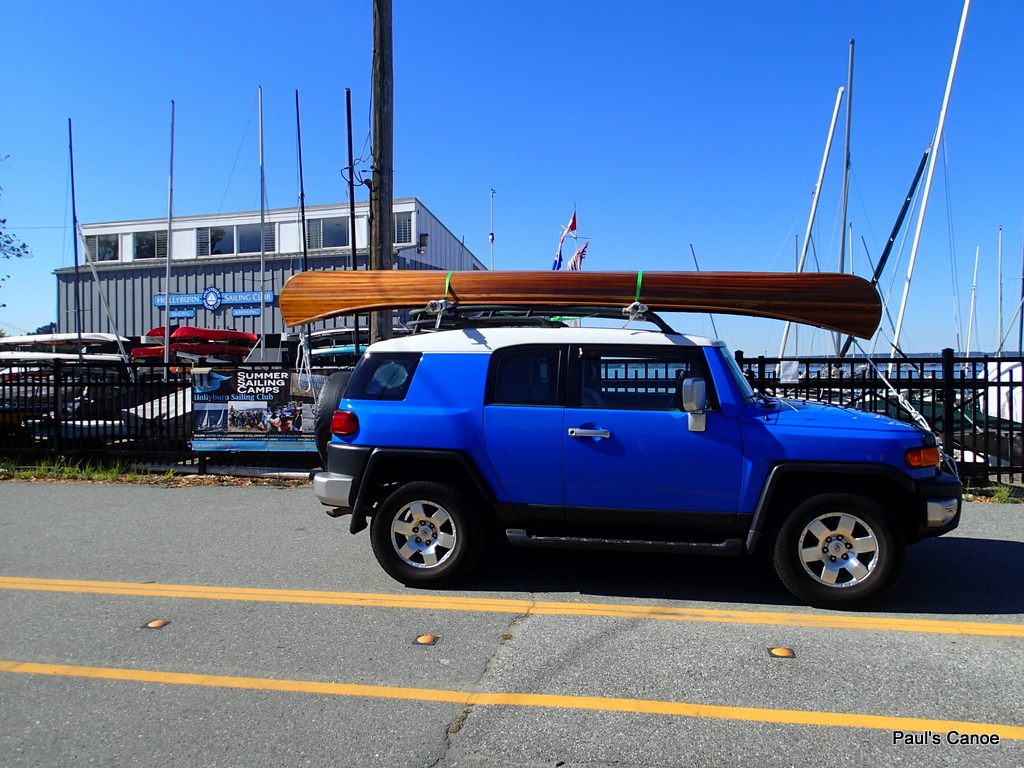
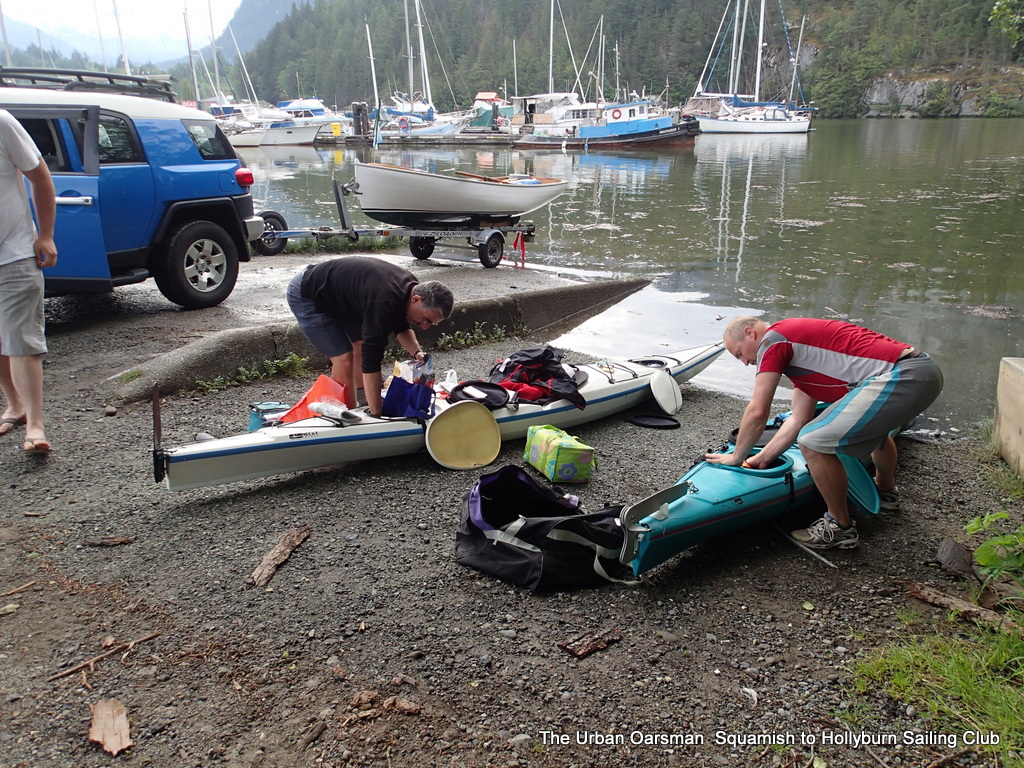
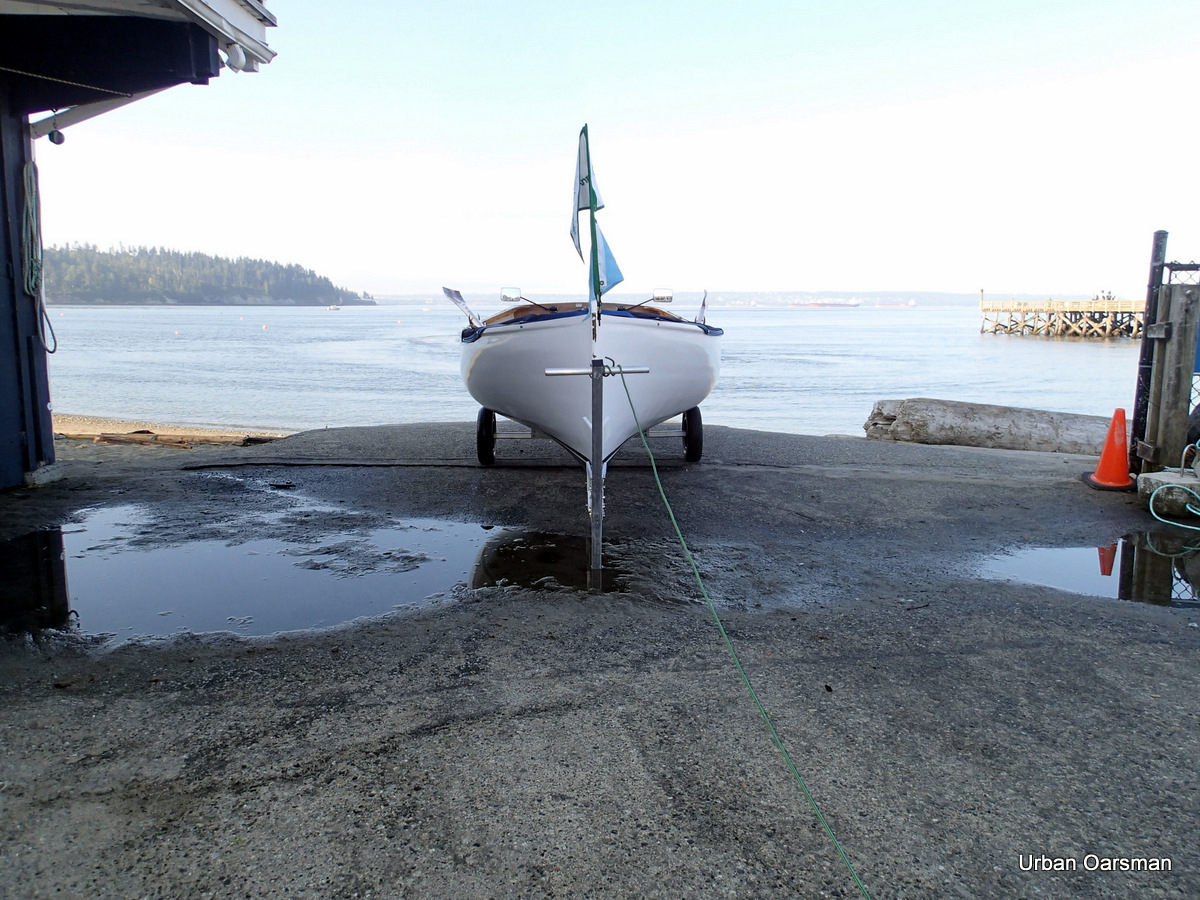
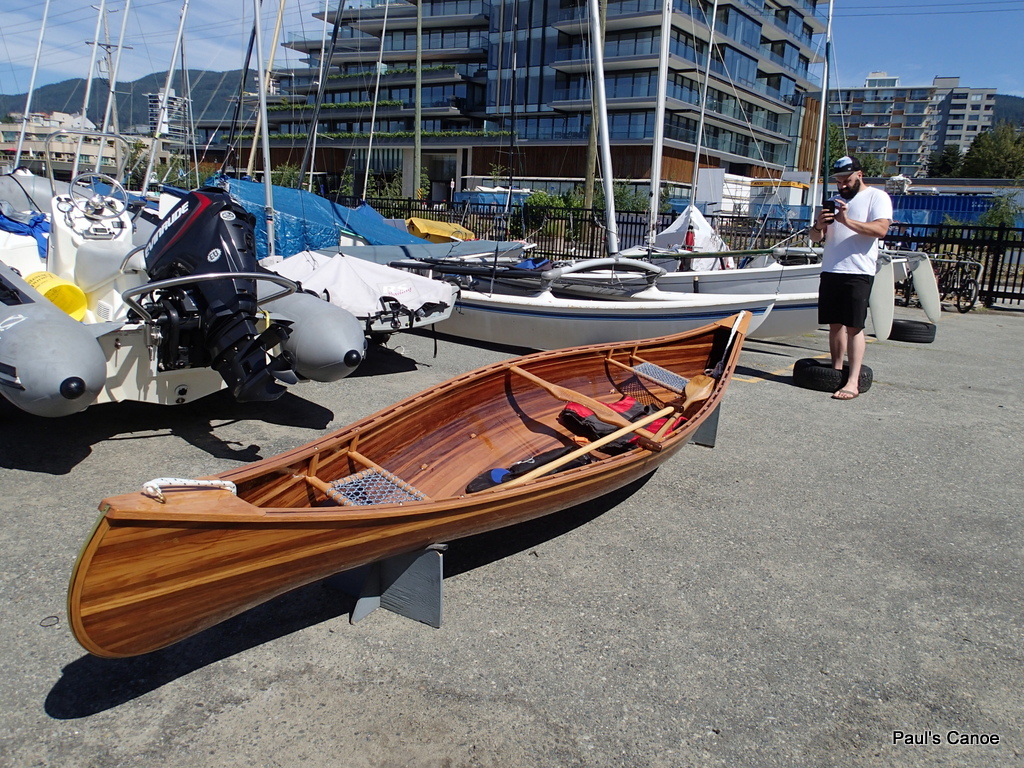
Unloading at the Sailing Club.

Aside from all the admiring glances, an uneventful drive to HSC.  Paul and I unload the canoe and place it on two kayak stands.

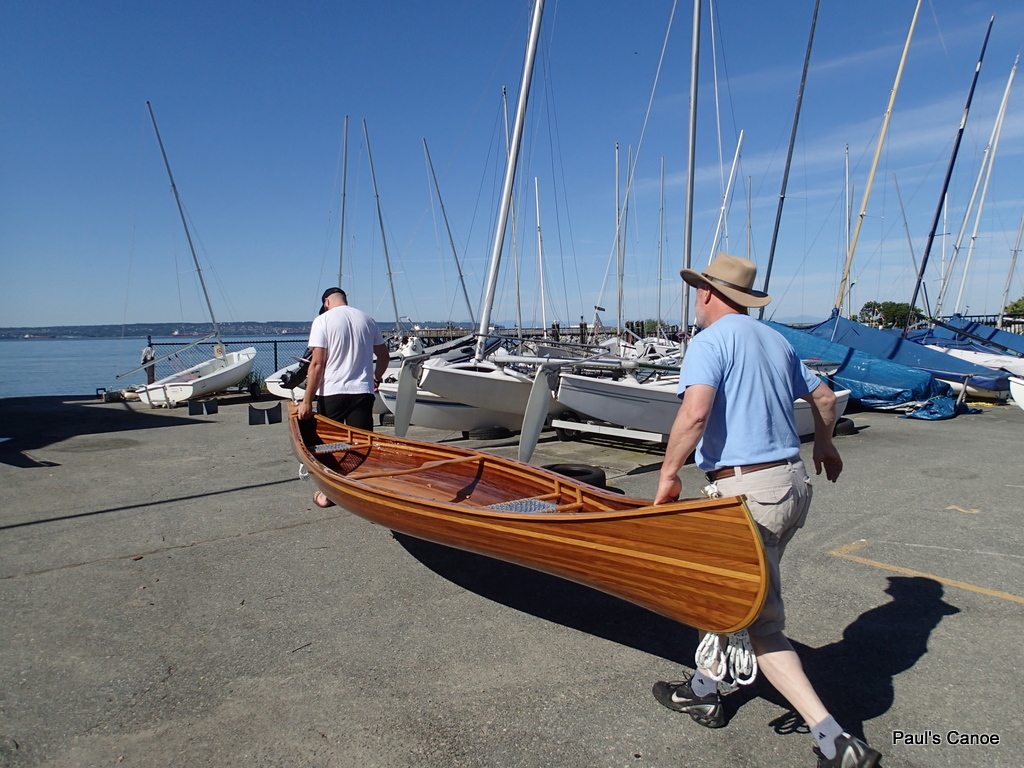
It is a light carry into the Club.

We put the canoe onto the kayak stands (now canoe stands). This club has everything you need to get out on the water…

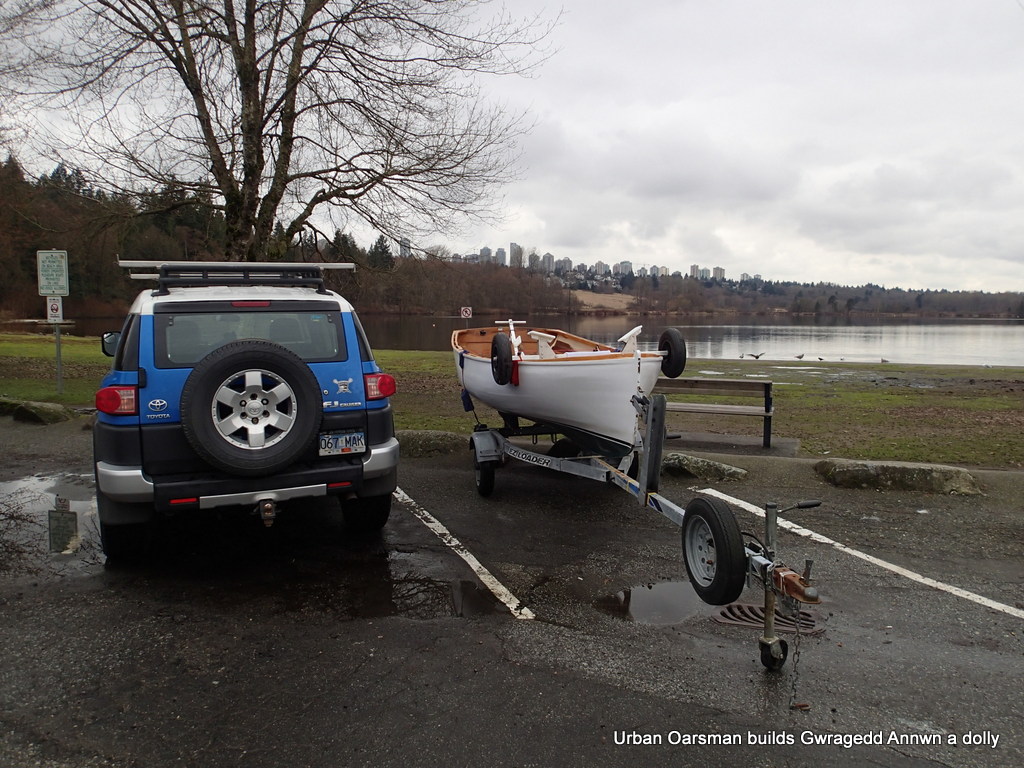
We get the paddles and I park my FJ in the Ambleside Park parking lot.

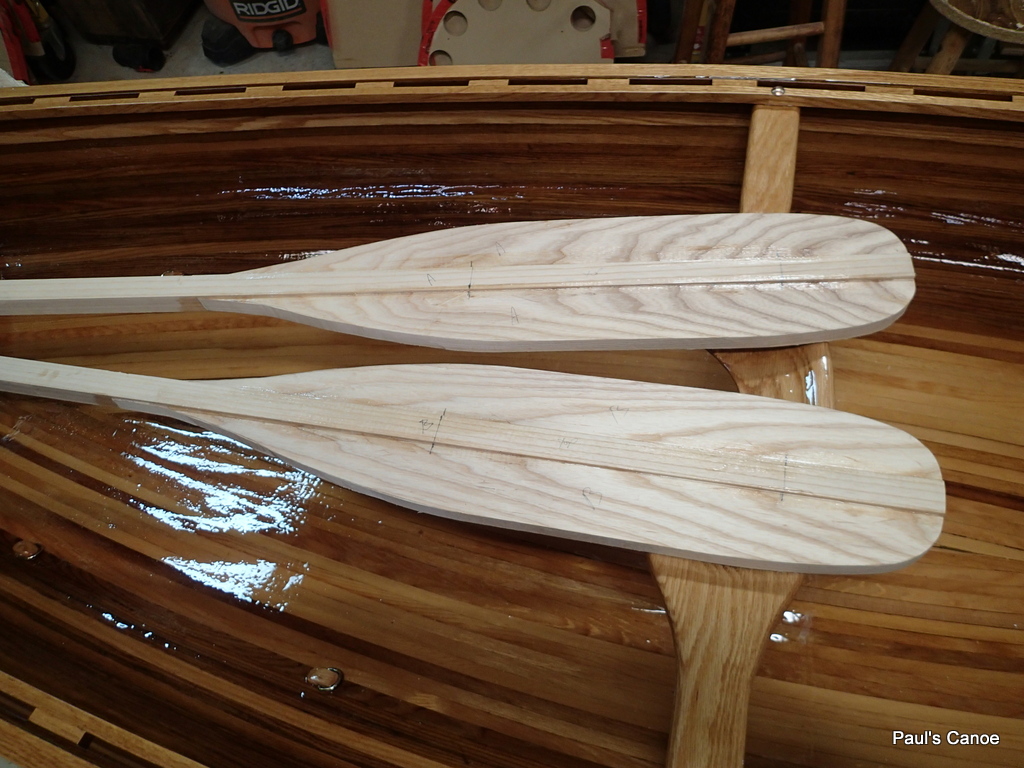
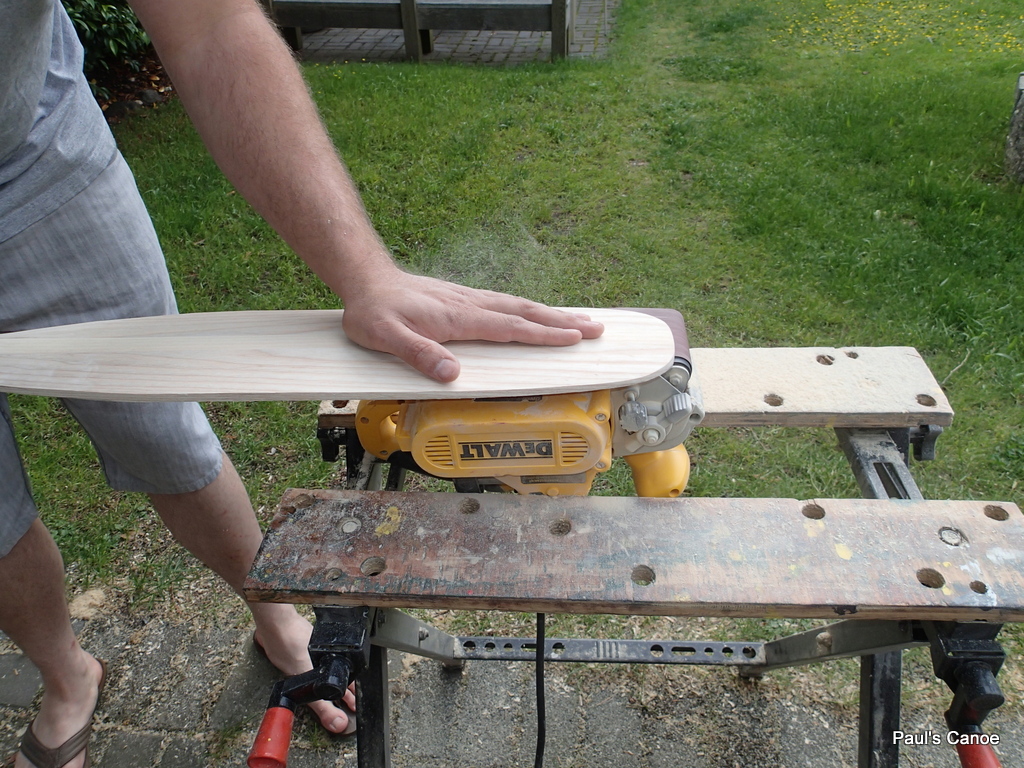
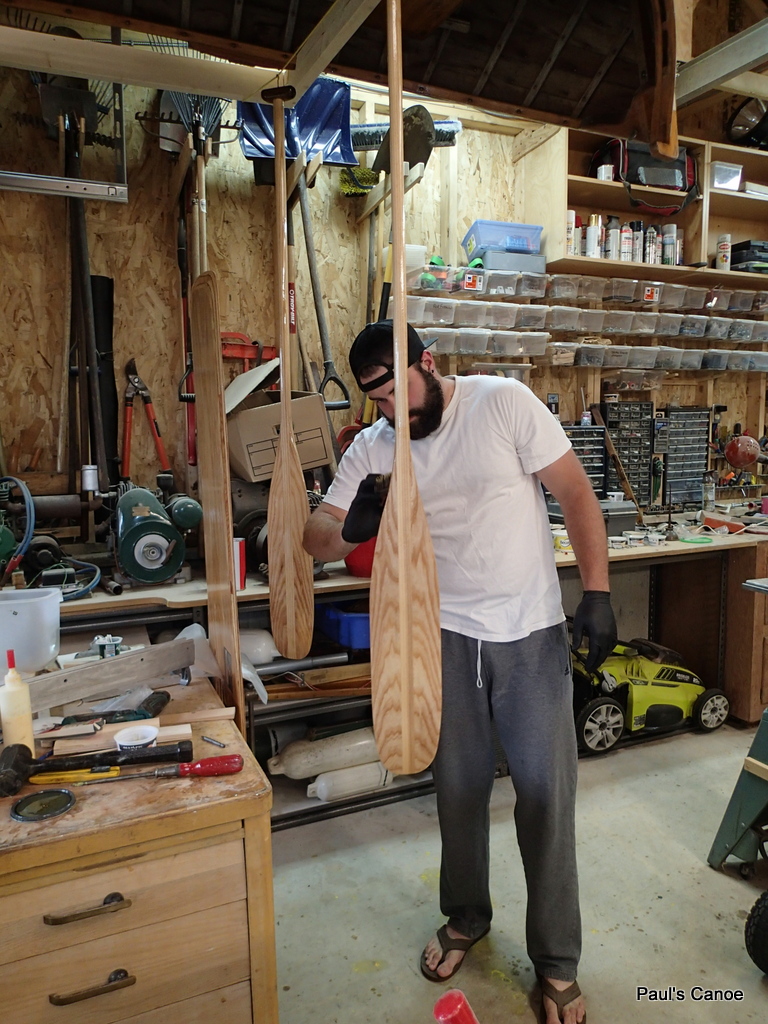
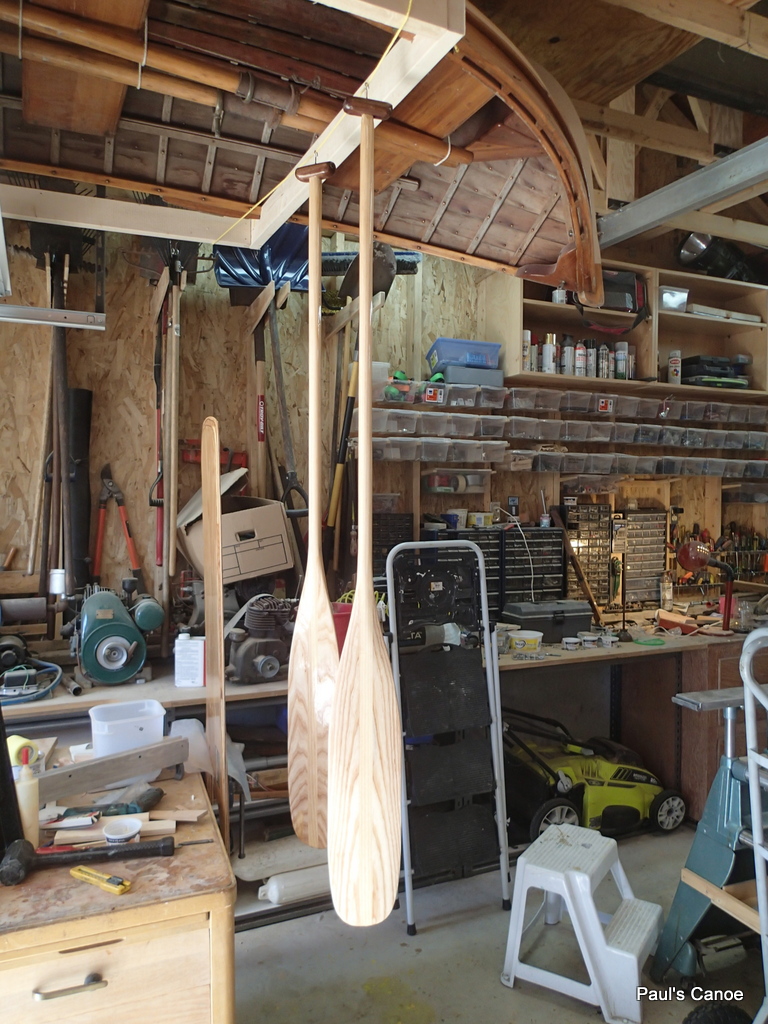
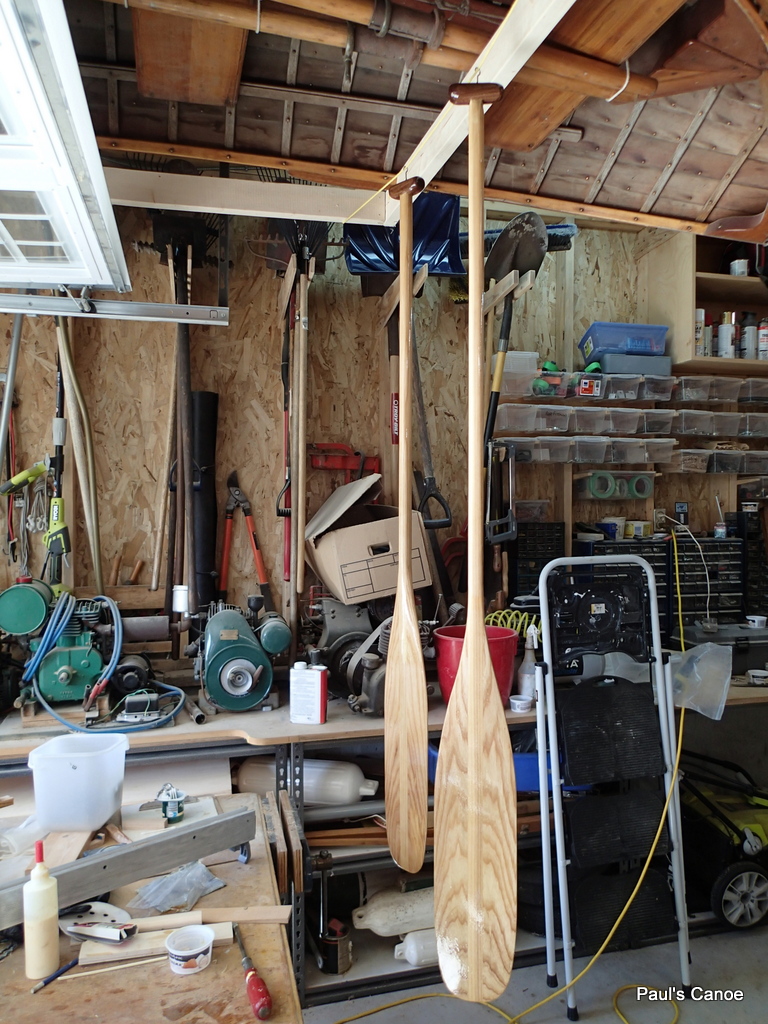
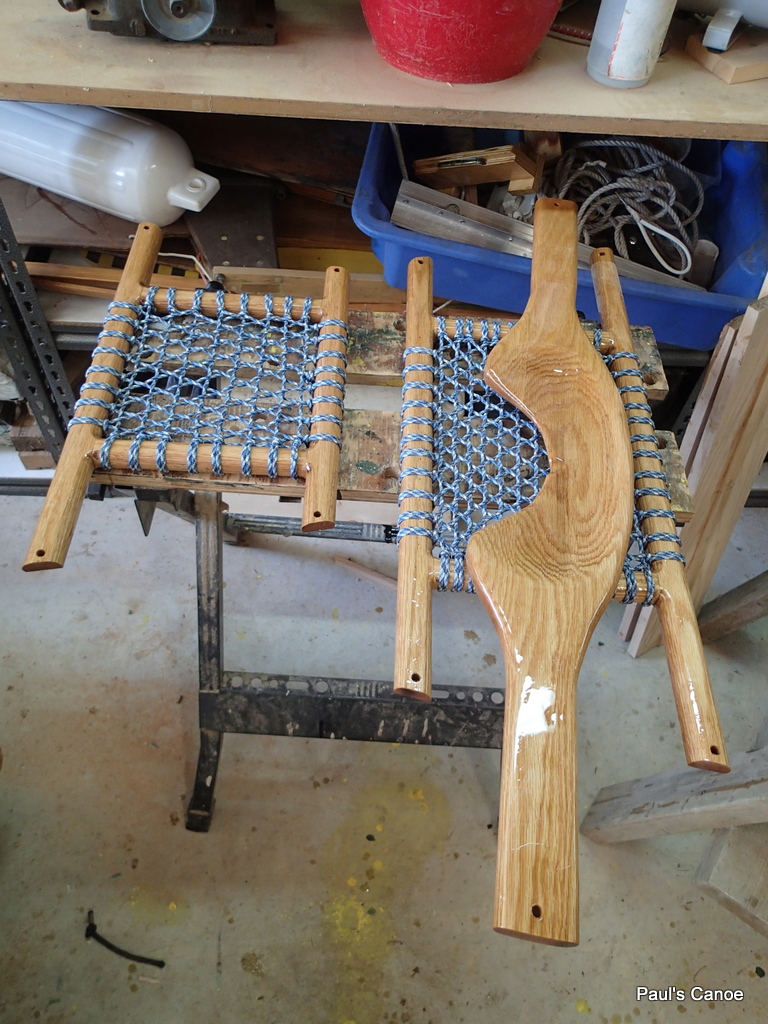
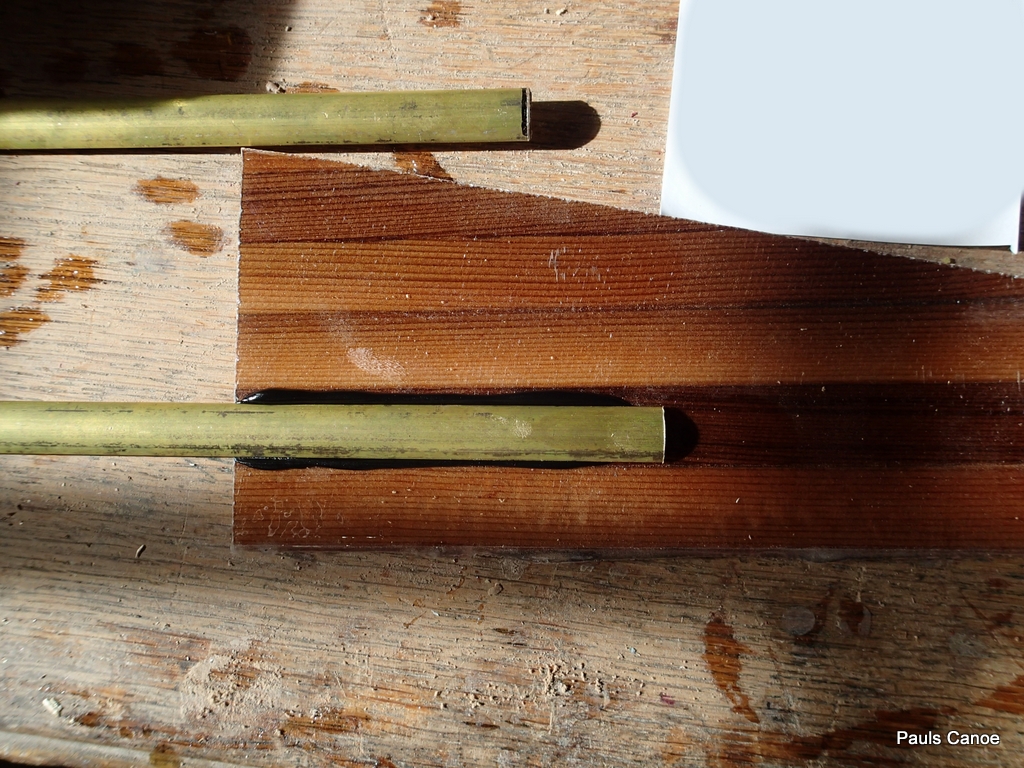
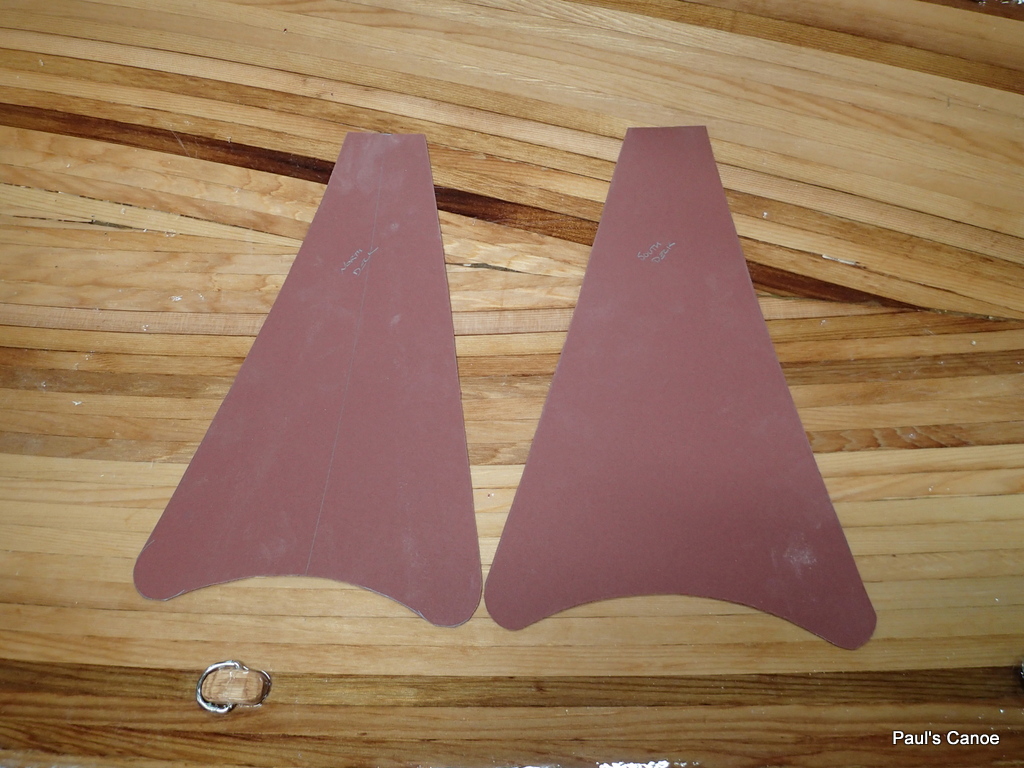
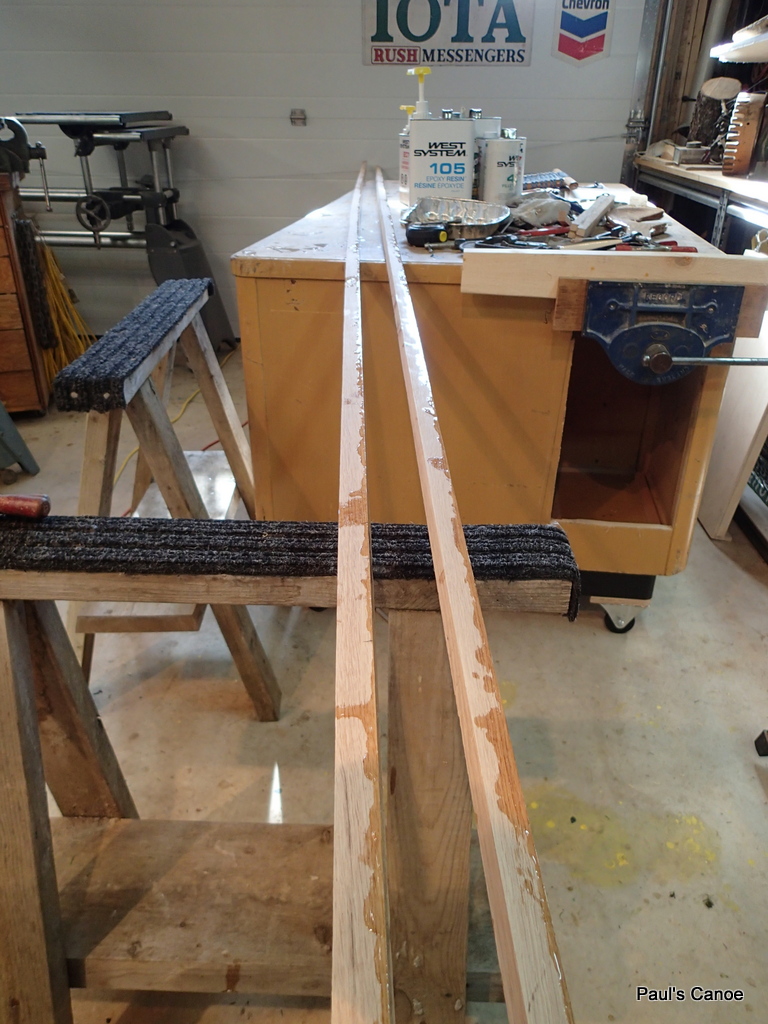
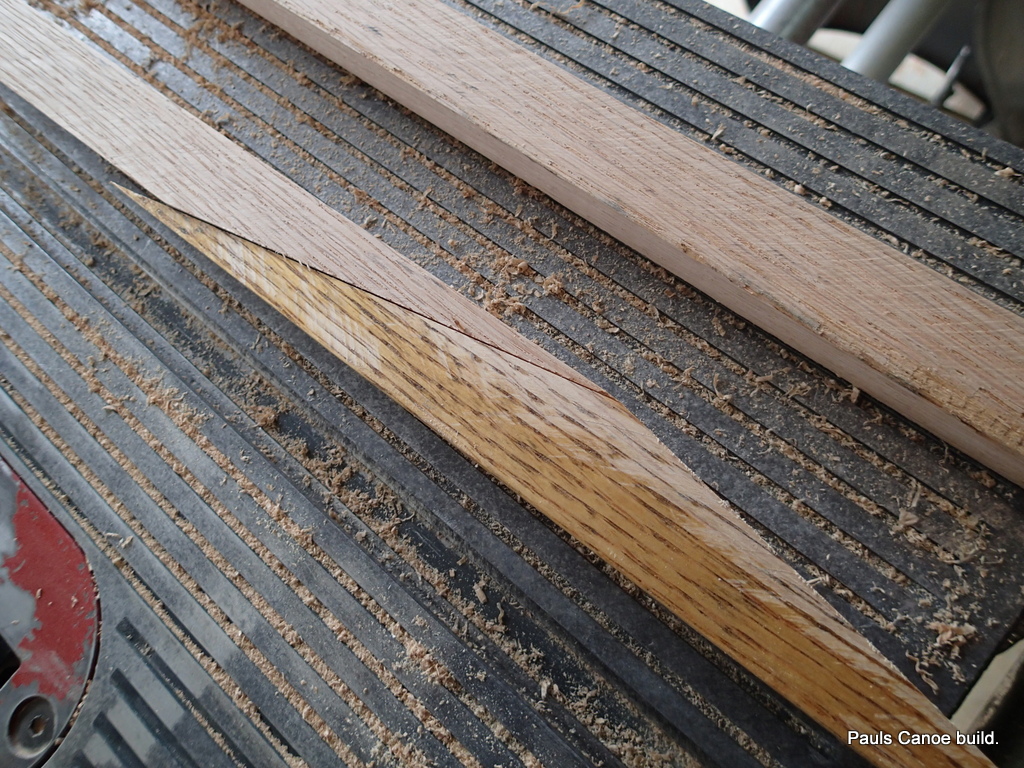
Paul’s paddle is 66″ long and mine is 63″ long.  (Paul is 6’2″ and I am 5′ 9″)  Today will be a good time to test the lengths for comfort.  Paddle length is always a bit of a guess.  Today we will fine-tune the lengths.

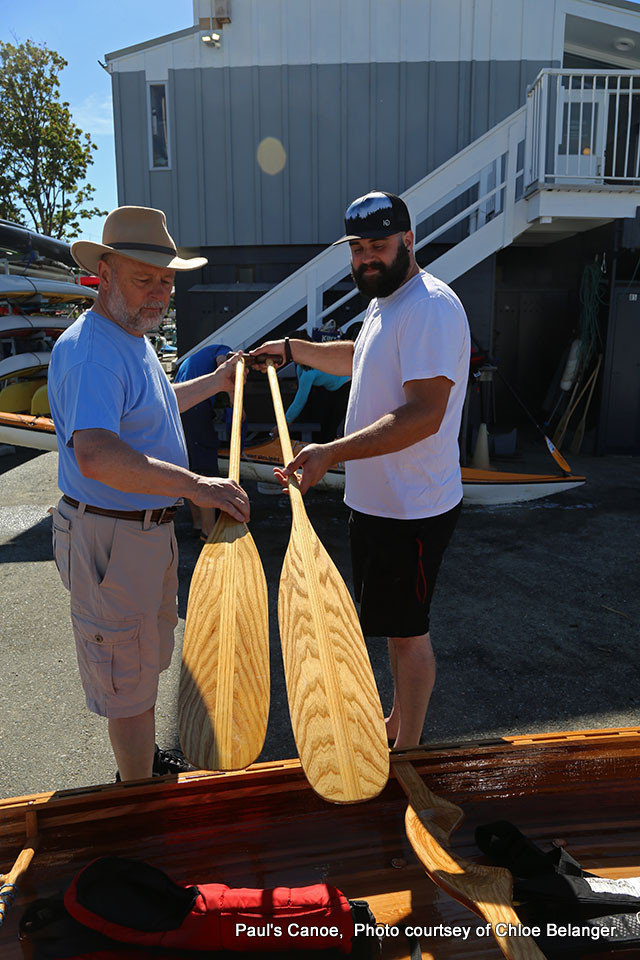
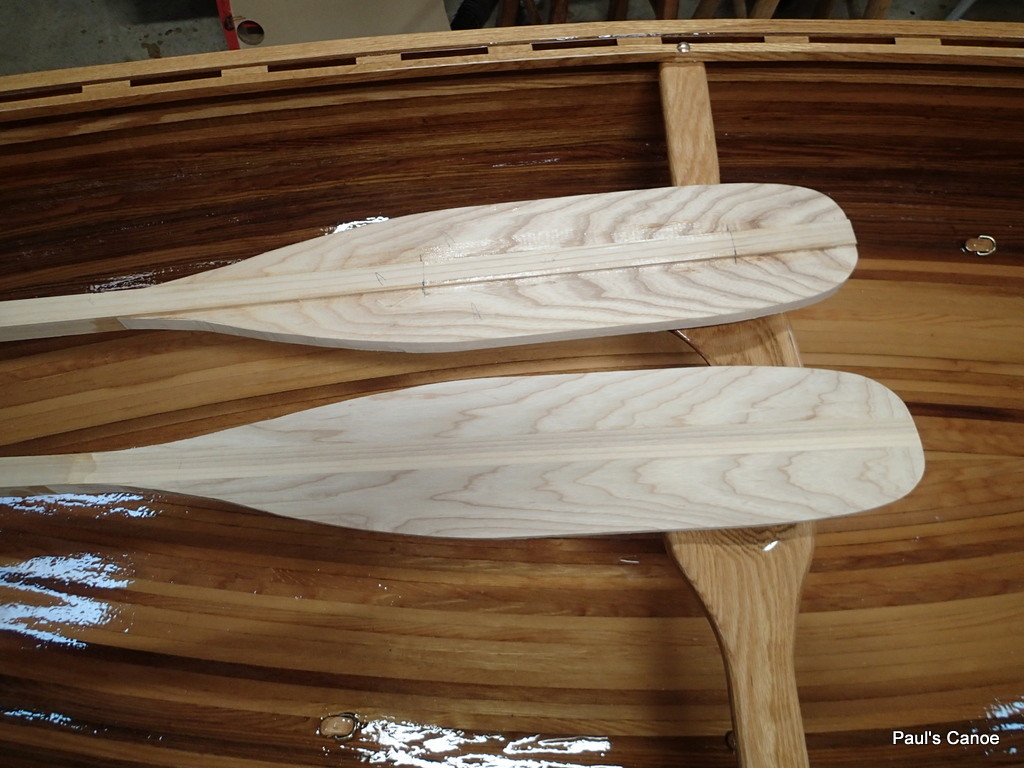
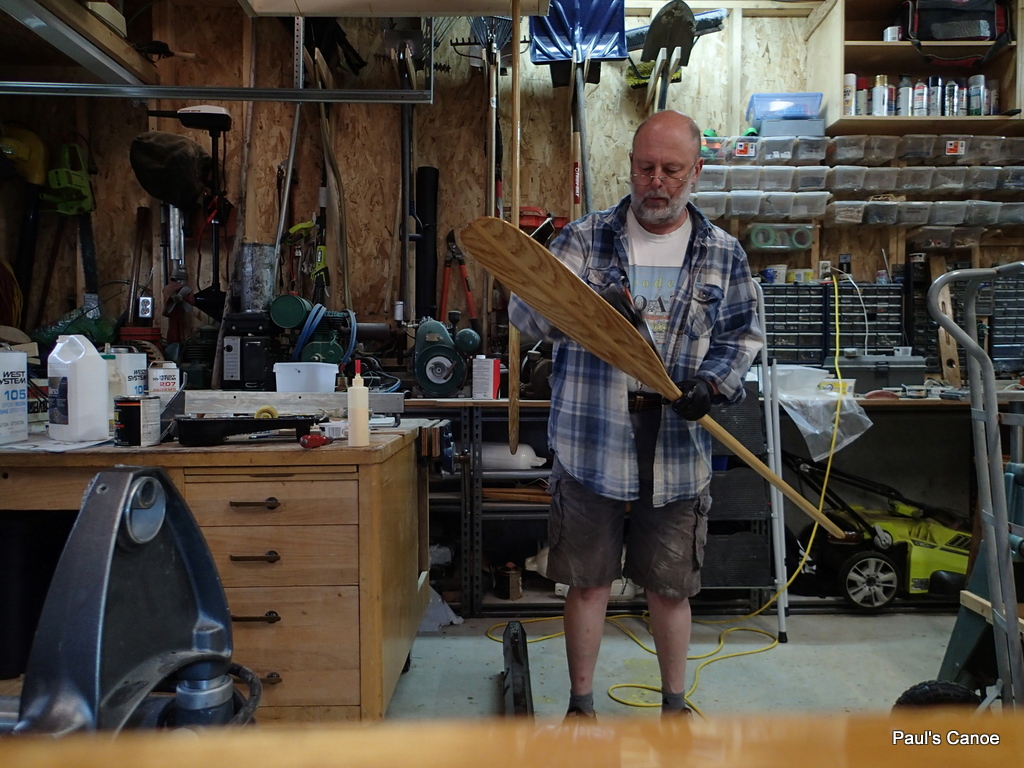
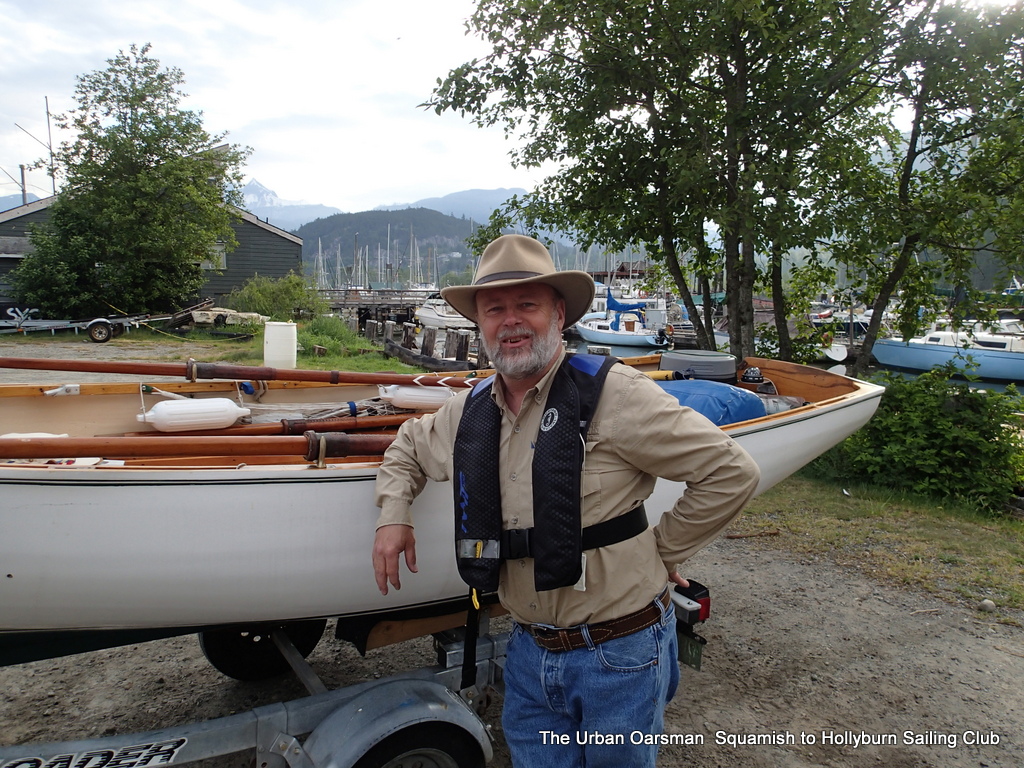
Showing off the paddles.

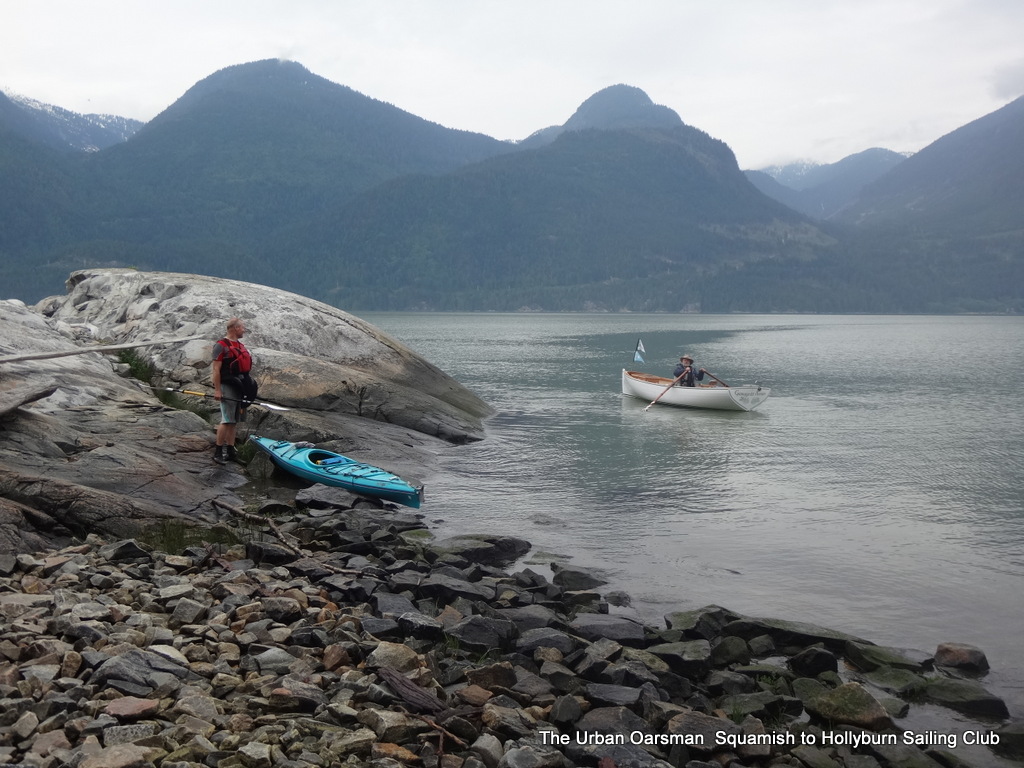
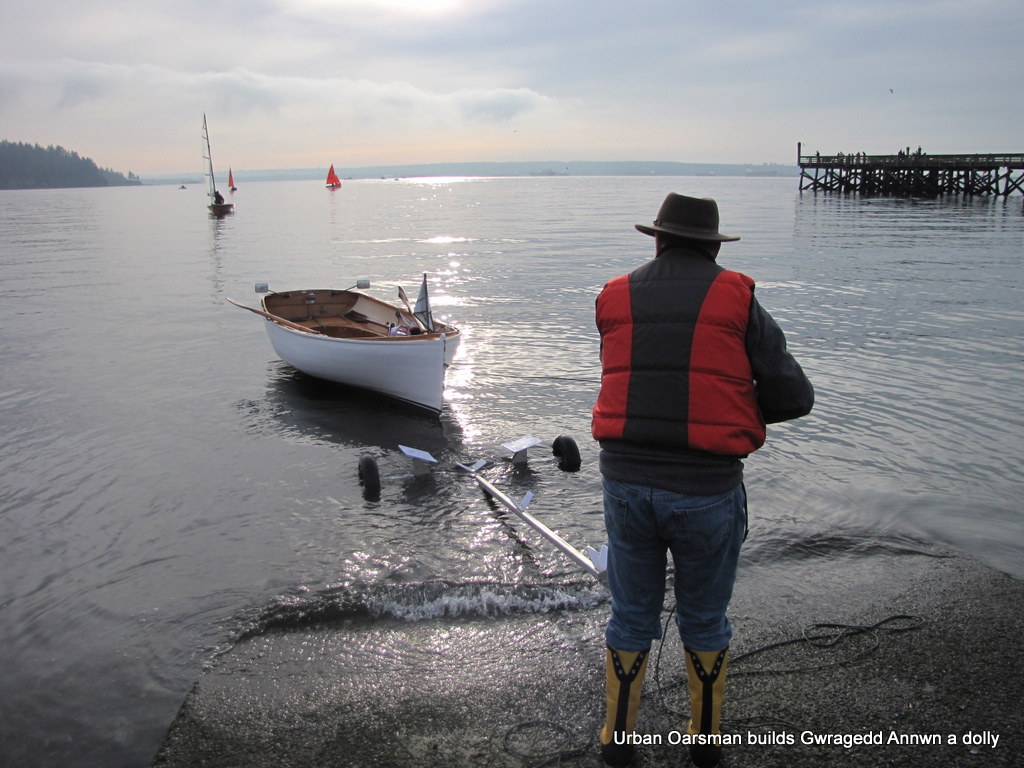
We get our life jackets on and take the canoe to the beach.
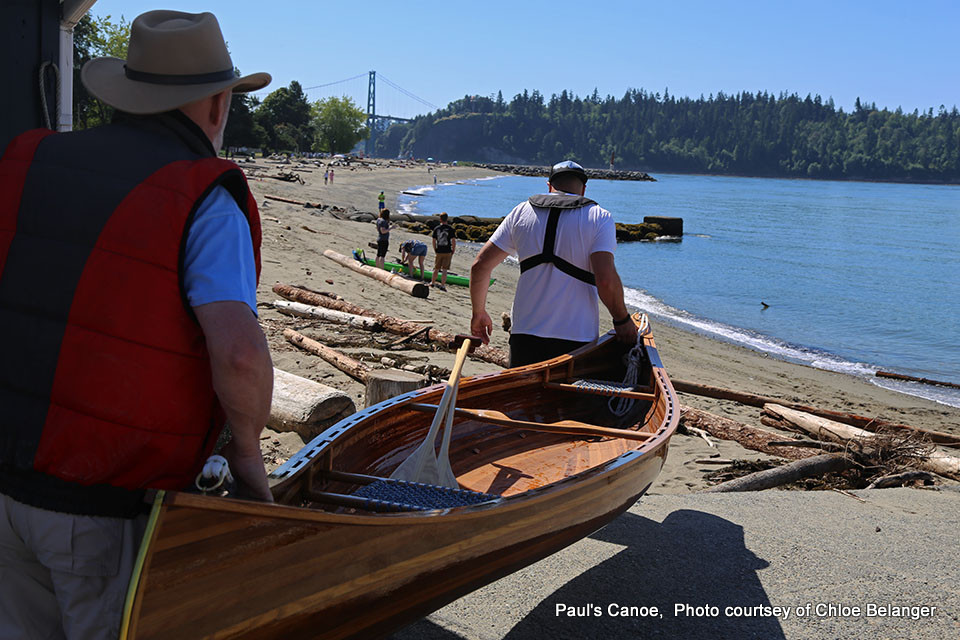
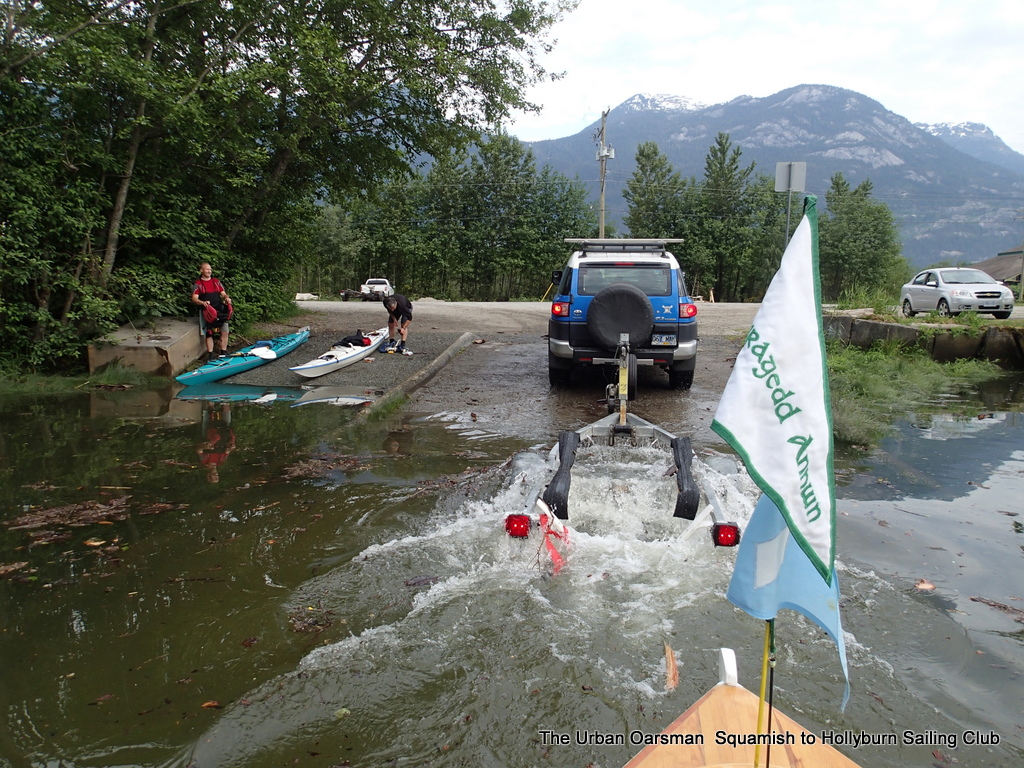
…To the beach!…

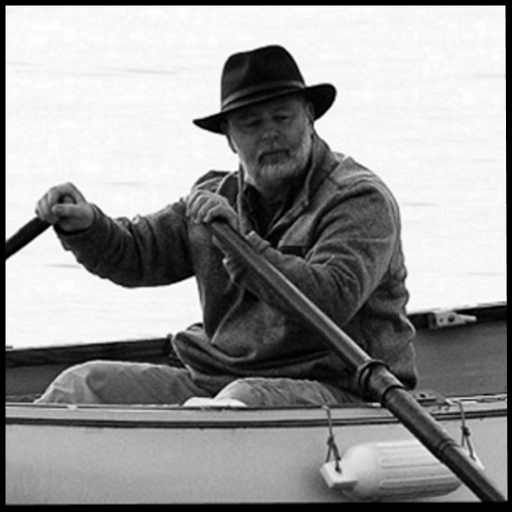
Paul will take the first paddle solo.

Paul is not one for a lot of ceremony.

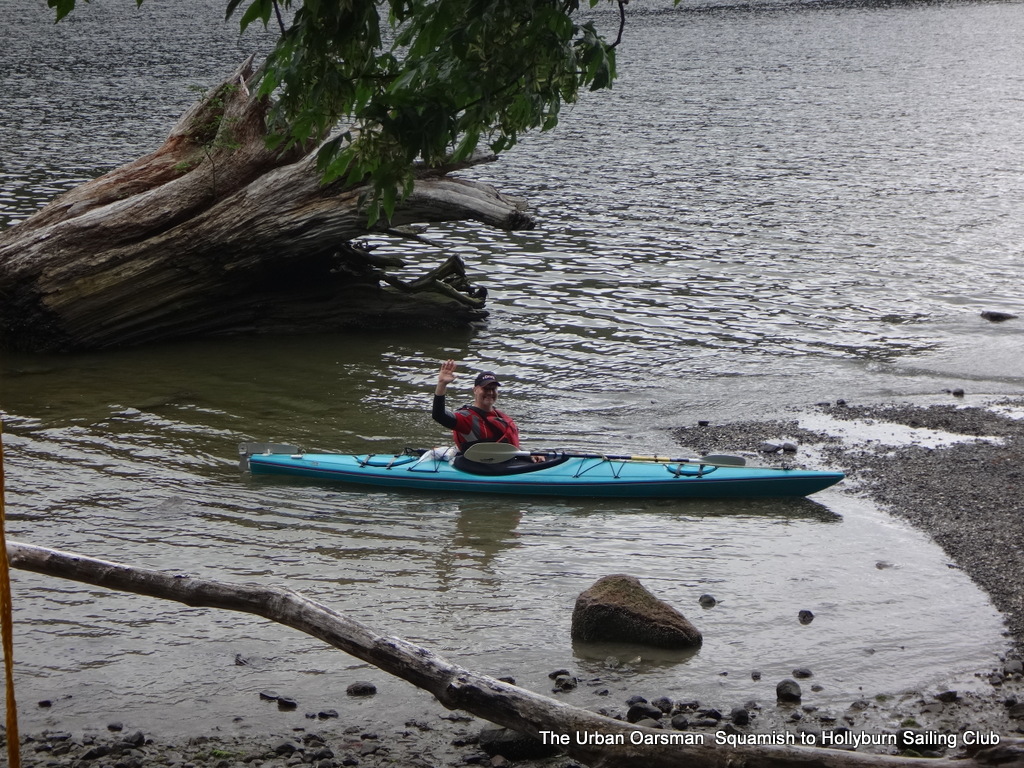
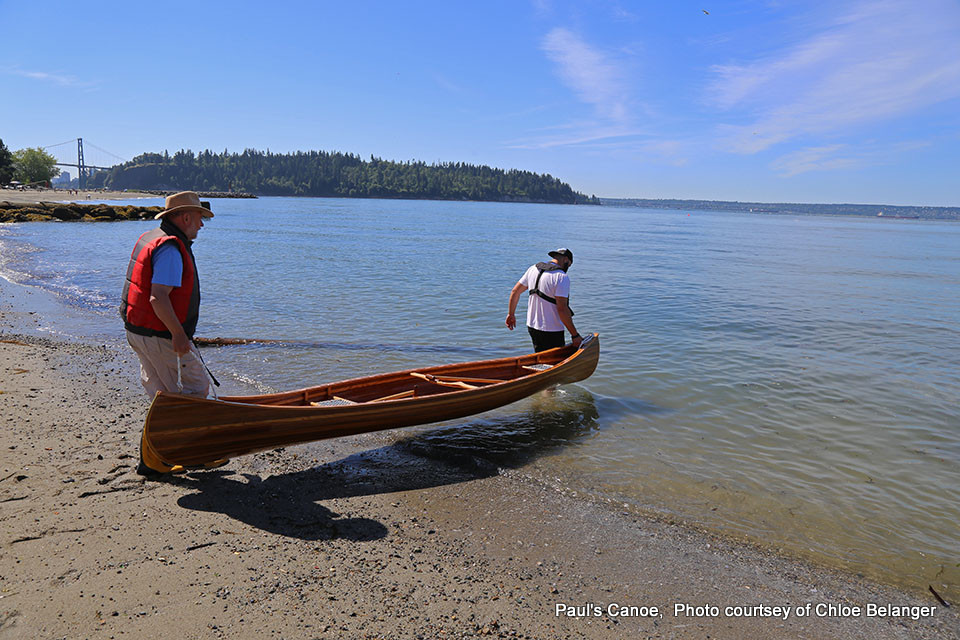
We place the canoe in the water and Paul gets in…

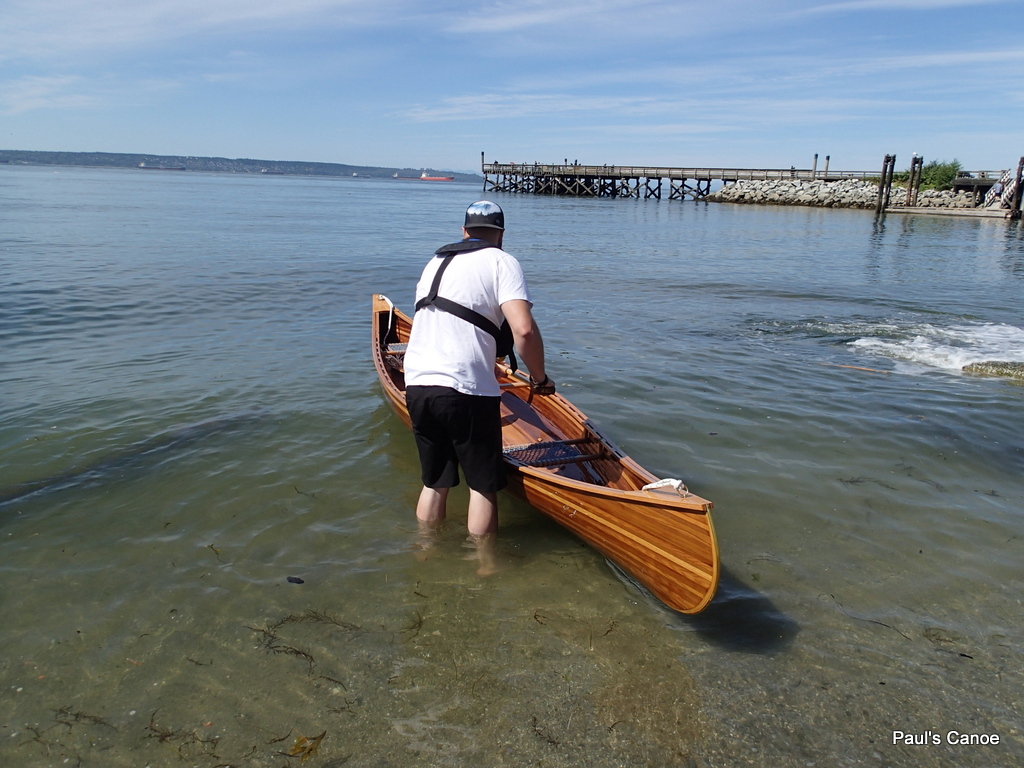
Getting in, waiting for the swell to moderate.

And away Paul goes…No flip, no dump, no hesitation.

A successful launch!

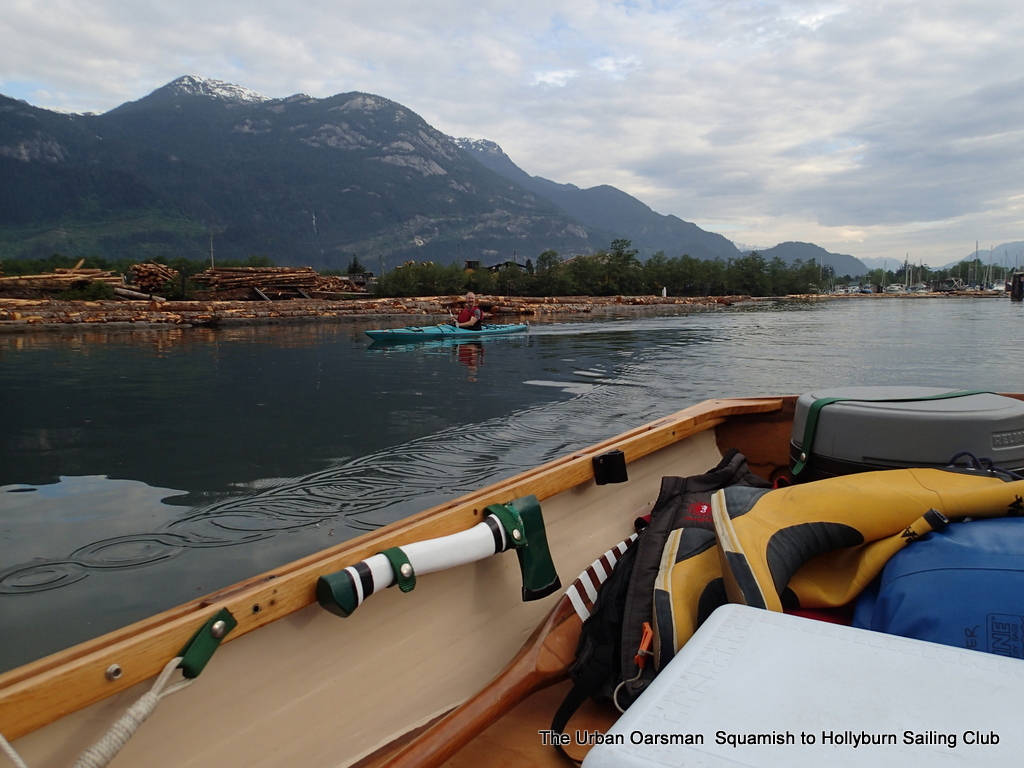
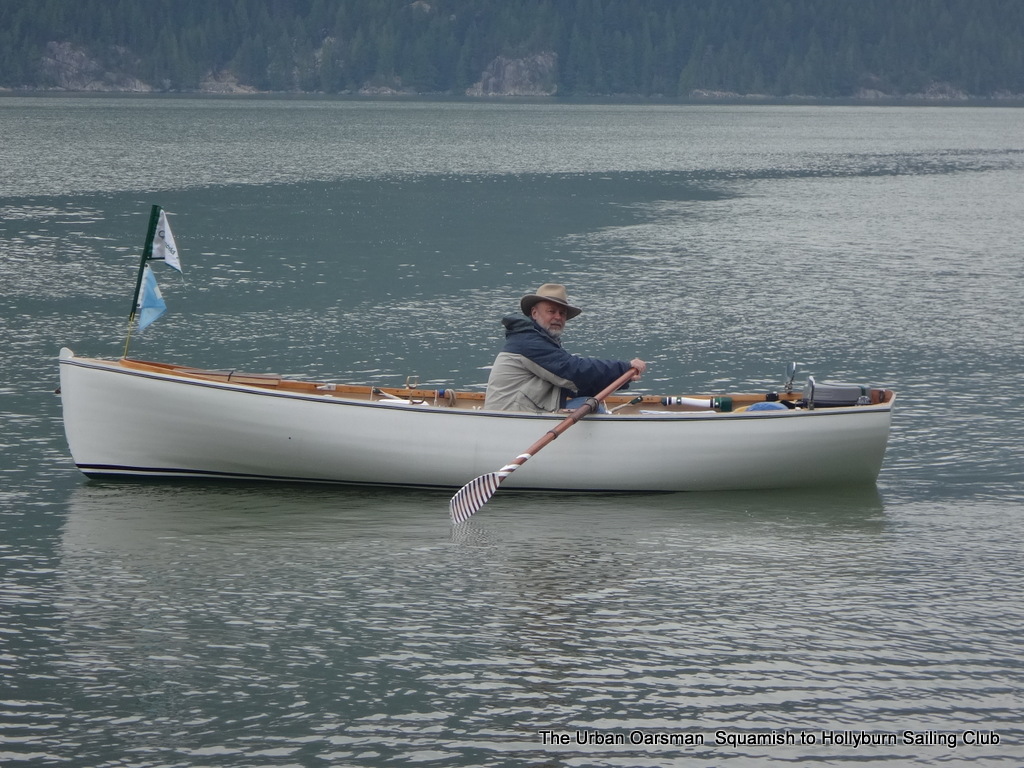
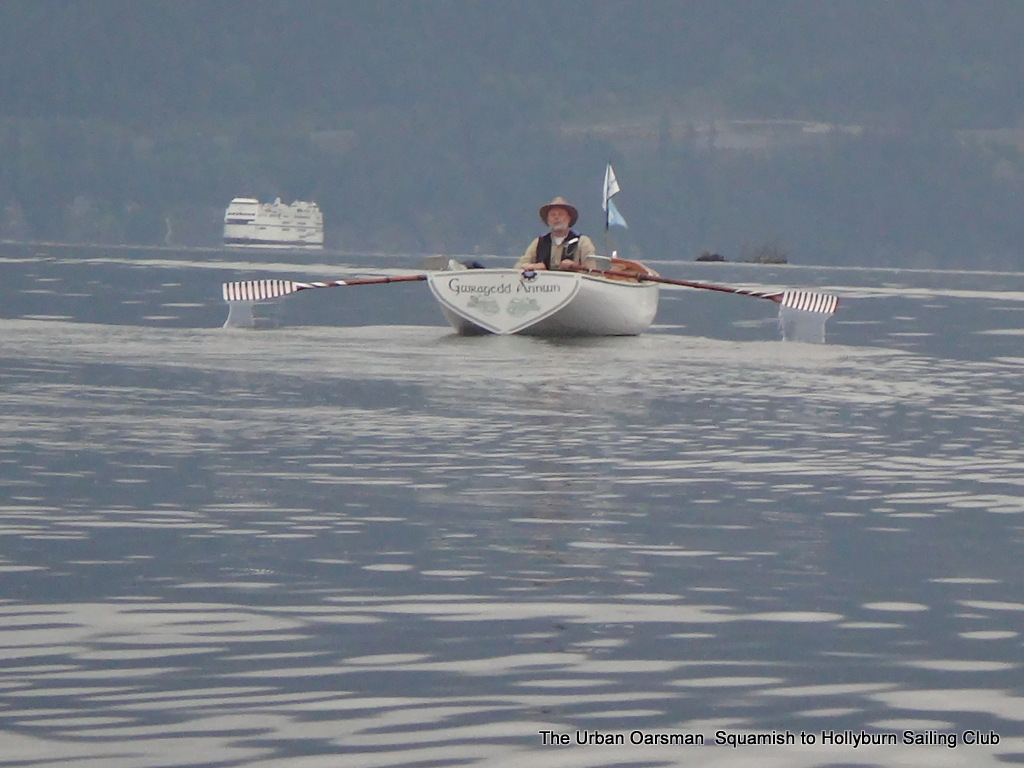
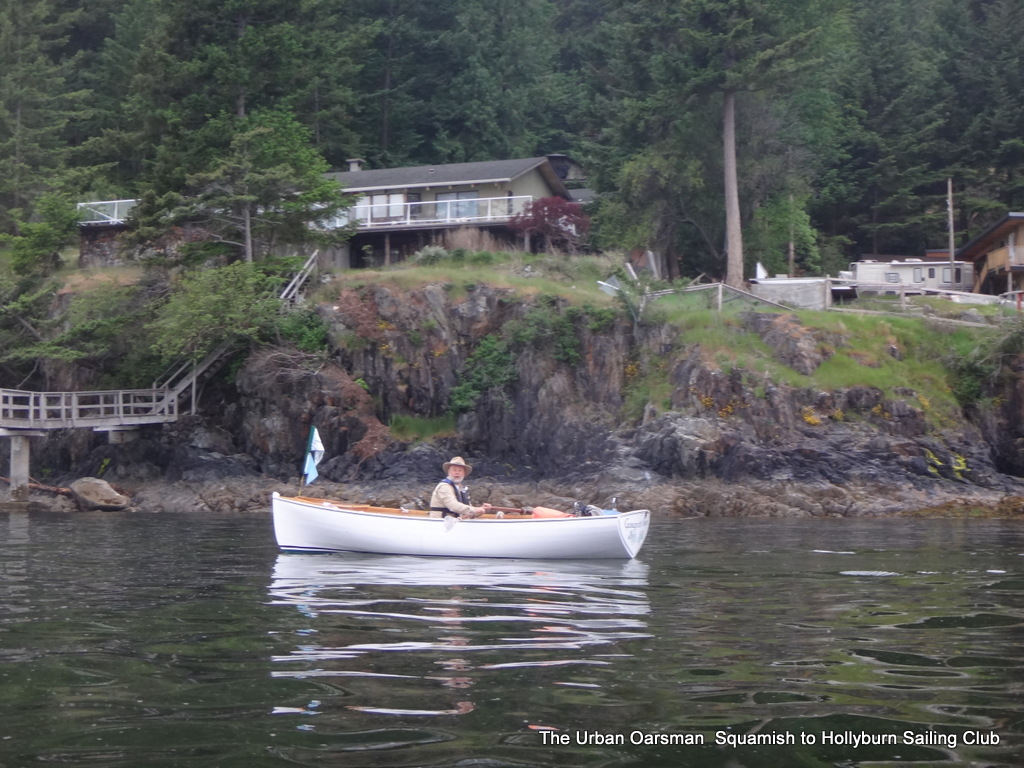
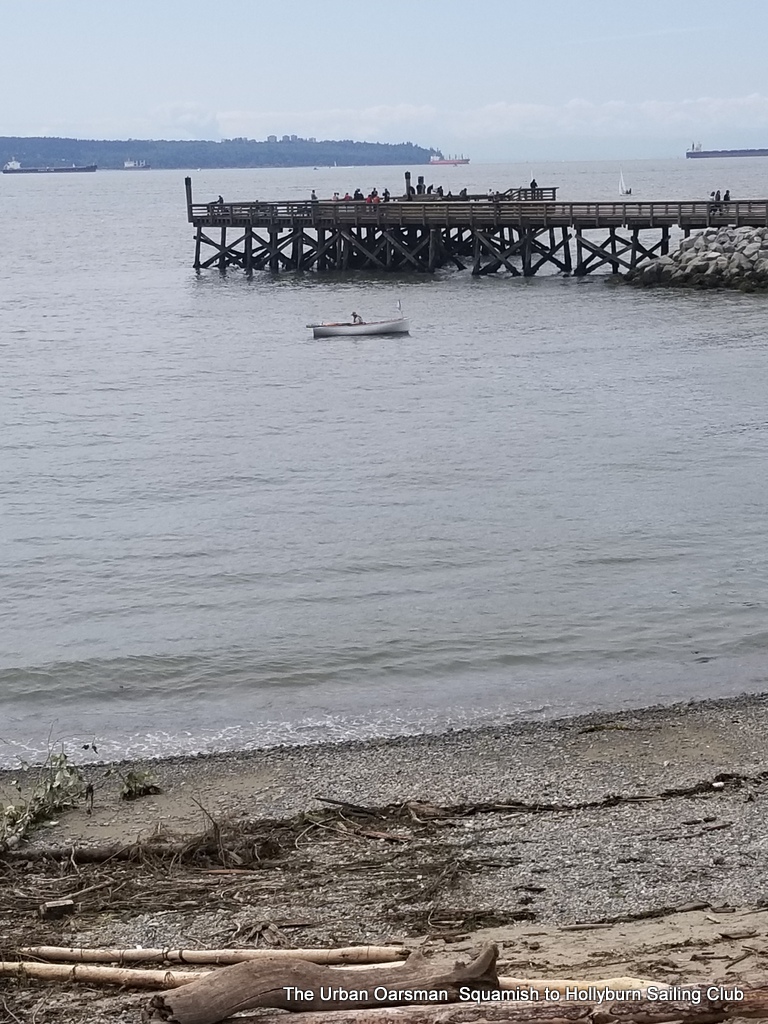
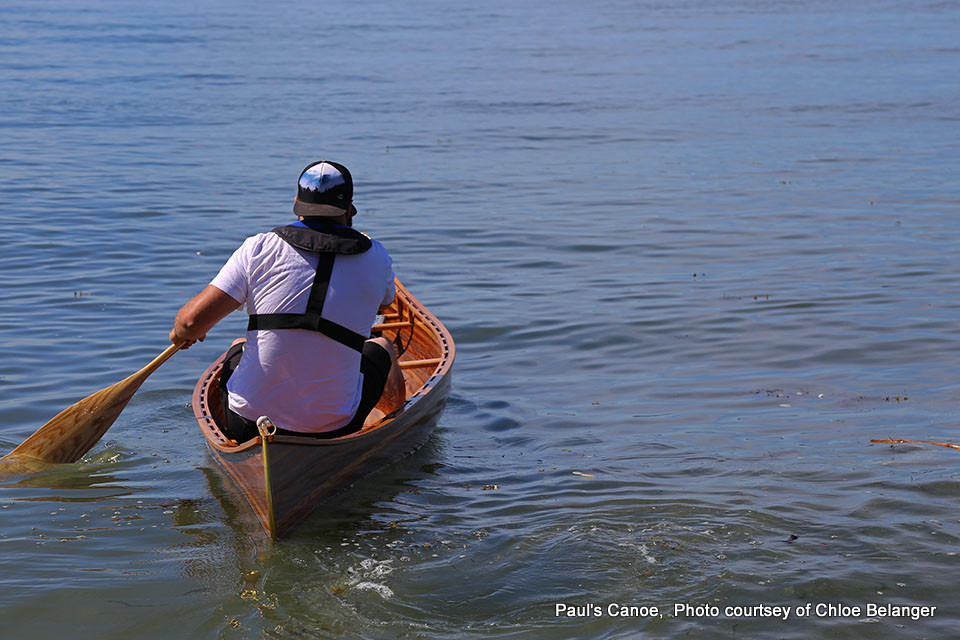
Paul takes the canoe for a test paddle.  Looks good!

The canoe is a little stern heavy.

Paul has good balance sitting on the seat.  He could be a little more forward.

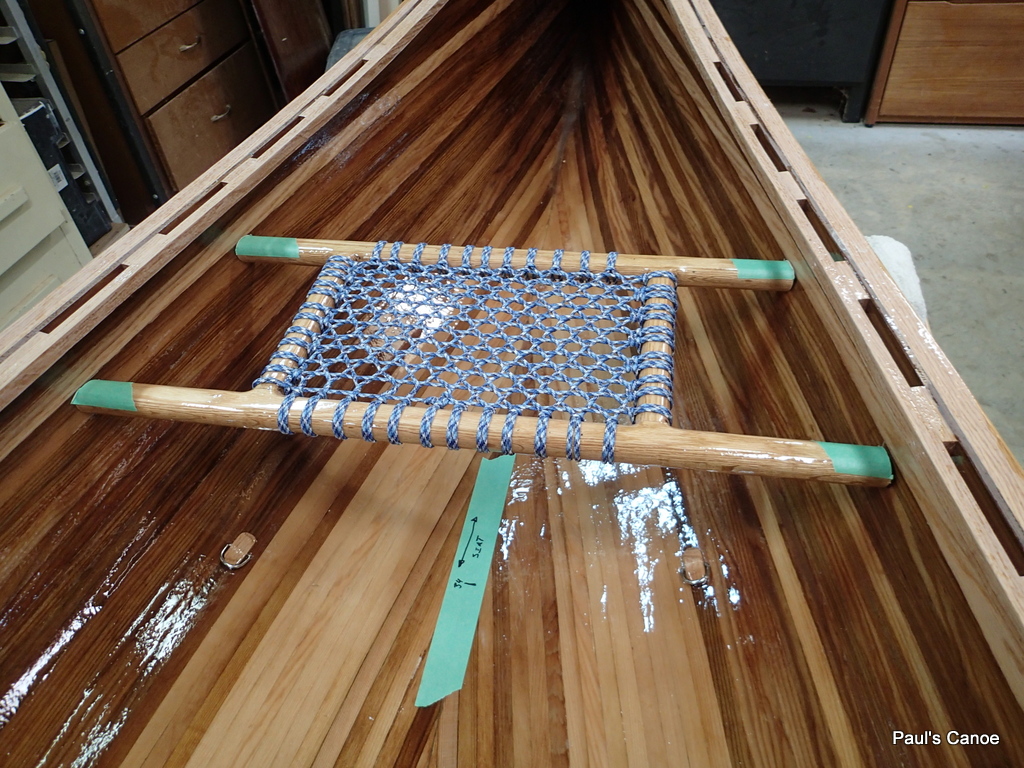
Paul tries sitting on the floor of the canoe just forward of the seat and the balance is perfect.

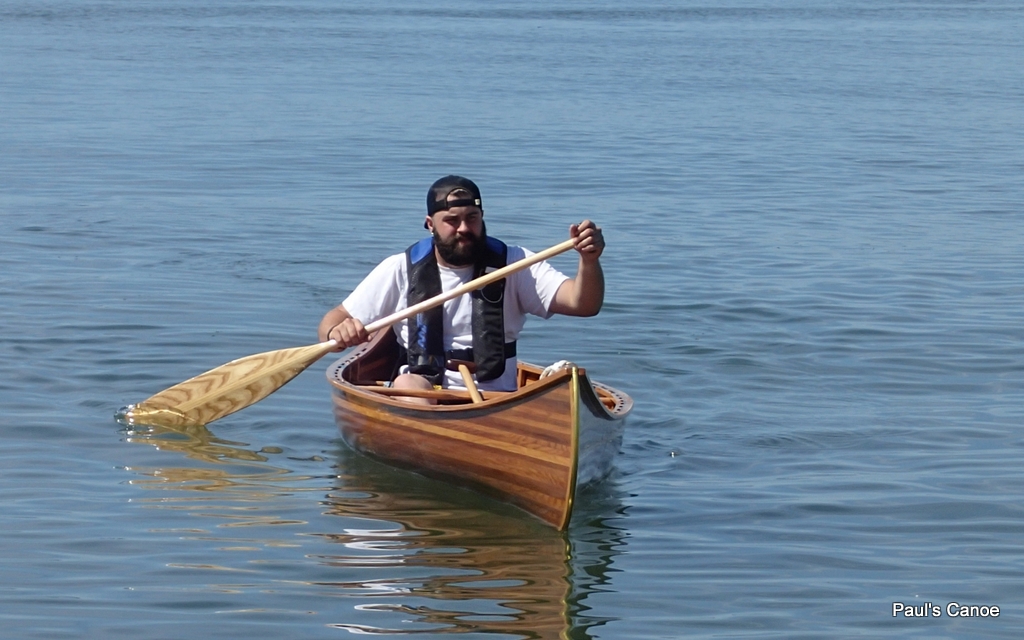
Paul does several circuits, trying out different sitting positions and both paddles.  He is quite pleased with the results.

The canoe tracks well, feels quite stable and is easy to paddle.

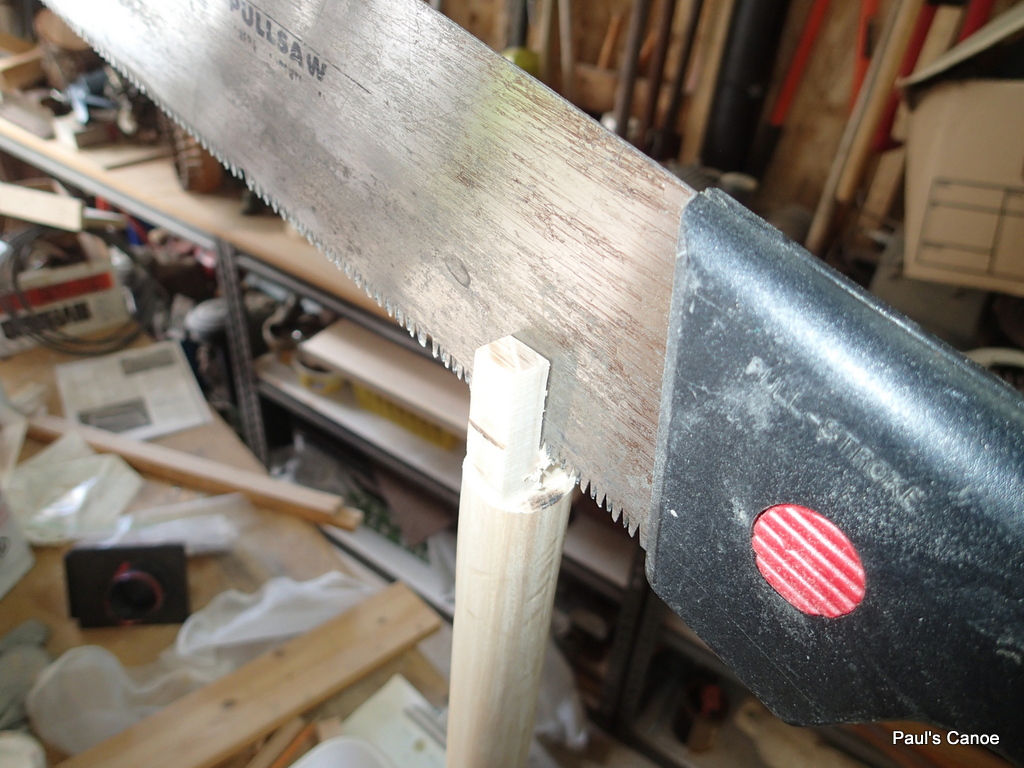
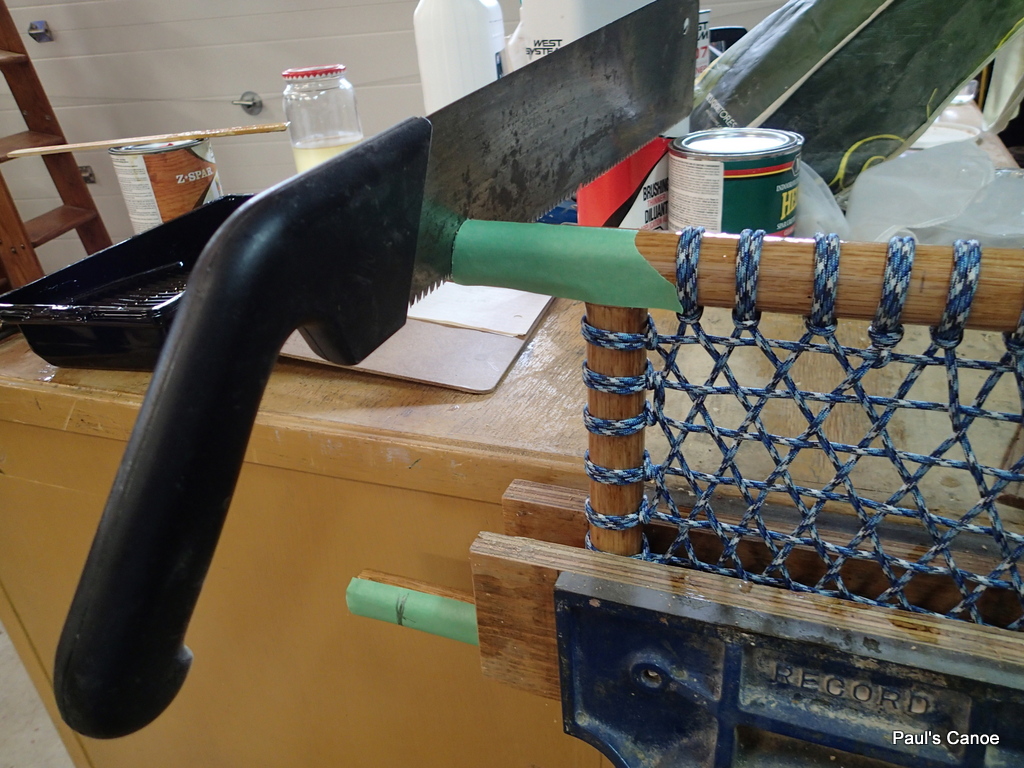
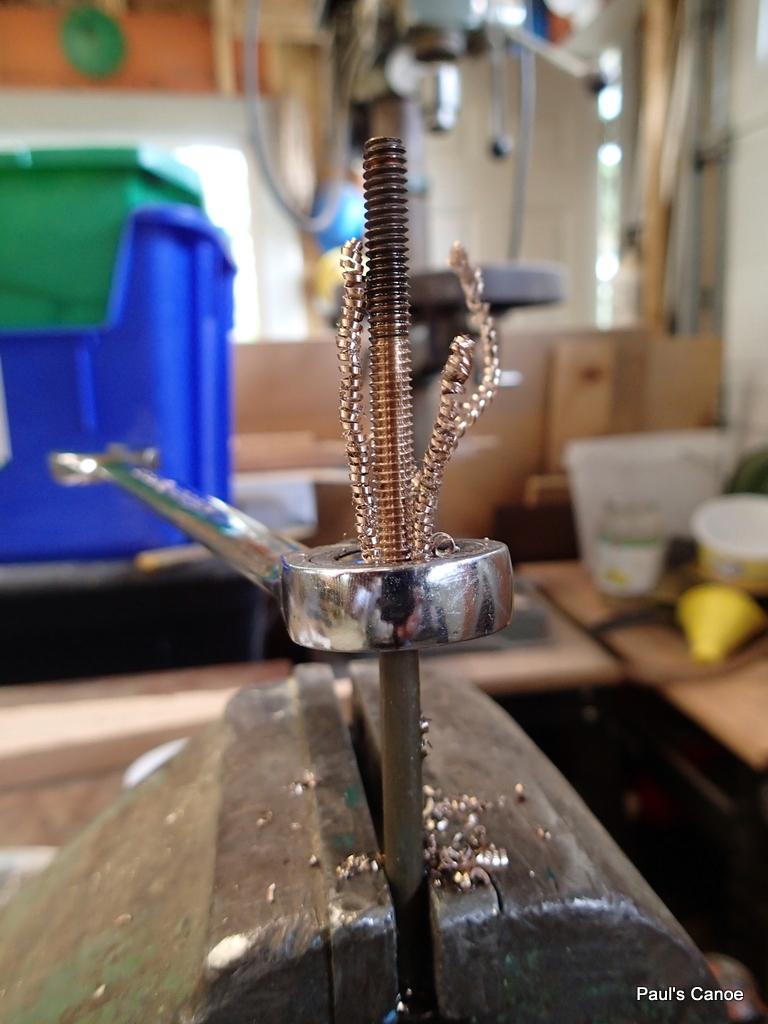
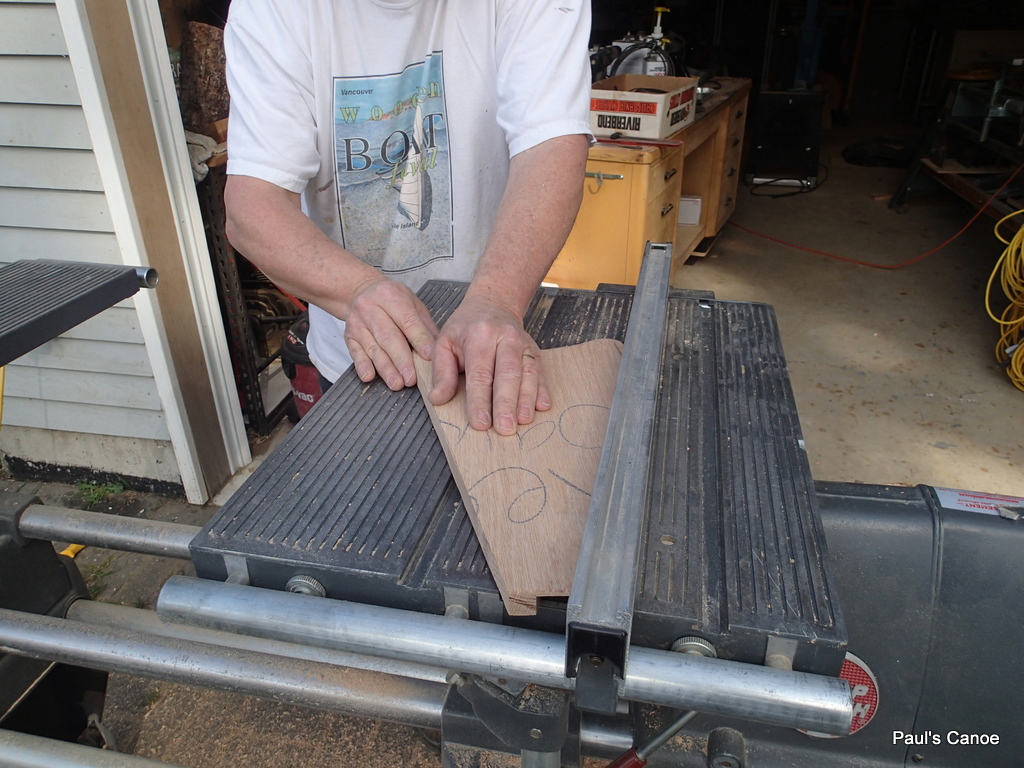
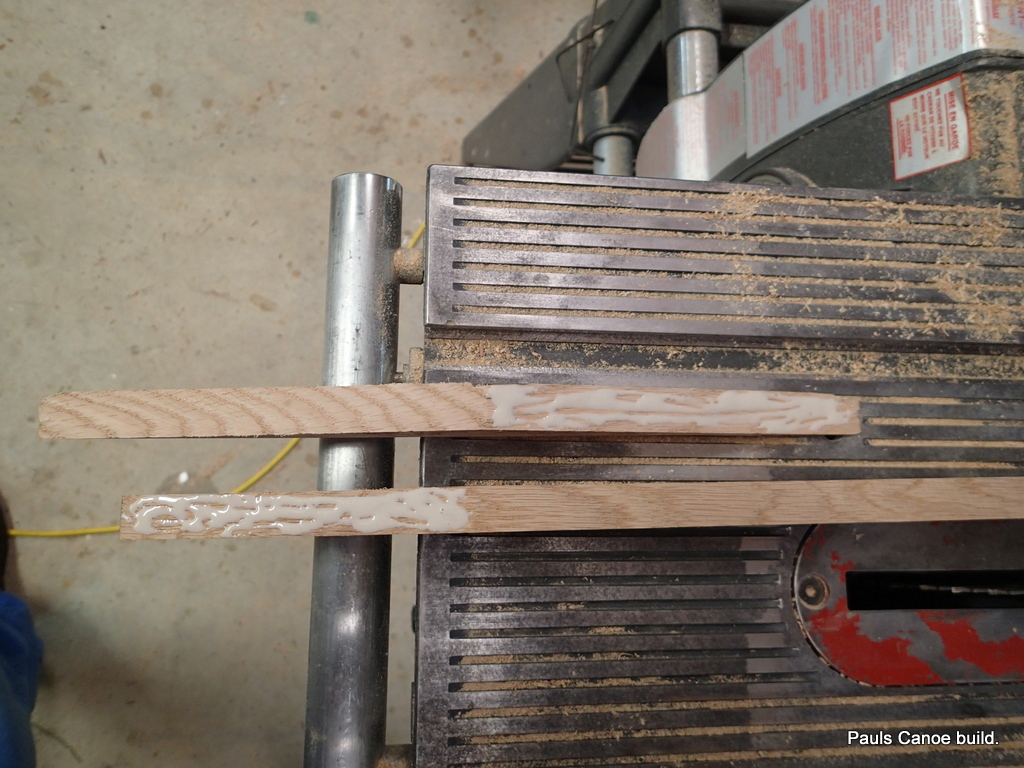
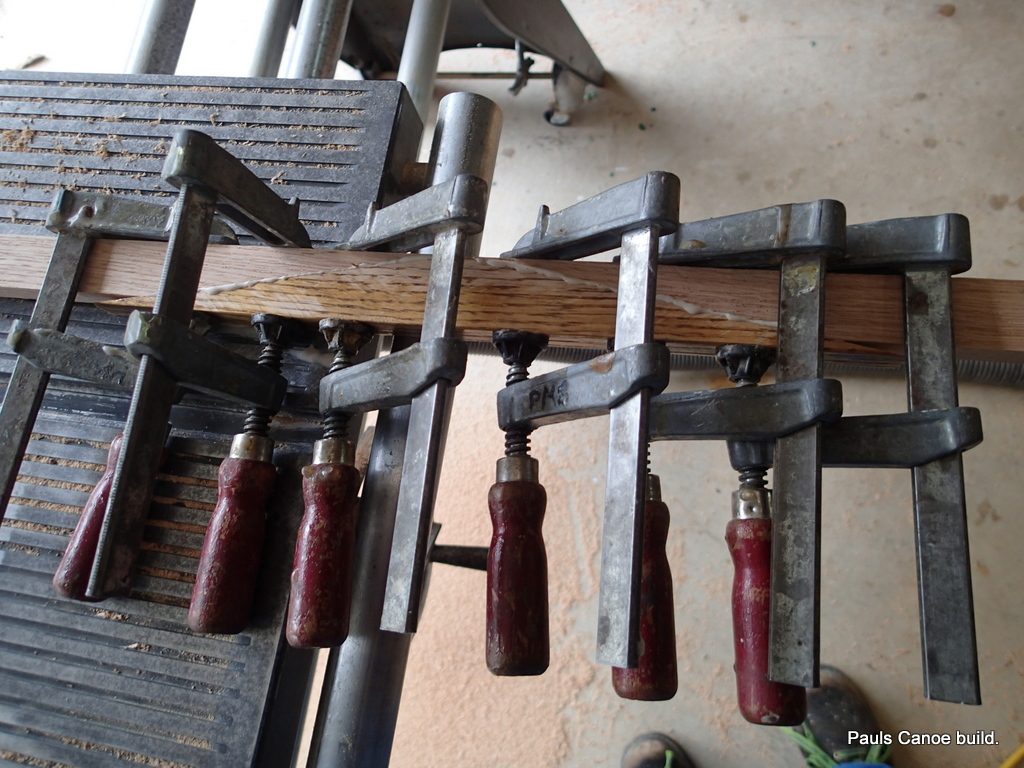
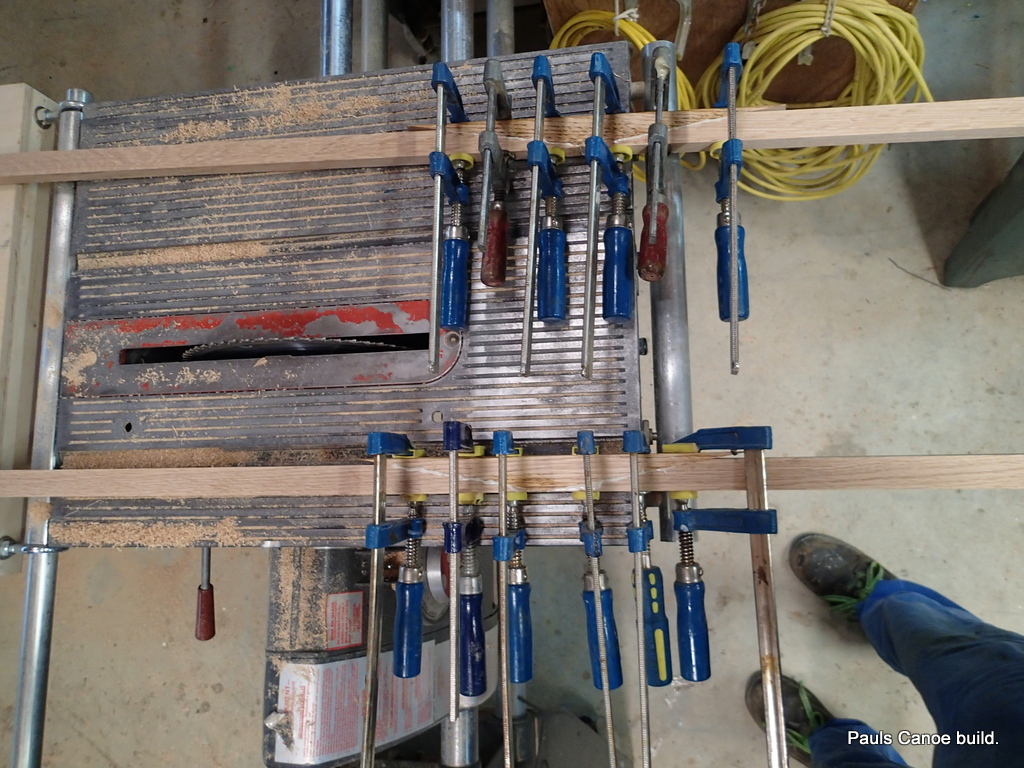
Paul and I are happy with the canoe, still unnamed.  Paul feels that his paddle is too long and my paddle is maybe a little too long as well for him.  We will take about 6″ off of his paddle and re-attach the handle.  We will come out again soon for another paddle trial.


My wife and I take the canoe out for a spin.  The balance with two paddlers is perfect.  The canoe looks level.  No photos of that paddle.

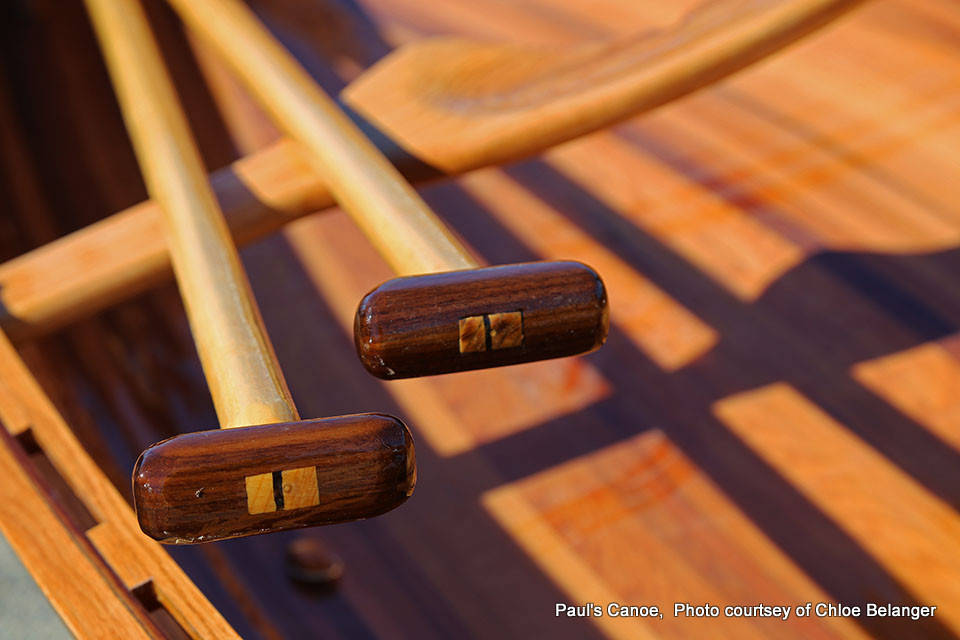
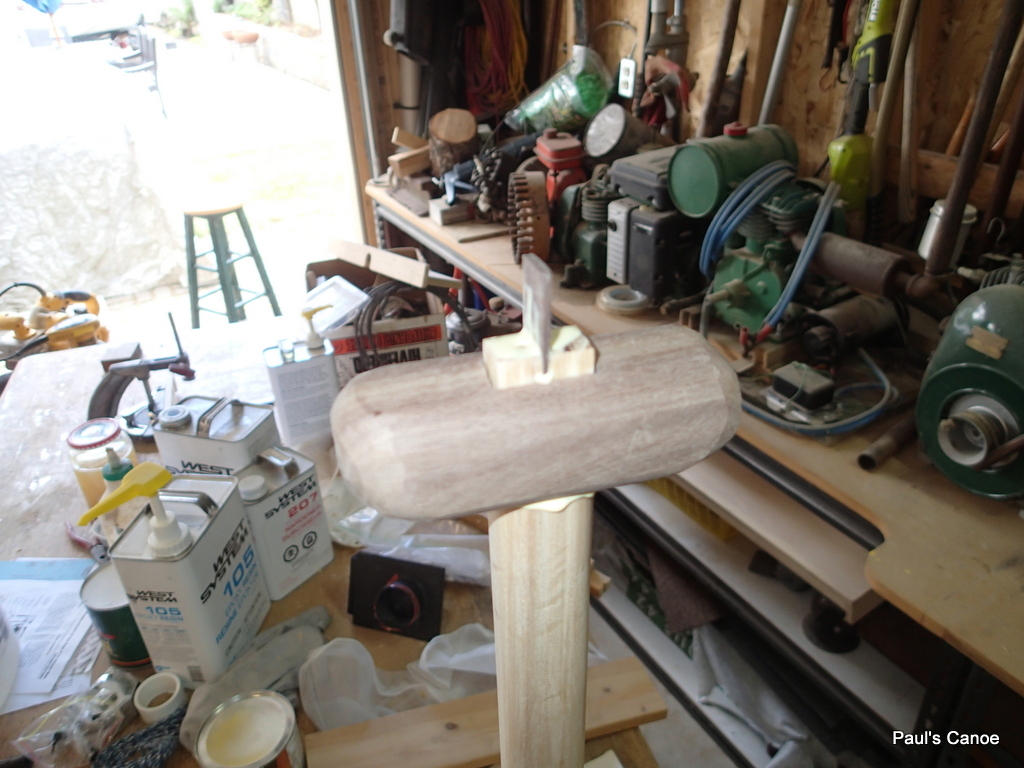
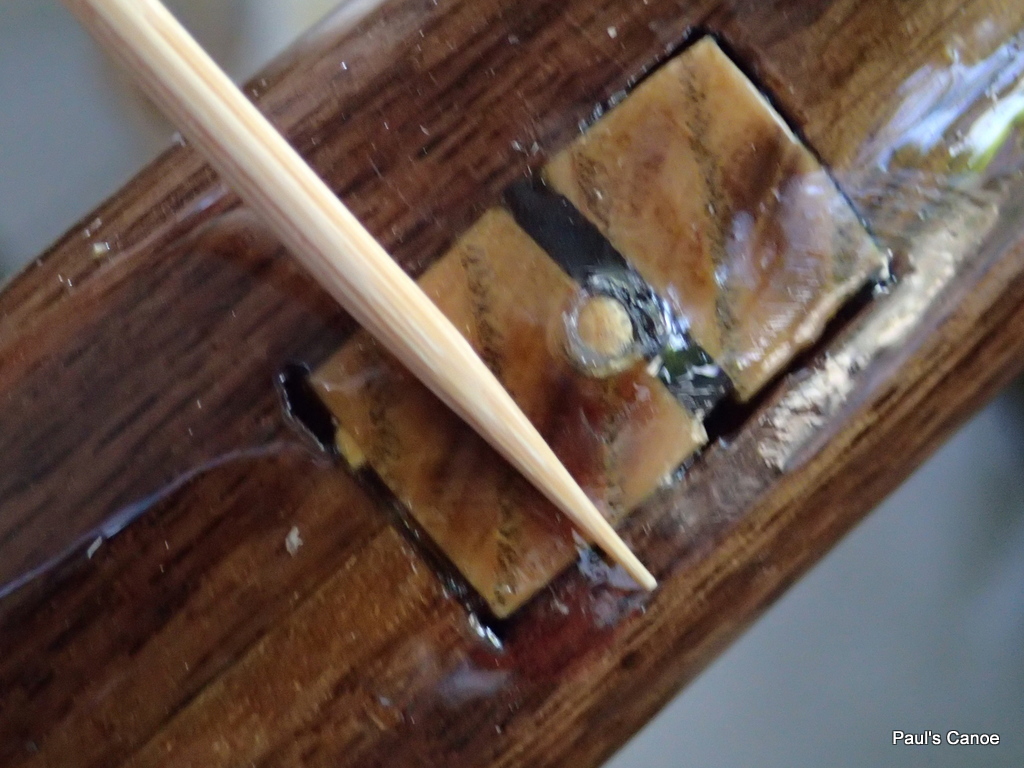
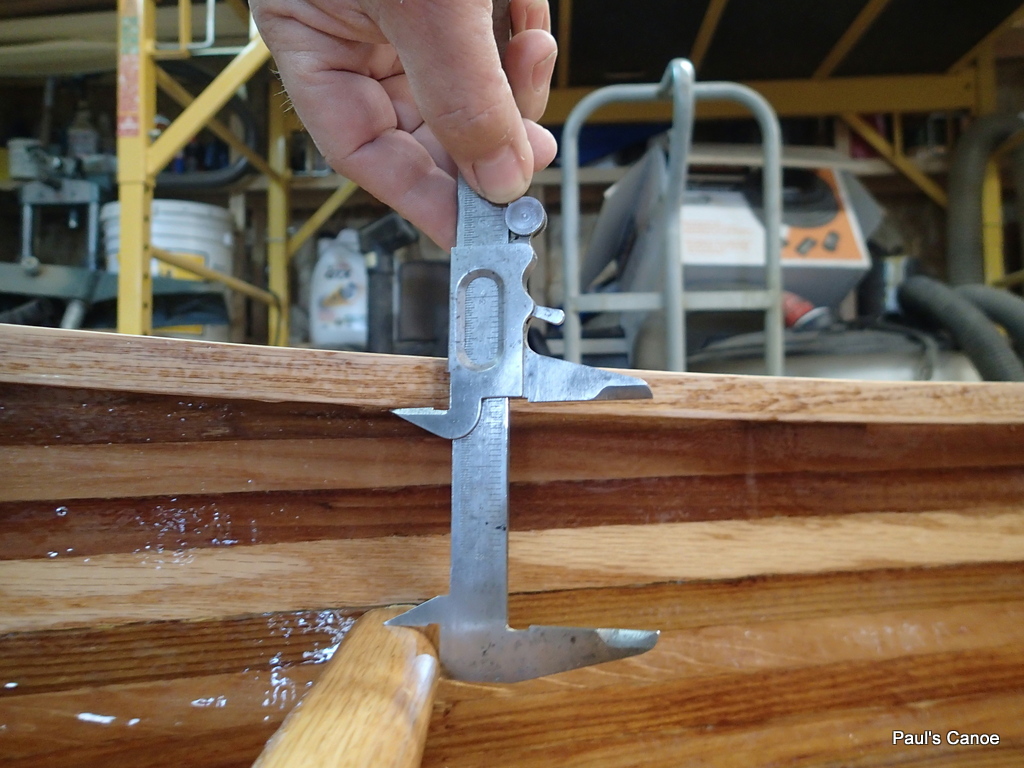
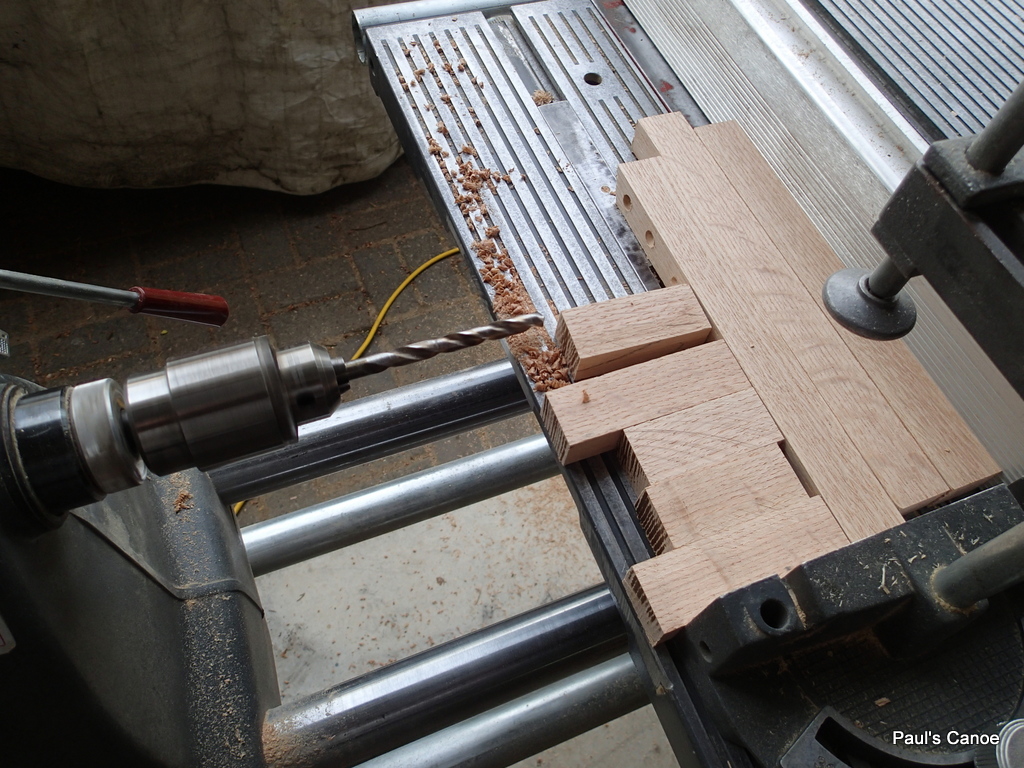
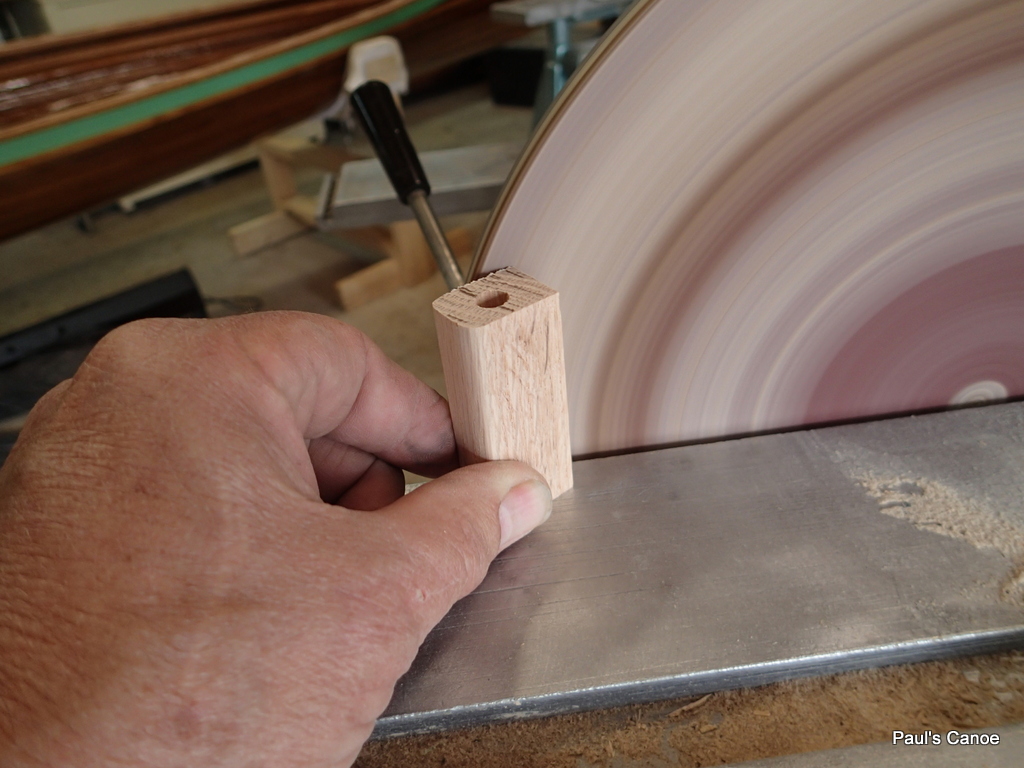
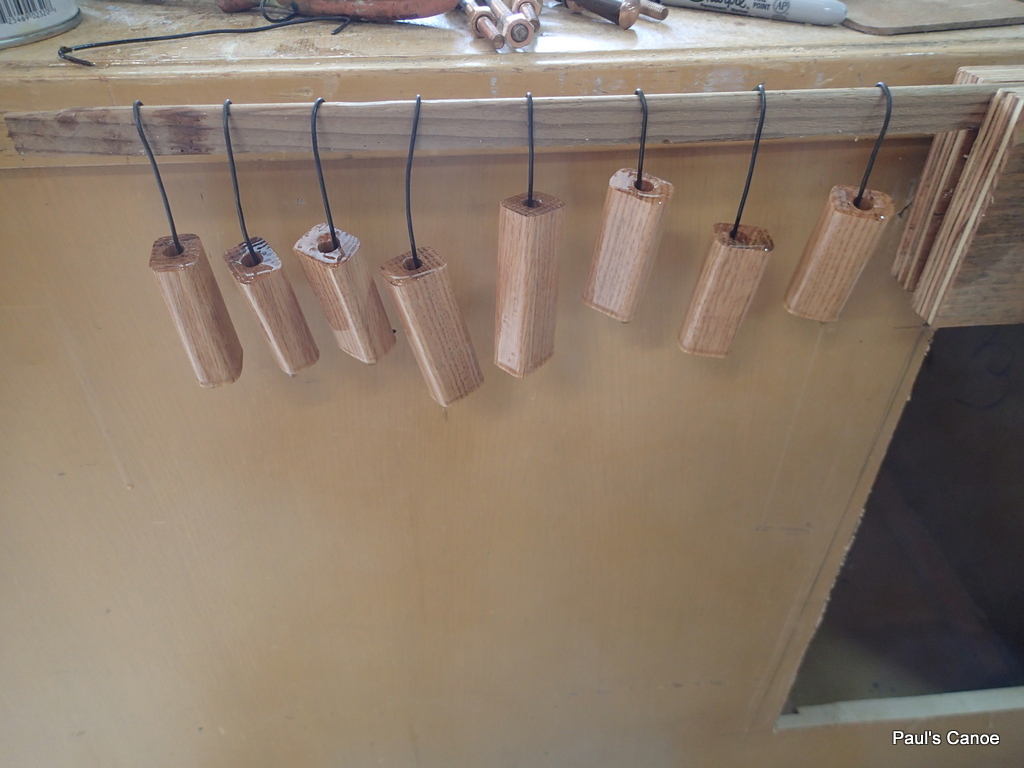
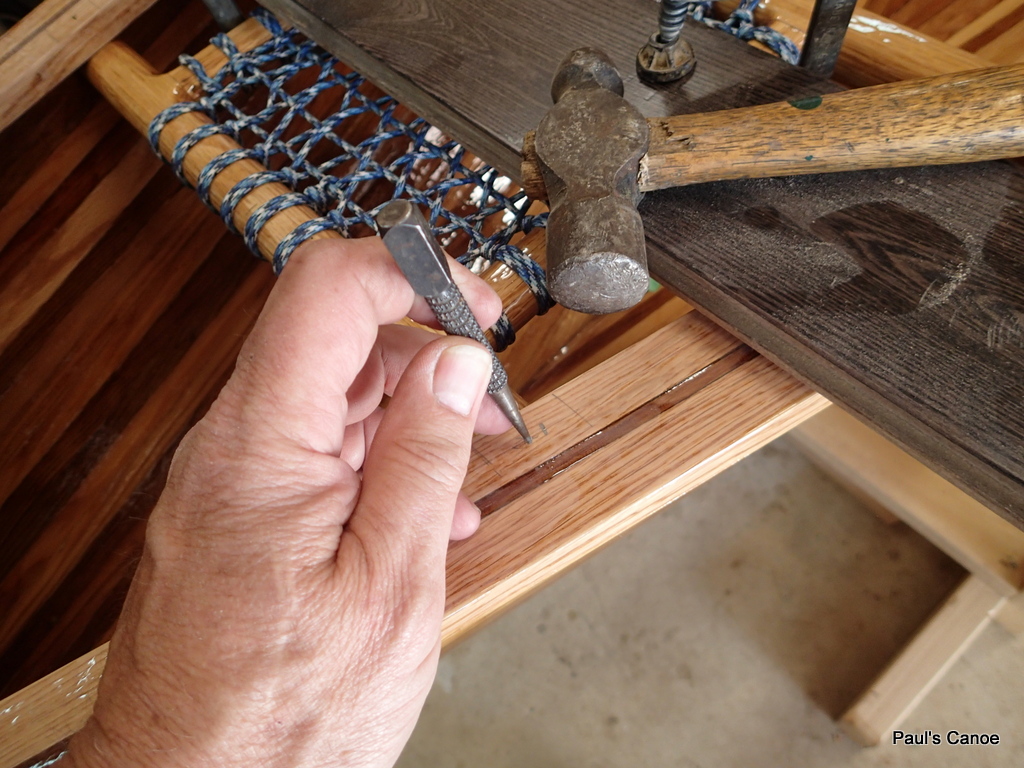
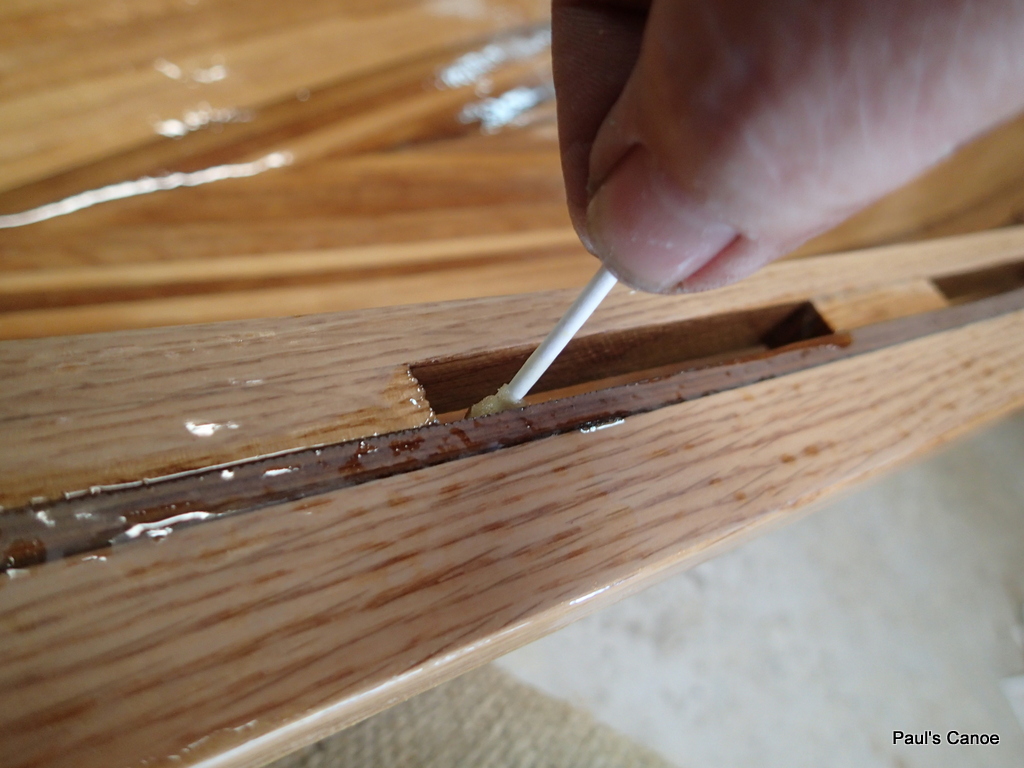
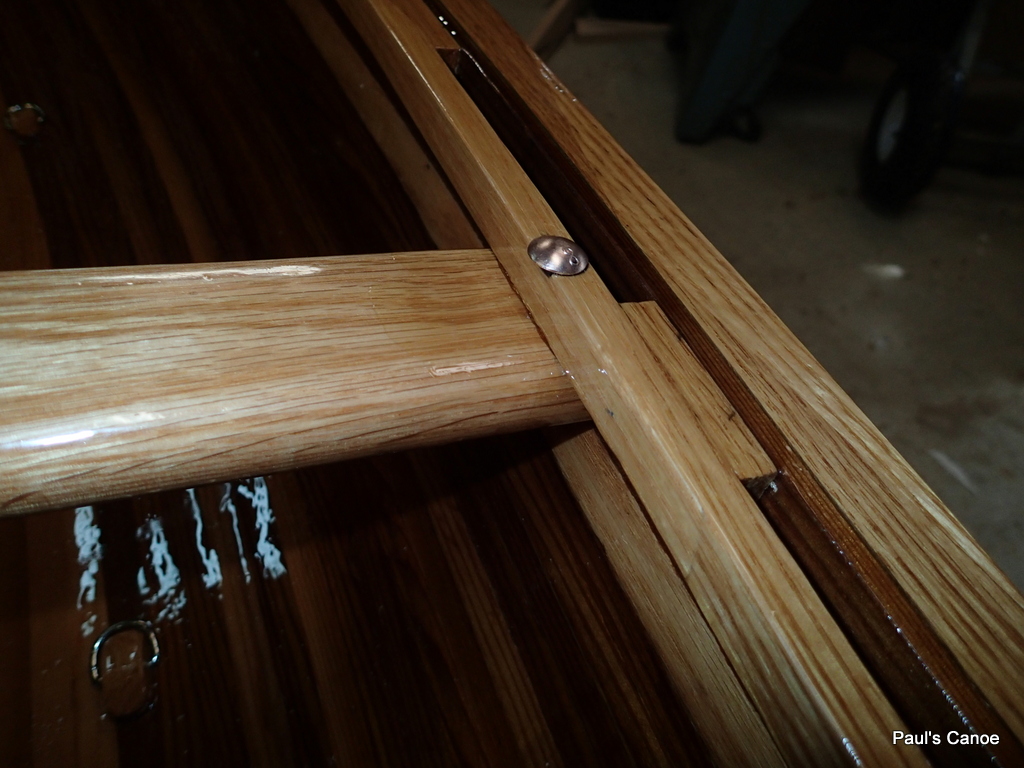
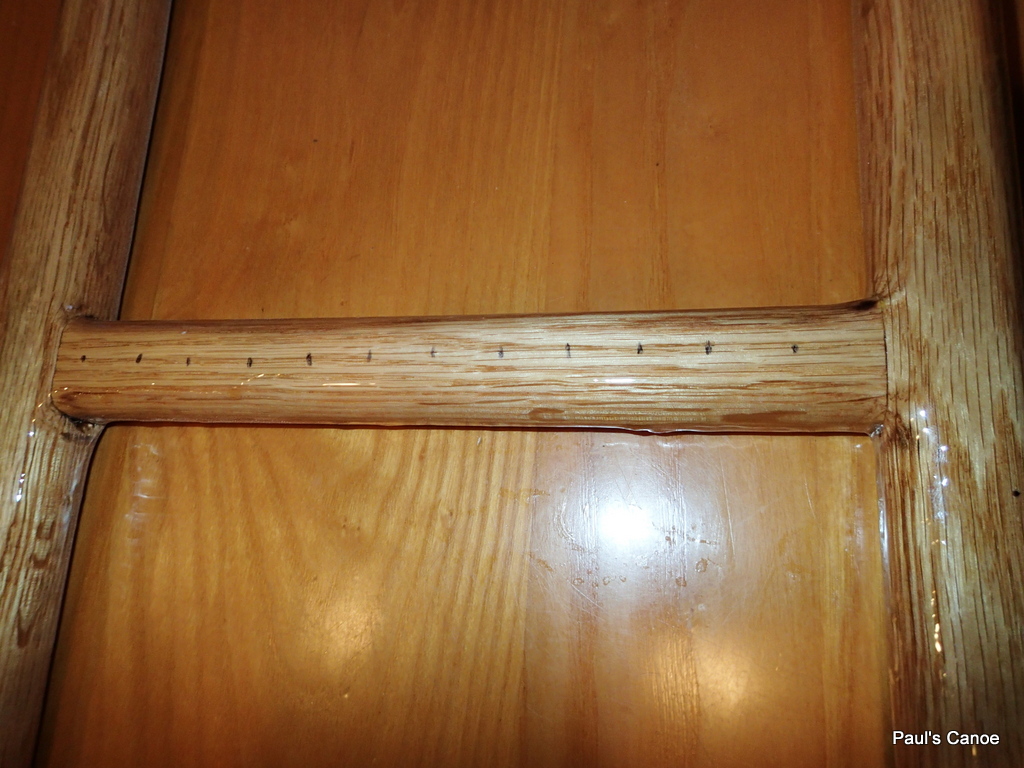
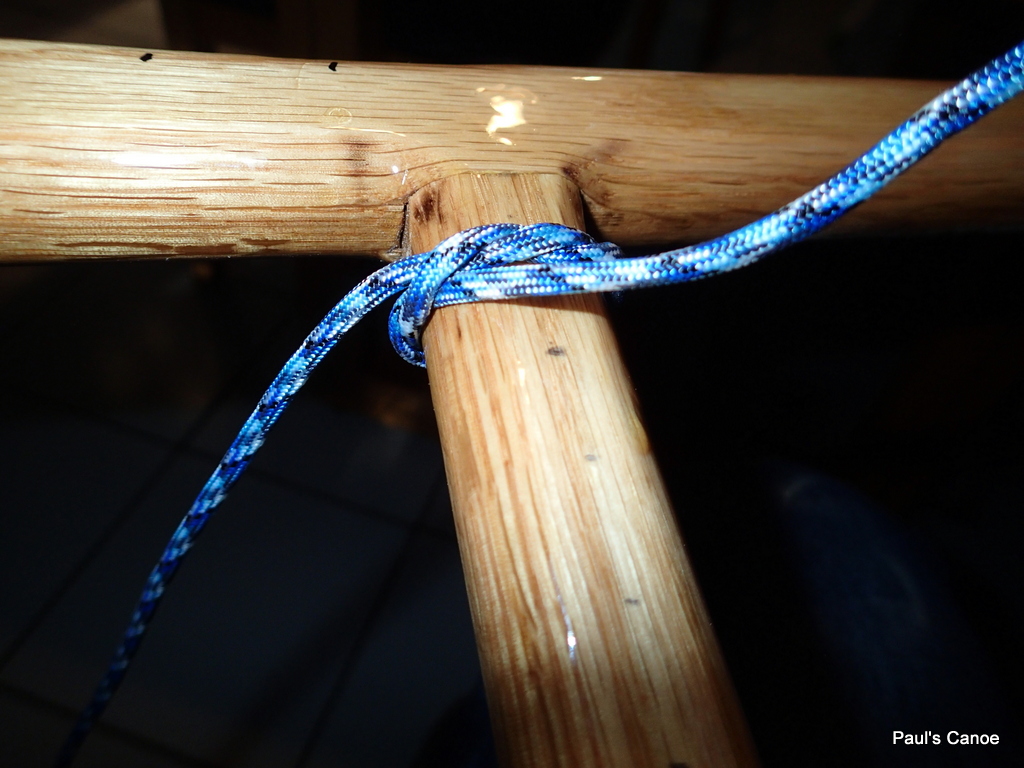
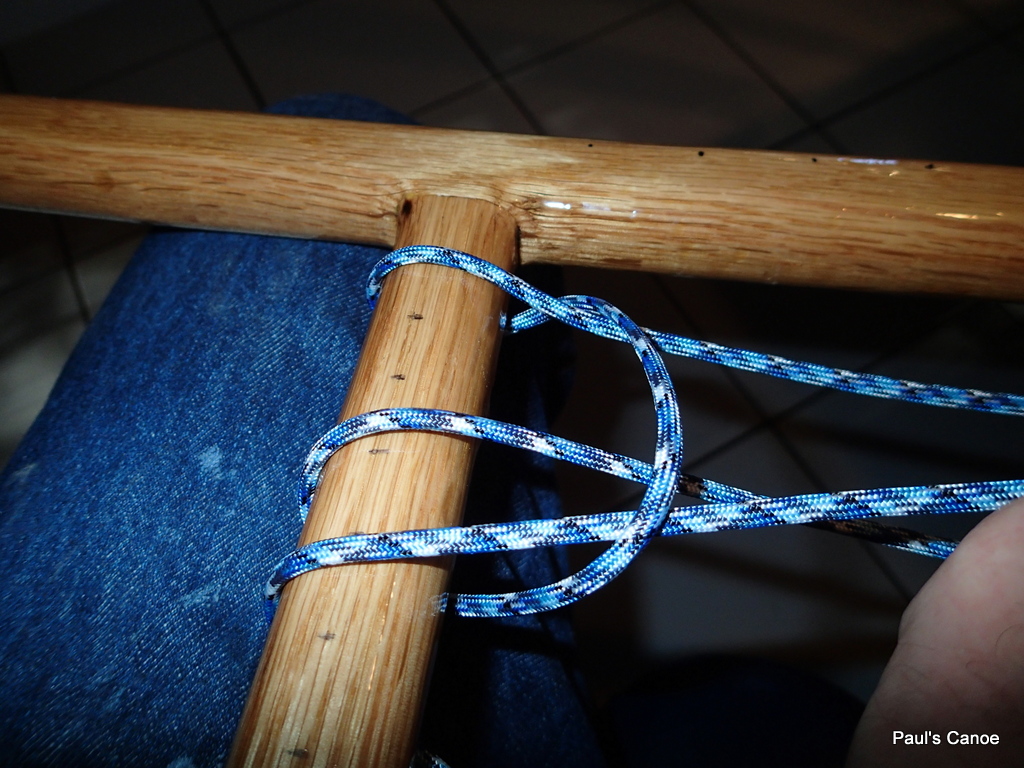
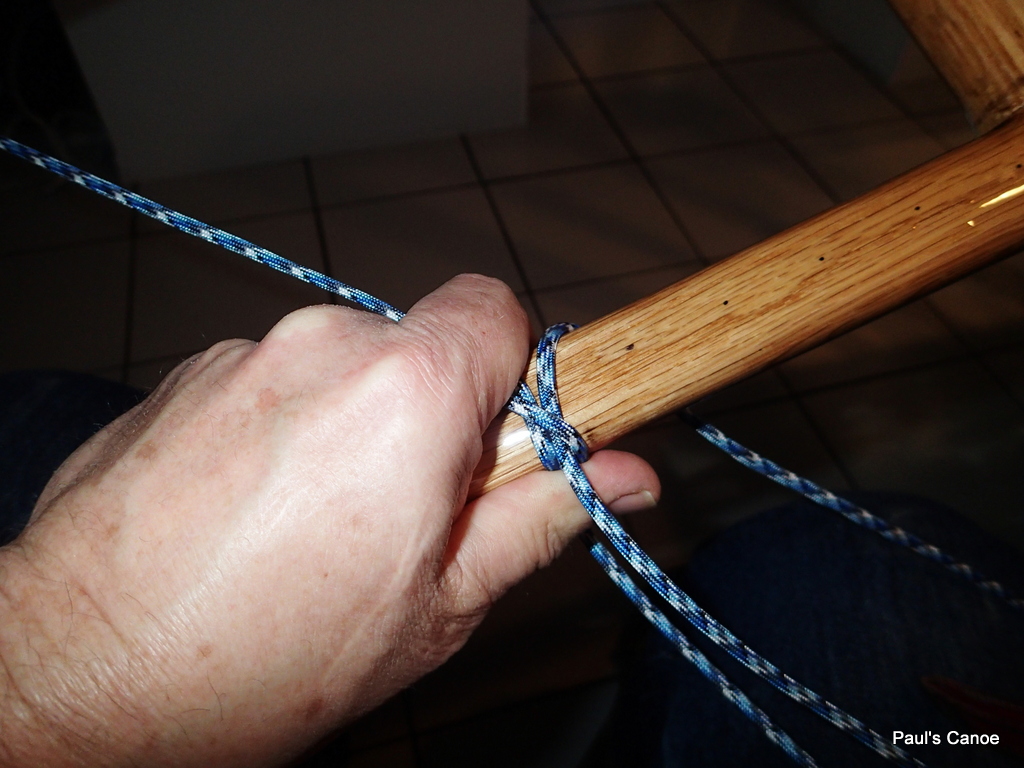
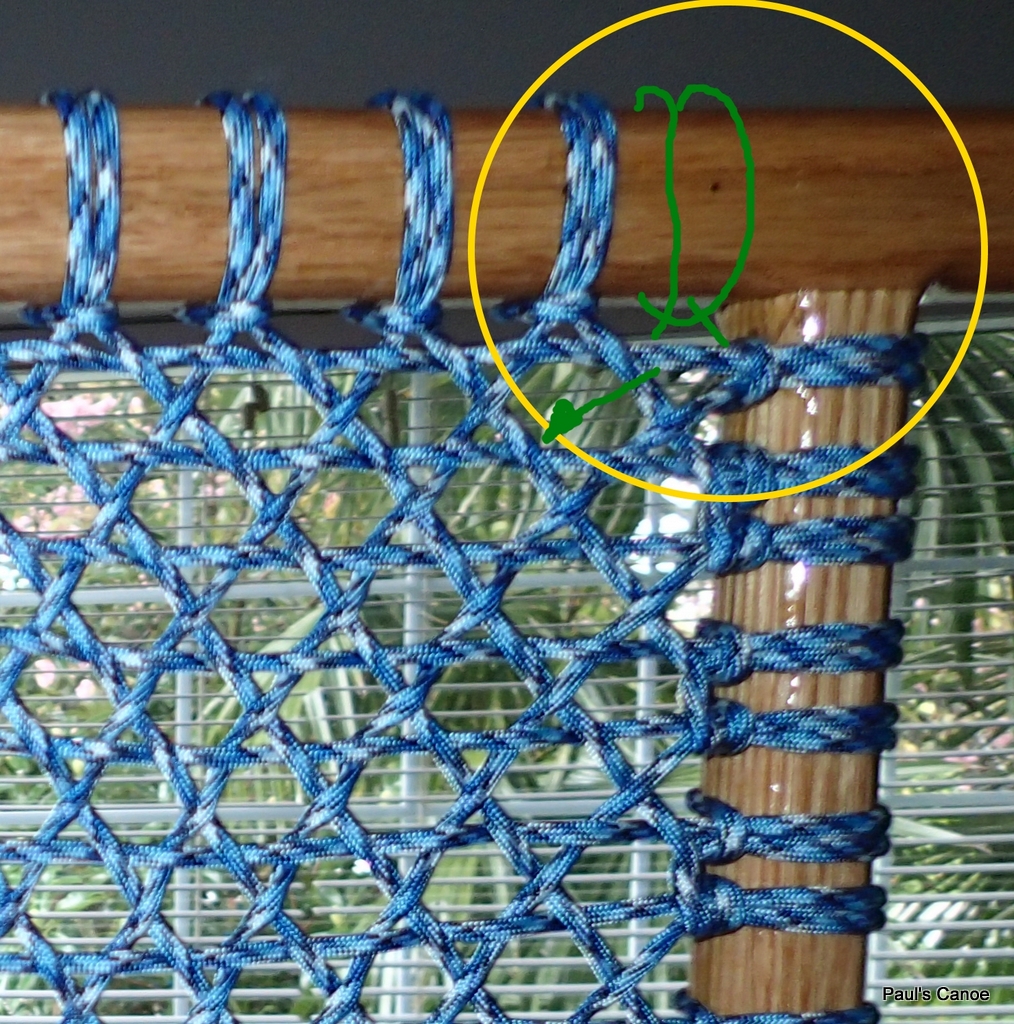
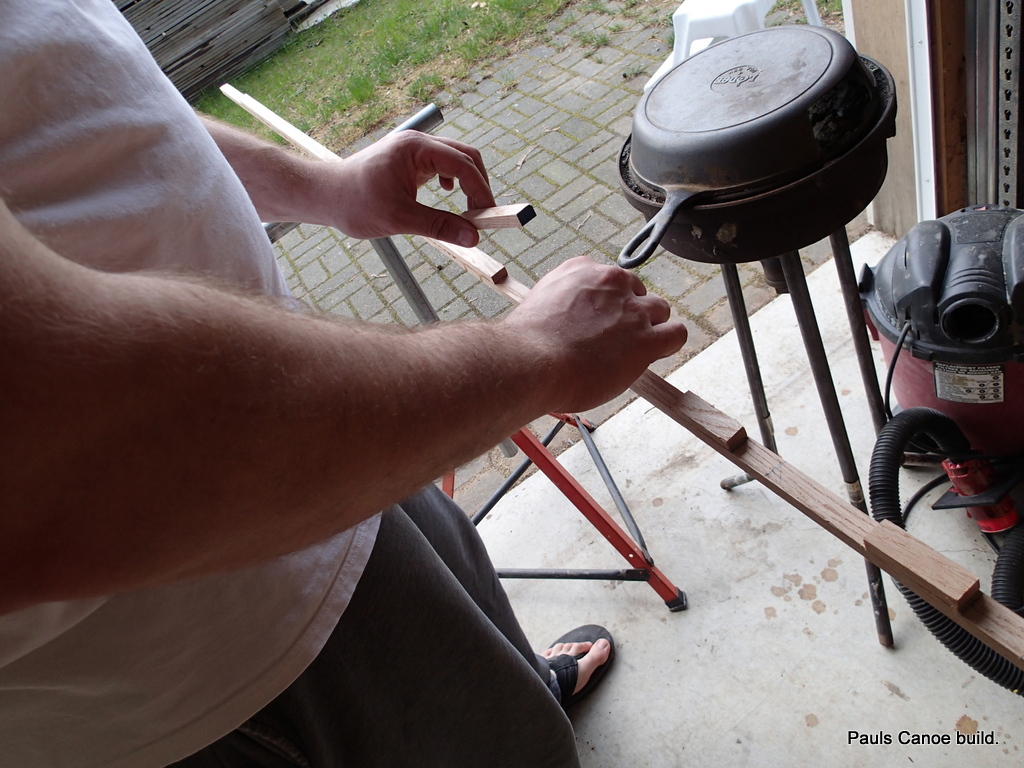
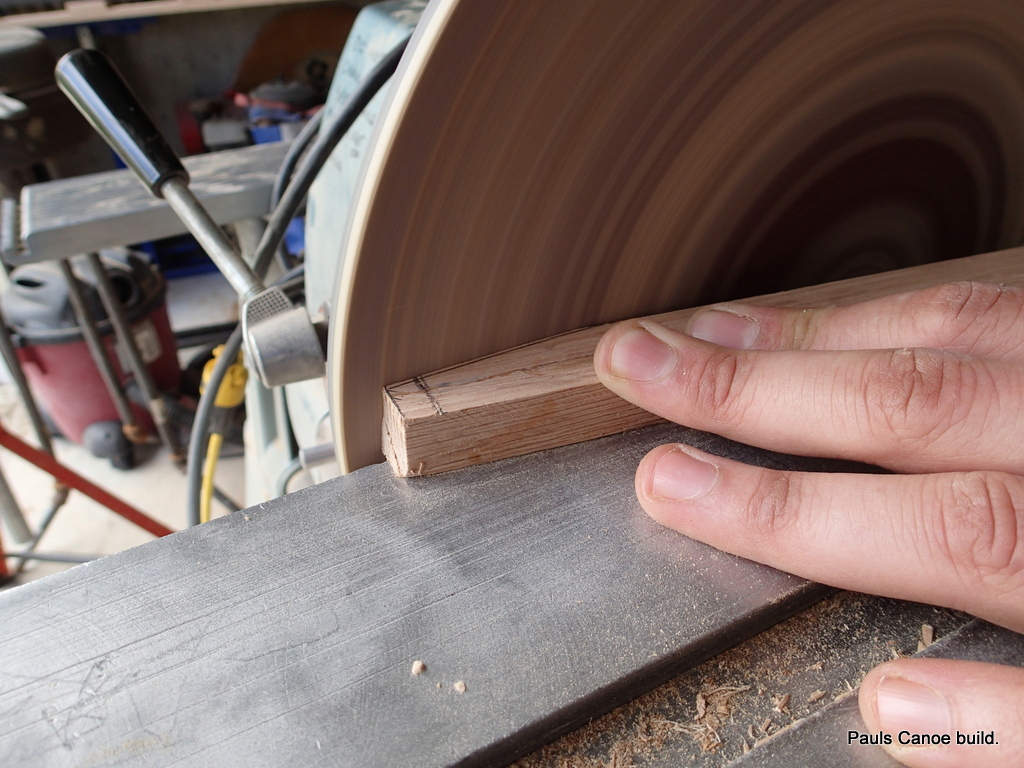
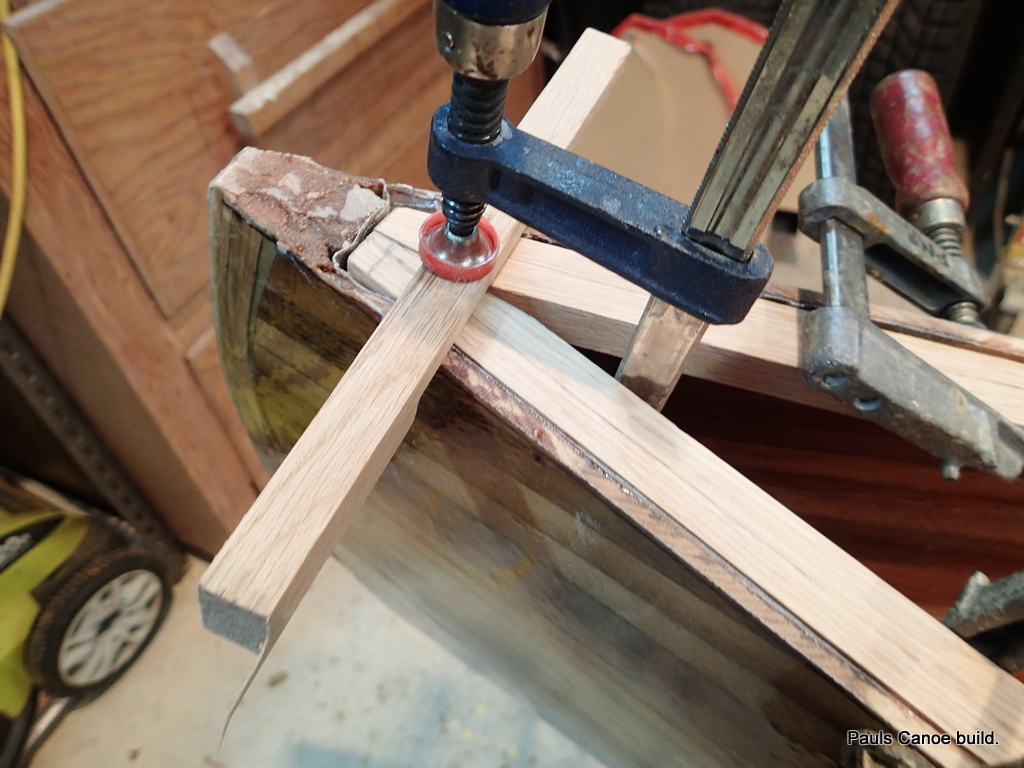
Canoe paddle handle detail.

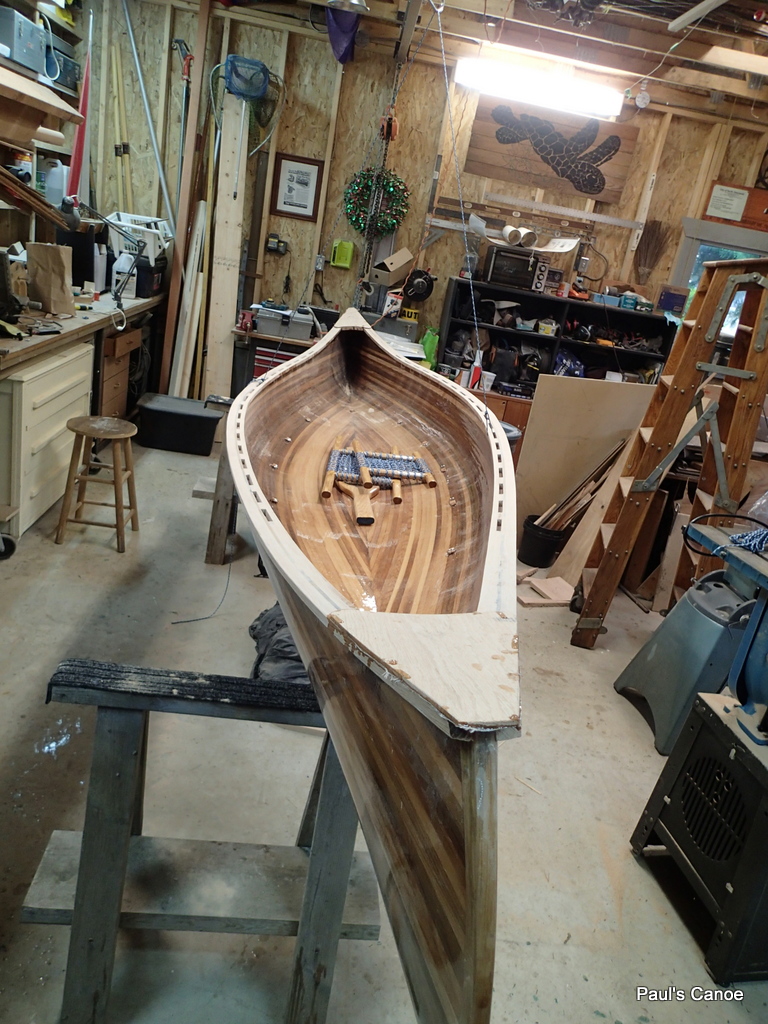
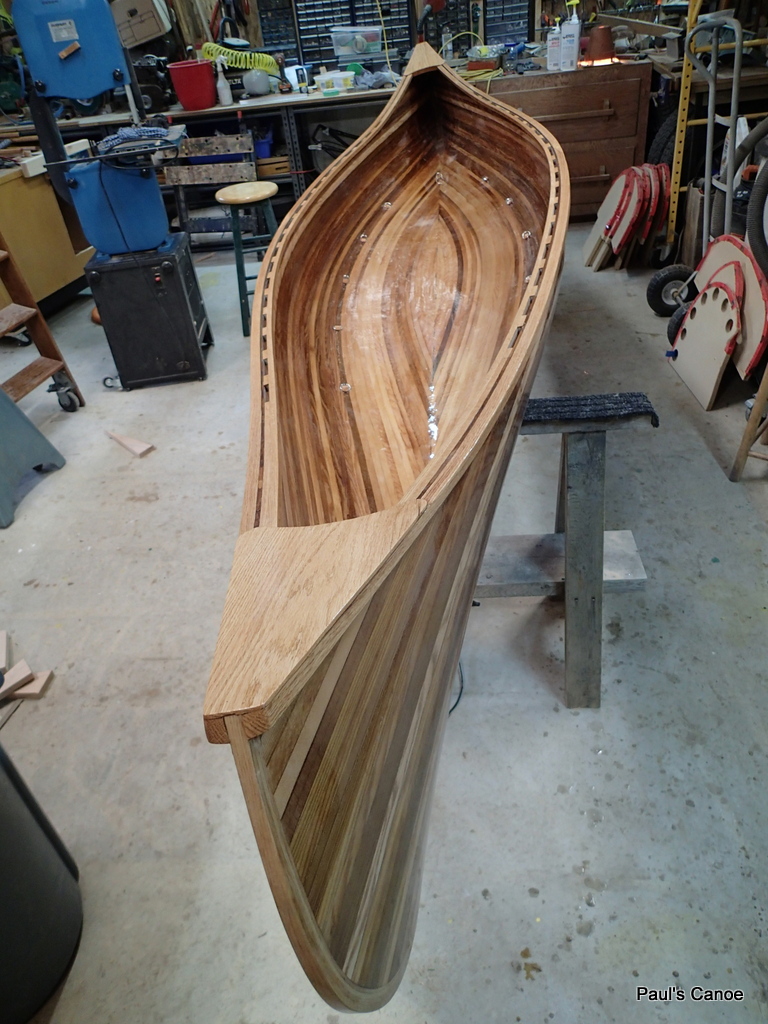
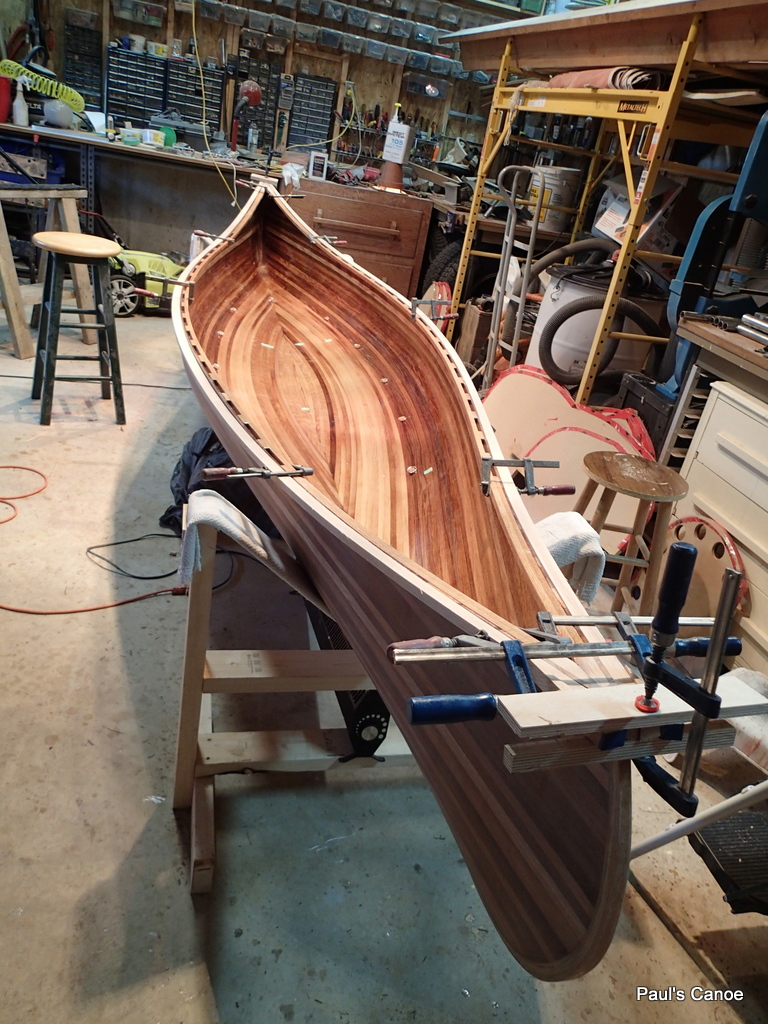
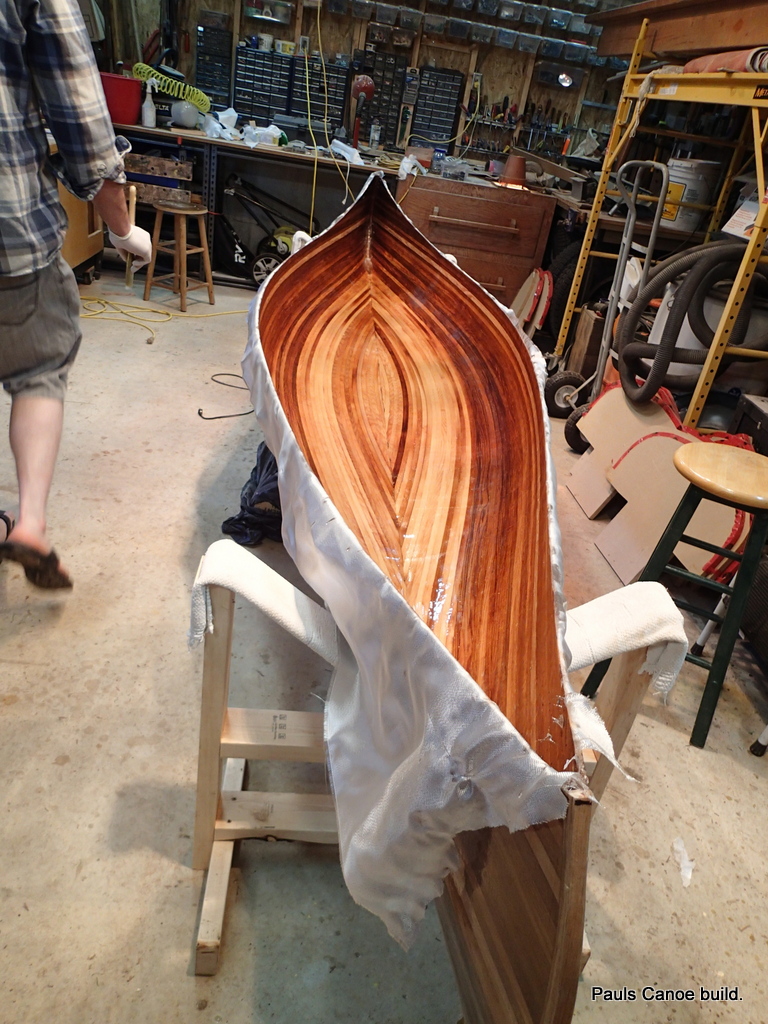
Paul’s canoe will be ideal for two paddlers and their gear.  An expedition canoe.  Paul did want to do some tripping and this canoe is the one for the job.

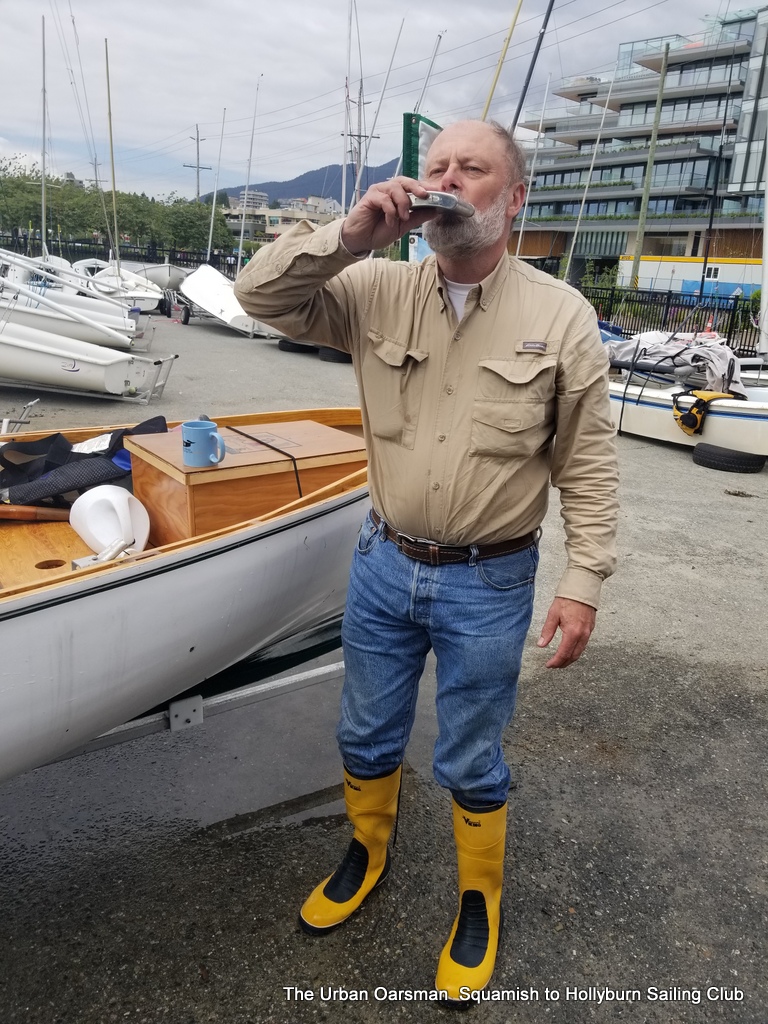
A quick rinse before we go home.

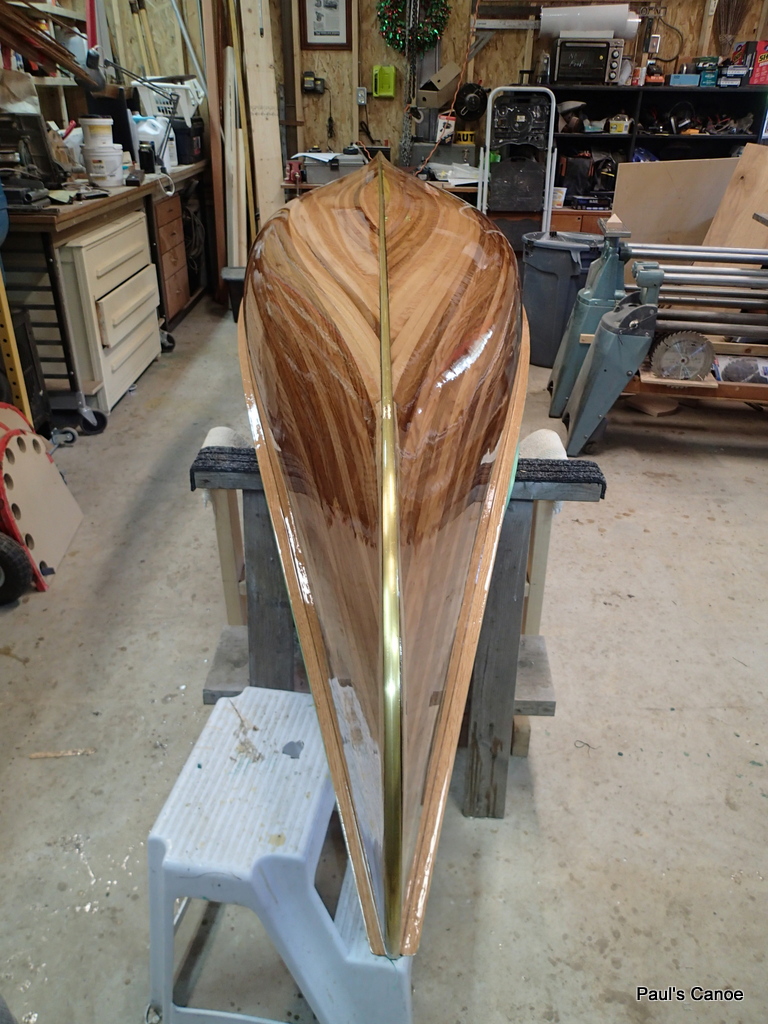
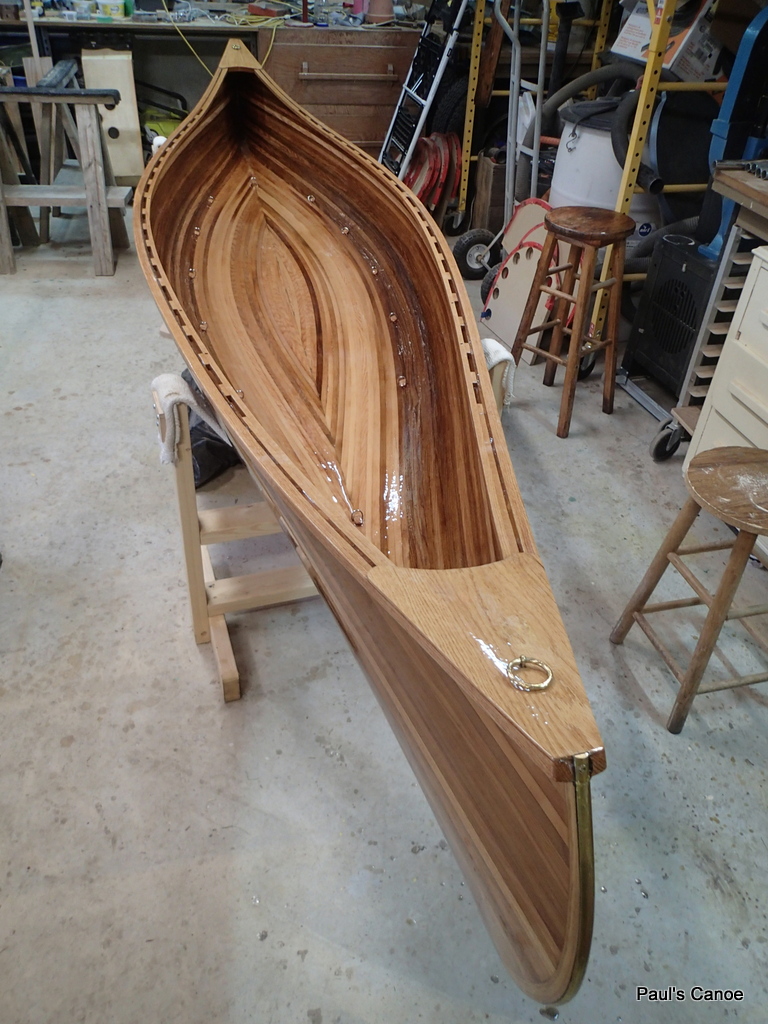
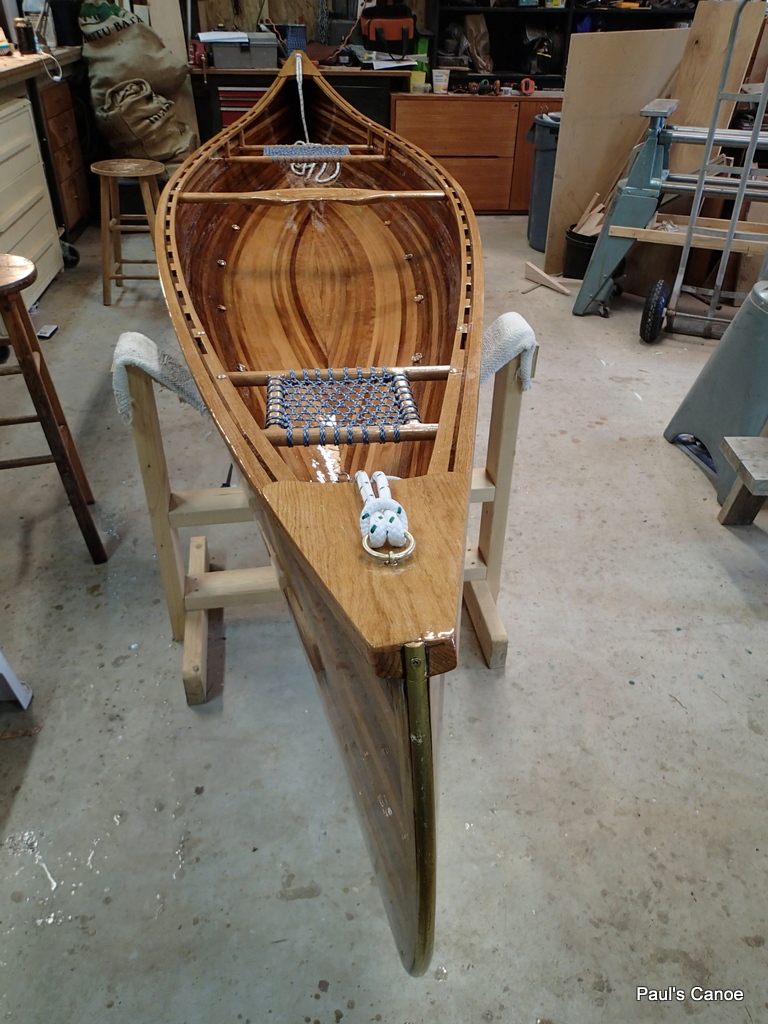
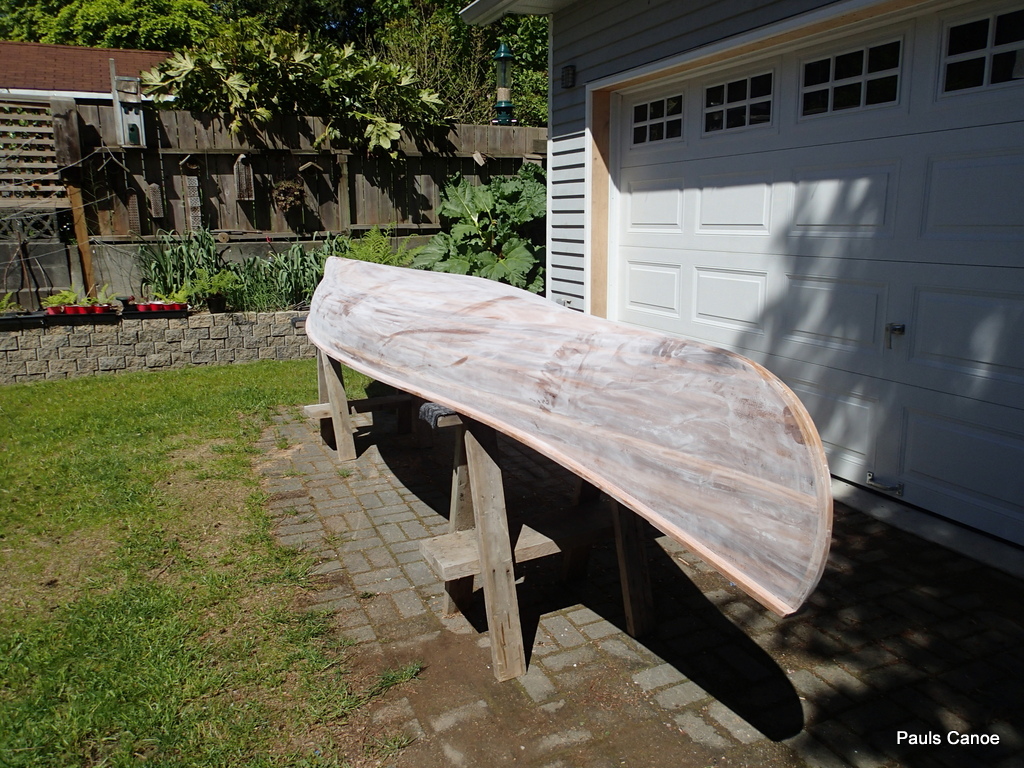
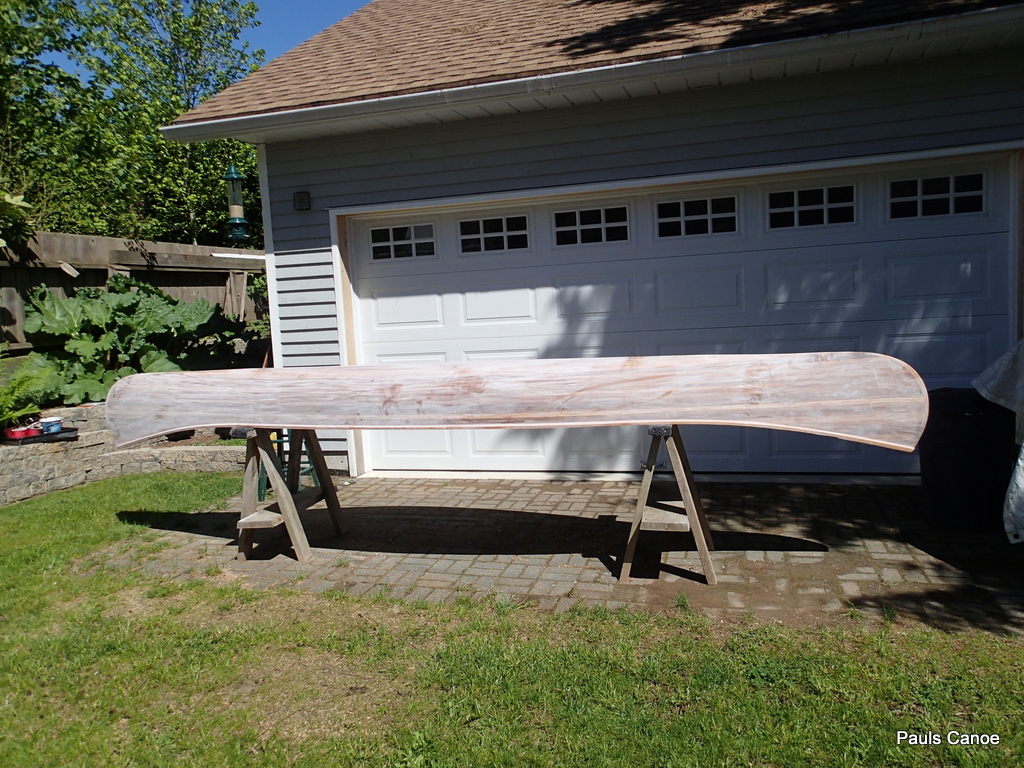
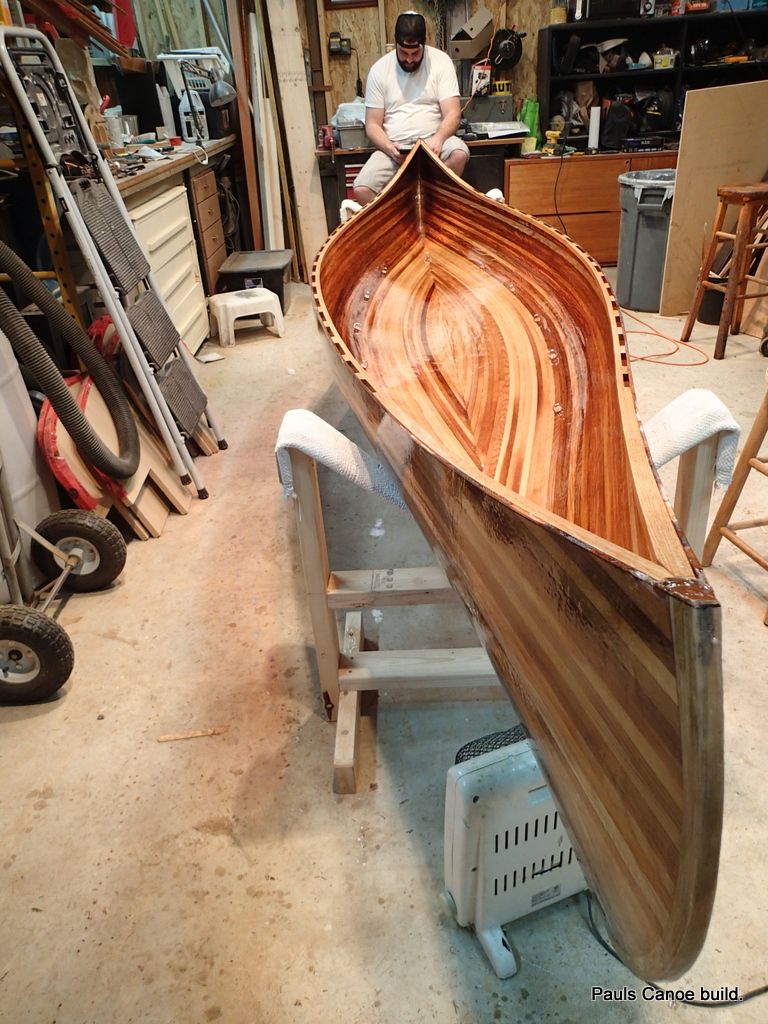
Final stats for Paul’s Canoe:  Overall length:  15′ 3″.  Width to outside of gunnels:  35¾”,  Width to outside of hull: 34¼” Depth of hull:  11½”, final weight 60 lbs.  Bow height 19″.

Good paddling to you,

Mike

Posted in Under the Keel.... | Leave a comment

Paul’s Canoe Part Twenty-five. Making the paddles.

With the canoe finished, Paul and I start work on our paddles.  In speaking with fellow Vancouver Wooden Boat Society member, Ian McGrath of Great Northern Craft, I tell him about the paddles.  Ian has some paddle blanks and will sell us two.  This will save me the hassle of sourcing wood for the paddles.   We get the blanks with Ian’s “Otter tail” design drawn on.

The paddle blanks cut out to the “Otter tail” design.

The lines on the paddle blanks indicate where the biscuits are.

Paul intends to do some longer trips so we have chosen “Otter tails” for long-distance paddling.

Paul marks the blade edge.

We will use the belt sander to shape the blade.

We start out by clamping the blade and working the sander.

This is really awkward.  The workmate keeps moving and it is hard to put any pressure on the sander.

We have to come up with a new plan…

I have seen old photos of workers sanding oars.  We decide to clamp the sander and work the paddle.

This way we have more control.  We can put more pressure on the sander.

I shape my blade down to a ⅛” edge.  Paul leaves his a little thicker, closer to 3/16”.  I suppose that Paul will be rougher on his paddle than I intend to be on mine.

The new system works a lot better.  We start out with 80 grit and finish with 120 grit on the belt sander.  We use my ⅓ sheet sander, with 220 grit paper, to take out the 120 grit scratches.  We then go to the random-orbital sander with a 240 grit pad.  Hand sanding with 320 grit finishes the job.

One blade shaped, one to go.

I use a ¼” round-over bit in my router to rough shape the shafts.  No photos of that.  We finish sanding the paddles by hand.

Cutting the slot for the wedge.

We put on the handles.  We square up the shaft at the top, cut a notch, and wedge the handle on, (with a little glue of course).

Ready to tap in the wedge, wipe up the excess glue.

Because Ash has such open pores, we will epoxy coat the paddles for a smoother finish.

Epoxy coating will also make the paddles tougher…The same method worked for Gwragedd Annwn’s spoon oars.

When the glue is dry and the handles are sanded, Paul mixes up six shots of resin and hardener.  We roll on the epoxy and brush out the bubbles.

Brushing out the bubbles.

We leave the epoxy to set…then four or more coats of Varnish!!!!

Epoxy cure time. (Actually looks just like Varnish cure time!)

The routine for Varnishing will be a light sanding followed by tack-clothing, a Varsol wash then a rolled-on coat of Varnish brushed out, until we run out of Varnish.

Second coat this morning.

I know what you are thinking…I am just posting a bunch of pictures taken at the same time.  I am not, varnish drying just looks the same in every picture.

Third coat this afternoon.

The stuff on the workbench changes.

Put the fourth coat on last night, fifth coat this morning.

Fifth coat in the morning.

Brushing out the bubbles.

Fifth coat to dry, sixth coat this evening.


…Three coats later, (Eight coats in total) I take out the eyehooks in the handles and plug the holes.

I cut off the tip of a bamboo skewer and using varnish, plug the hole.

I will give the bamboo & handle a light sanding and a few more coats of varnish to glue in the bamboo plug.

Both holes plugged…ready for use!!

The official launching of the canoe will be on Father’s Day, June 17th, 2018, at the Hollyburn Sailing Club, 1326 Argyle Ave West Vancouver, BC, at 9:30am.

See you there!

Mike


Posted in Under the Keel.... | 1 Comment

The Urban Oarsman & Son build a Canoe, part Twenty four…Final varnishing of the hull and attaching the seats, thwart and the stem rings.

Black goop is dry, time to take off the tape.

The black goop is dry.  Time to take the tape off and trim any excess black goop.

Paul trims off any black goop “flash” and tape.

We give the hull a wipe down with Varsol, to remove any black goop stains or spots.

Filing the screw flush.

Paul files the attaching screws more flush with the brass strip.

Almost done filing.

After Paul has filed the screws flush, we vacuum the hull and wipe it with a tack cloth and then give the hull a wipe with the Varsol.

Tack cloth wipe.

We are trying to get as good a finish as we can without going too crazy about it.

Stir that varnish!

We add a little Pettit solvent and stir.  We will roll on the varnish and follow by brushing it out.

Half way there.

We roll and brush out the varnish.  Fun, fun, fun.

Brushing out the varnish.

When you are brushing out the varnish, you can feel the brush “drag” where there is a holiday.  We re-roll out that piece again.

We spend the next half hour looking for “holidays” and runs.

When the outside hull has dried, we attach the stem rings.  They are brass cotter pins with a brass ring.  We drill a hole in the deck piece, squirt in some black goop and put in the cotter pins and ring assembly.

Stem rings glued in.  The tape protects the deck.

When the black goop is dry, I remove the painters tape and install the seats.  This way, all the holes I drill for the seats will be varnished on the inside.

Seat placement, marked with tape.

I have used the formula to place the seats, trying for about 200lbs balanced off by 160lbs.

Ready to varnish the gunnels…also eyeballing the seat placement.

Cutting the seats.

Fitting the seats.

I mark all the seats and cut them to fit.

Temporary placement.

I will have to cut the “riser blocks” to hang the seats from the inside gunnels.

Measuring for the riser blocks.

Six of the blocks are the same length, two of the blocks are longer,  I cut them out of some left-over oak.

Horizontally boring the holes to hang the seats.

I use the Shopsmith disk sander to shape the blocks.

The colour more matches the seat frames.

I dip them in the varnish four times.

…jus’ hanging around.

The two longer blocks have an angled top.

I use a nail set as a punch for each hanger hole.

Clamping the seats into position for drilling the hanger bolts.

I have a long ¼” drill bit for the hanger holes.  I want there to be some wiggle” room to hang the seats.  It will be a tight fit.

I cut all of the hanger bolts to length and thread the ends.

After we have temporary fitted the seats and thwart, we remove them for the hull interior varnishing.

I put the seat and thwart to one side.

I have put painters tap along the underside of the gunnel (inside and outside) to catch any drips.  You can see them a lot better against the painters tape than the varnished hull.

I start by using a q-tip to varnish the scuppers.

Scuppers varnished.

Q-tips are cheap, and I use two of them a side.  I roll on the varnish and brush it out on the flat part of the gunnels.

Six coats of varnish for the gunnels.

The next step is to varnish the inside of the hull…Five coats.

Ready to varnish the inside…Sanded, tack clothed and washed with Varsol.

Paul and I will roll out the varnish and then brush it out….

Under the deck.

Rolling out the sides.

Rolling out.  The roller leaves bubbles, but and overall even coat.

Brushing out the bubbles.

The brush takes care of the bubbles.

Dry, varnish, repeat five times.

Final coat. (at last!!)

When the last coat is dry, Paul and I install the thwart and seats.

We roll the canoe on its side.  Thwart goes in first.

We put a dab of the black goop to stick the seats to the hull…put a little less stress on the hanger bolts and gunnel when it is dry and we are using the canoe.

Thwart is in.

We give the bolts a wipe with Varsol to remove any excess black goop.

We slowly work the hanger bolts in, cutting them to fit.

It is a tight fit.  We use dabs of black goop as a thread locker.

Cutting the hanger bolts to fit.

It is very tight for the seat.  We use a piece of wood to push the canoe sides apart to get the nuts on.

Note the tape on the screwdriver and the piece of wood…do not want to mark the canoe.

This is slow painful work..It is a very tight fit for the seats.  Next canoe will have wider inside Gunnels and no scupper where the seats will go.

Last hanger bolt goes in.

We give the bolt heads a wash with Varsol.  Time to let everything dry.  The canoe is done.

Ooops!

Paul and I have an Ooops.  We hang the canoe by the stem rings to weigh her and the rings pull out.  I buy new brass cotter pins, put the rings in them and solder them up.

Threading the new brass cotter pins.

I thread the new cotter pin assemblies (brass ring, cotter pin soldered and threaded, brass washer, brass washer, brass nut), we drill the old holes through and bolt the new stem ring assemblies in.  No coming out now!

New stem ring assembly installed.

The canoe is now finished!  Final weight, just under 60 lbs. Time to get those paddles done.

Paul’s Canoe.

See you out on the water.  The launching date is set for Father’s Day, June 17th, 2018 at Hollyburn Sailing Club.   now to get working on those paddles!

Mike


Posted in Under the Keel.... | Leave a comment

Squamish to the Hollyburn Sailing Club…a three day row with the “Cheetahs” of the Sea.

Maciej, Lars and myself at the Squamish boat launch.

For every trip, you need to have a trip plan and leave it with someone who can call for help if you are overdue.

Original trip plan:

Trip as actually done:

Trip plan showing our planned route and the route we actually took.

We leave too early in the morning to pick up Maciej and Lars.  I am towing Gwragedd Annwn and have Maciej’s and Lar’s kayaks on the roof racks.  Paul has volunteered to drive the FJ home from Squamish.

FJ loaded and ready to drive to Squamish…4:56am!

When we get to the Squamish boat launch, Maciej and Lars load up their kayaks.

Loading up the kayaks.

Gwragedd Annwn is already loaded and ready to launch.  This will be a “test” cruise to see how well Gwragedd Annwn works on longer trips.

Ready to launch.

I get in Gwragedd Annwn and Paul launches me.

Paul says a final “good-bye” and heads back home.

Lars and I head out, Maciej says he will be along shortly.

We paddle out of the Mamquam Blind Channel.

Conditions are very good.  An outgoing tide and no wind.

The “Cheetahs” of the sea.

Maciej and Lars will paddle together…The kayaks are twice as fast as Gwragedd Annwn.

I rapidly fall behind.

Leaving Squamish in the distance.

I take my sailing boots off and row in my runners.

Waiting for me at Watts Point.  Those two specks on the rock are Maciej and Lars.

The real advantage I have in Gwragedd Annwn is I do not have to go to shore to get a snack or a drink or anything else.  The kayakers have to.

No break for the rowing.

I row on, rowing by a breaking rock by the point.

Rowing past Watts Point.

The breaking rock:

Breaking rock by Watts Point.

It is almost 8:30 in the morning and conditions are still good.

Gwragedd Annwn is down by the stern…I will have to move some cargo forward.

I row on, past the Point, Maciej and Lars pass me again.

The “cheetahs” of the sea pass me.

I hear the train:

The Rocky Mountaineer heads up the Sound.

The BC Mining Museum is in the distance.

View to the East from Gwragedd Annwn.

View from the kayakers:

Those kayakers are fast!

I am so far behind, I am not even a speck!

The kayakers go into Ts’itpsm (Zorro Bay).

TS’ITPSM (Zorro Bay)

It is the kayakers job to set up camp so everything is ready when I arrive….at this rate, they will have a lot of time to do that.

I arrive at Ts’itpsm (Zorro Bay):

9:45am.

I spot a Zebra Swallowtail butterfly in distress.

The Urban Oarsman to the rescue!

Rescued, I row the butterfly into shore.

Drying wings.

Almost there…..

Butterfly rescue.

Entrance to the campsite.  I am not going to bail out… I row around the bay and head on to Lhemlhemkwus (Islet View).

Around the point and on towards Lhemlhemkwus (Islet View).

Eastern Defence Island.

One of the Defence Islands.

I row on.   You can see my chart, #3311 sheet 2 of 5 HOWE SOUND, part of the Sunshine Coast series of charts.  I had bought a map bag from MEC, but it was a little too small.  I ended using a big “Glad” bag, $2.50 vs, $35 for the map bag.

Hard rowing passing Defence Islands.

There is a 2 to 3 kilometer an hour counter current along the shore.   Gwragedd Annwn’s progress slows to a crawl.  I row for a long time to go not very far.  I arrive about 12:30pm.

The cleared beaching area.

I find the campsite.  There is a cleared beaching site.  I beach Gwragedd Annwn and shortly after, she is dry.  I must admit, I am tired from the row, about 6 hours and 15 minutes at the thwart.

I am going to anchor Gwragedd Annwn off of the beach.

The tide will go out far enough for me to set her anchor by hand (or foot as it turns out).

Setting the anchor.

The  tide is still going out to the low low tide.  I have checked the tide tables, The tide will not be this low again tonight.  I will have plenty of water for Gwragedd Annwn.  Maciej and Lars have a fire going.  Time for lunch.

Some chicken noodle soup.

The current is flowing the wrong way past the landing area quite quickly.  I am happy to be ashore.

’round the campfire.

Maciej chops up some firewood using my axe..note to self, do not let him use the good axe!

Oh well…I can grind out the dents when I get home.

Maciej and Lars have set up their tents.  I am going to sleep aboard Gwragedd Annwn.  There is a slight change of plans, Maciej and Lars want to paddle down the West side of Anvil Island.  Fortunately there is cell phone coverage throughout Howe Sound.  I call in and amend my trip plan…No sense looking on the wrong side of Anvil for us.

Islet View campsite.

Lars forgot his cup.   Maciej makes him a new one.

Lars’s new cup.

When the tide has re-floated Gwragedd Annwn, I board and prepare for bed.  The current is still flowing to the East, even on the rising tide.   Weird.

I am anchored and have a stern line to shore.   Set for the night.

Maciej says there is no rain forecast in the weather report.  Great, it will be easier to sleep aboard Gwragedd Annwn than drag her up and then down the beach in the morning.  The tide will be very high tonight and quite low tomorrow morning when we wish to leave.

It takes a while to get organized.

Because there is no rain forecast, I am not going to pitch my tent, I am going to sleep on the deck.  I still have to put the deck pieces in place, stow gear, assemble my camping cot and get my sleeping bag ready.

Ready for bed.

I have my sleeping bag laid out, on top of a self-inflating mattress which is on top of my camping cot.  As I prepare my bed, another couple has arrives.  You can see their zodiac on the large stump.  The tide will rise past the base of the stump.  The current is still flowing to the East.

20 minutes of rain in the middle of the night.  See the drops on the mirror.

The weather liars lied.  At around 12:20am, it starts to rain.  I am uncertain as to what to do.  I have a tent, and I could go to shore and pitch it and sleep in my spare sleeping bag, but what a hassle.  It is not raining very much, I am warm, so I decide to wait it out…I put my jacket over my sleeping bag, my hat over my head and hope that it stops soon.  If I start to get cold, I will go ashore and pitch my tent and sleep in it.  After 15 minutes or so of light drizzle, it stops.  Saved!!

Around 1:30 it begins to rain again.   Rats!  Again I decide to wait it out…It stops by 1:40pm.  It is dry for the rest of the night.

When I wake up, my sleeping bag is dry, my body heat has dried up all of the rain.  Gwragedd Annwn’s decks are still wet.  I carefully pack up.  I go ashore, have breakfast with Maciej and Lars and set out.

Leaving the campsite.  Note the raindrops on the mirror.

Again, I am the first boat out.  The current is still flowing to the East.

I am the speck in the distance.  The current starts flowing to the West just past the islets.

Looking back, it begins to rain again, but, at least I am rowing and warm.  Not far from the islets,  the current switches and now is pushing me to the West.

Defence Islands to the East.

It is raining a lot heavier that it did last night.  I feel sorry for Maciej and Lars packing up in the rain.

Maciej and Lars paddle out of the rain.

West side of Anvil Island is to the right of the picture.

We share an orange and have a chat as they pass me….We will meet again at Halkett.

Confirming plans to meet in Halkett Bay.

Gwragedd Annwn is sitting much more level.

Maciej and Lars press on.

Passed by the Cheetahs again.

I can smell the mill.

Port Mellon way.

I row past Anvil Island.  No landing here.

When you are this close to land, every turn seems to be another point of land.

Conditions are still good…Maciej was right, conditions are usually better early in the morning.

Pam Rock.

Maciej and Lars make a detour to Pam Rock.

Pam Rock.

Pam Rock

The sentry at Pam Rock.

I, on the other hand, row straight towards Gambier Island.

Leaving Anvil Island behind.

Rowing beside Gambier, Anvil Island in the distance.

Most of my gear is dry.

I continue on to Halkett Bay.

Steep cliffs on Gambier.

As I close on Halkett point, Lars calls me on the radio…the campsite is full and he is heading home, continuing on to HSC.   Maciej is staying behind to find a campsite.

Lars leaving Halkett Bay heading home.

Lars will probably be at HSC before I get to Halkett Bay.

Langdale ferry.

Halkett Point.  The wind begins to pick-up from the South East.

Rounding the point.

Not much further now.  The wind picks up more for the run into Halkett Bay.

Maciej at Halkett Bay.

When Lars left, the tide was past the big stump behind him.  I beach Gwragedd Annwn.  Maciej and I quickly discuss continuing on to HSC.  Maciej has found a good campsite and we decide to say.  I go ashore to the campsite Maciej has found.  About 5½ hours at the thwart.

Gwragedd Annwn on the hard at Halkett Bay.

Our campsite:

Our campsite in the fern forest.

A toast to being here.

Sparkling cranberry and soda.

I turn in for a nap.  As the day progresses, some campers leave, the tide comes in, space open up and I can tie Gwragedd Annwn to the dinghy dock.  We get word that Lars is back at HSC.

Gwragedd Annwn at the Halkett Bay dinghy dock.

We will have another long day ahead of us, so we turn in early.  The loud music starts by 9pm and then abruptly stops at midnight.  No music no more voices.  Did a ranger make a visit?

Early start.

I row Gwragedd Annwn over to the beach below the campsite and load up.  I help Maciej carry his kayak to the water.  I get a head start while he loads up.  He will catch me shortly.

6:25 am, I am on my way.

Conditions good, flat calm, no wind.

On my way, Langdale ferry in the background.

Maciej and I will have to watch out for the ferries.

Langdale ferry.

Maciej passes me.

Finisterre Island to the left, Bowen Island to the right.

Maciej is going to try to go between Finisterre Island and Bowen Island.  I do not think that the tide will be high enough for Gwragedd Annwn to make it.  I go around.

Doorway to Finisterre Island.

The tide is too low even for Maciej, he carries his kayak across the spit.

Rowing past Bowen.

Maciej and I had intended to cross the Queen Charlotte Channel together.  Here we are discussing the crossing.  There is a problem.  If Maciej paddles slowly enough for me to keep pace with him, he gets cold!  We decide to cross at our own pace and meet just past Point Atkinson, in Starboat Cove.

Bowen ferry.

We have two ferries to dodge.  The Bowen and Nanaimo ferries.

Dodging the Nanaimo ferry.

I see the Bowen ferry and stay to the North of her route to Snug Cove.  When she passes, I row on.  I spot the Nanaimo ferry quite far out but I will never be able to cross her route in time.  I stay to the South West of her route until she passes.

Nanaimo ferry past, White Cliff Point.

I row past White Cliff Point, Whyte Islet, Bird Islet, Batchelor Point, Fishermans Cove.

Eagle Island, Fishermans Cove.

The rowing gets tougher…I have run head-on into a counter-current.  My speed over ground slows to less that two kilometres an hour.

Slog, slog, slog.

I creepy-crawl past Grebe Islets, Indian Bluff.

Point Atkinson, the Lighthouse at last!

The going to here has been painfully slow.  I round the point.

Point Atkinson Lighthouse.

Maciej should be just around the corner, in Starboat Cove.

Maciej spots me from the rocks.

A slight change of plans, Starboat Cove is too full of driftwood for a landing.  Rounding Atkinson, the current and wind are now in my favour.  I decide to carry on to HSC.

Get goin’ while the goin’ is good.

Maciej will pack up and catch up to me soon.  I am making good time.

Maciej passes me near anchorage 14.

The tide and current continue to favour me.  I carry on.

Anchorage 13.

Maciej vanishes into the distance.  Those kayakers sure are fast.  I row on.

Arriving at Hollyburn Sailing Club.

Maciej and I on the beach at HSC.

Back at the Club.

Toast to the trip.

Trip stats:

GPS numbers.

All in all a great row…no blisters and good numbers.

Many thing worked well…I can sleep on Gwragedd Annwn.  She does row well with a load.  The stove worked, the tent worked, the food storage worked, the equipment storage worked.  The anchoring worked.  All in all a good row and a good result.


Happy rowing to you,


Mike


Posted in Under the Keel.... | Leave a comment

The Urban Oarsman & Son build a Canoe, part Twenty three…Final sanding of the hull and glueing on the brass keel strip.

This is the last chance to get the hull smooth.  I kill off an afternoon sanding the canoe.  (Again!)  When we brought the canoe out into the sunlight, you could see a few runs….We are trying for a good finish…

Power sanding with the 220 grit.

220 grit then 320 grit.

Power sanding with the 320 grit.

Looks the same as the 220 grit.

I finish with wet/dry sandpaper.

I wet sand the hull with a hand sanding block and 320 wet/dry sandpaper.

After the sanding, I give the hull a good rinse.  I am done with sanding.


Even though Ted Moore does not have a bass keel strip on his Hiawatha design, Paul decides that he wants to have one on his.  I look at many pictures of cedar strip canoes on line and none have a brass keel strip….I guess that Paul wants his canoe to stand out.

From Alaska Copper, I buy:  Three Half Oval Free Cutting Half Hard Yellow Brass Bars (minimum order).

From their catalogue:
Nominal Chemicals: Copper 61.5%, Zinc 35.4%, Lead 3.1%
Average Physical Properties: Tensile 45,000 psi (min), Yield 17,000 psi
Specifications: ASTM B 16, Temper H02 (1/2 Hard)
Size                 Lbs/Ft
1/8 x 1/2        .181

Paul will use 213″ of half oval at .181 pounds per foot= .181 x 12 x 213 = 3.21275 Lbs.

Paul’s canoe will exceed Ted Moore’s design weight.


Paul wants to use a few screws as possible, so we will use polyurethane goop to glue the keel strip on.  Four screws, one at the top of each stem and one at the bottom (on either side of the stem curve) to hold the strip on while the goop cures.

Lining up and planning out the keel strip.

The brass half oval comes in 12′ lengths.  We have two choices, a 12′ length in the middle with a (approx) 24″ piece at each stem or two strips from the stems, meeting in the middle.

The first choice will be the easiest, as any excess length will protrude at the stem and can be cut off.  The fit need not be as exact as using two pieces that meet in the middle.

Paul wants to have two strips, meeting in the middle for only one “seam”.

We measure and dry fit the keel strips.  I use a punch to start each screw hole.

Determining where the two stem screws will go.

You can see the first screw at the beginning of the curve.  Paul will now drill the top screw pilot hole.  Paul drills the second pilot hole 1/16″ too far away to draw the keel band tight.

Same “Drill” at the South end of the canoe stem band.

We dry fit the keel strips and then draw a pencil line on either side of the brass strip.

Drawing the pencil line.

We will use tape to mask the keel line.

Paul puts tape on the lines.

With the keel strips to one side, time to “Goop up”.

Paul makes a point of shooting goop into the screw pilot holes.

Paul runs a bead between the strips of tape from stem to stem.  Gloves are mandatory!

Bead of goop.

I use a Popsicle stick to spread out the goop bead.

Spreading the goop.

All gooped up and the keel strip is on.

How we did it:  I held the keel strip at an angle,  so Paul can easily screw in the top stem screw.  We slowly bend the keel strip down and Paul puts in the second stem screw.  We then lay the keel strip flat.

Paul and I do a lot of “eyeballing” to get the keel strip straight and use tape to hold the strip in place.

The fit is pretty good in the middle of the canoe.

Where the strips join.

A slight gap will allow for the expansion and contraction of the strip.  The goop says that it can accommodate +/- 35% movement.

We scrape off the excess with a putty knife and then use Varsol to clean up the rest of the  excess goop.  After we have cleaned up the excess, we tape the keel strip down every 10″ or so.  Time to let the goop dry…3 to 6 hours to be tack free, up to 7 days to cure completely.  We will remove the tape tomorrow afternoon, after 24 hrs of drying time.

All taped up.

The strip looks really straight….but, will the goop really stick the brass half oval to the epoxy coating on the hull?


I make up a test strip, using a left-over piece of hull and left-over brass half oval.

Tester.

In a couple of days. we will try to pull the two apart.  The canoe should have a better bond, as it was sanded and washed with solvent.  With this tester, I just put down a bead of goop and set the brass strip onto it.  If we cannot pull the tester apart (or it is very hard to do) job done.  If we can pull the two pieces apart easily, we will consider that the goop is for bedding not bonding and drill the canoe’s keel strip and put in more screws to hold it on.   Time will tell.

All the best,

Mike


Posted in Under the Keel.... | Leave a comment

The Urban Oarsman & Son build a Canoe, part Twenty two…..…Final shaping of the gunnels and glueing on the decks.

We are going to work outside to keep the dust down in the shop.  There is varnishing in our future. A perfect afternoon for working on the Canoe.  Warm, sunny with a little breeze to take the dust away.

We get ready to work on the gunnels.

We are going to take around ⅛” off of the gunnels.  This will give us a clean edge.  If the gunnels still look a little too thick, we will plane off another 1/16″ or so.  All eye-work.

Paul files off some epoxy “flash”.

I hold the canoe steady while Paul cleans the gunnel so the power planer will not hang-up on anything.

More eye-work.

Paul decides on two passes of the planer…about ⅛” of an inch.

Checking the outer gunnel thickness.  Paul is happy.

Paul now sands the shear-line, leveling the gunnels with the cedar hull strips.

Start with 50 grit belt.

We were pretty careful with aligning the gunnels and the shear-line.  Not a lot of sanding to do.

Dusty business.  Finish with the 120 belt.

After Paul finishes sanding a round-over onto the gunnels, I make a paper pattern for the decks.

Deck templates.

The two decks are not exactly the same.  I transfer the pattern to the 1″ thick S2S oak stock and use my bandsaw to cut it out.  I am going to Dado the two sides to fit the inside gunnels.

Cutting the Dados.  Slow and careful.

Paul has decided that he wants the decks to appear to be just over ⅛” thick.  I adjust the Dado blades accordingly.

Decks clamped on.

We line the dados with cloth and lots of epoxy.  We put the decks on with the canoe right-side up and then flip it upside-down so the epoxy drips will not run down the sides of the canoe.

Decks clamped on side view.

We leave the epoxy to cure overnight.

The next day I decide to weigh the canoe.  I take off all of the clamps and put in the seats and carrying yoke.

Weighing.

Scale reading:

Just under 50 lbs.  Canoe Craft design weight 48 to 50 lbs.  right on track.

If Paul wants the canoe to be lighter, we will plane off more of the outside gunnels.  Paul is happy for now.

I  sand off the epoxy flash with 100 grit and then give all the bare oak a going over with the 240 grit:

North Deck de-clamped, sanded and ready for epoxy coating

We feel that the deck is very substantial, as it is 1″ thick and epoxied to the gunnel tops and sides.

Time to epoxy the decks and gunnels.

Paul is at work so I roll on the epoxy coat.

Epoxy coating the decks.

I roll on an epoxy coat onto the decks and gunnels.  I now know what the canoe will look like when varnished.

South Deck done.

I roll out the epoxy for about ½ hour.  I will come back in an hour or so and chase any new bubbles.

Look’in good.

I will wait for the epoxy to cure and then put on another coat…Maybe tonight.  Should be done with the ‘Poxy then.

Cheers,


Mike

Posted in Under the Keel.... | Leave a comment

The Urban Oarsman & Son build a Canoe, part Twenty one…Glueing on the outside gunnels.

Paul and I have tapered the outside gunnels and now we are going to epoxy them on.  The first step is to cut off the excess gunnel.

Cutting off the excess.

Having cut off the excess, we dry fit the gunnels and use a clamping jig to keep the gunnels aligned at the stems.

Dry fit of the gunnels.  I draw on “witness marks” for easier assembly after epoxying.

I have cut two wedges to be able to clamp the gunnels tight to the stem.  A third clamp keeps the gunnels on the same level as the top of the stem.  I will use wax paper to keep the clamping blocks from sticking.

Paul paints the gunnels with epoxy resin first, giving it some time to soak in.

With the hull sanded, We expect to get a good bond between the gunnels and the hull.  Paul paints the canoe at the shear-line with epoxy resin.

Ready to clamp on the gunnels.

We begin clamping.  Paul holds the gunnel in place while I clamp.  The goal is to get a little epoxy “squeeze-out”.  The 2½” clamps only fit near the stems where the gunnel is tapered.

Many Clamps later….

You can see a few runs.  We are going to turn the canoe over so the drips will not run down the hull…

Upside down.

At this point, Paul and I decide to give the canoe one more coat of epoxy…a finish coat to get rid of the “runs”.

Close-up of the stem clamps.

The two gunnels are aligned at the stems.

Rolling on the “Finish” coat.

Paul and I roll on the finish coat.  We go over the hull many times.  We are trying for a very “thin” coat.

Brushing out the bubbles.

We go over the hull with a brush, taking out (popping) any bubbles the rollers leave.  We go over the hull many times, looking for “holidays” (missed spots) or runs.

Finish coat done.

Now it is time to cure.

The next morning.

I take off all of the clamps to see what she looks like.

I flip the hull over to have a look.

Overhead shot.

Looks good!!!

I flip the hull back upside down and begin to fill any gaps between the hull and the gunnels.

Chasing bubbles.

Were ever there is a gap, I get some bubbles as the epoxy fills the gap.

Time to let the epoxy cure.

After chasing bubbles for half and hour….it is time to let the epoxy cure.

“Poxy curing.

Tonight when Paul gets home, we will round-over the gunnels, sand the shear-line flat, put on the decks and then give them all a final epoxy sealing coat.

Almost ready to go……42 lbs.

Attach the brass half-oval.

Varnishing is in the future.

Mike

Posted in Under the Keel.... | Leave a comment

The Urban Oarsman & Son build a Canoe, part Twenty…………Weaving the Babiche pattern for the seats, tapering the outside gunnels and final outside hull sanding.

Paul has decided to weave a “Babiche” pattern on his canoe seats, using paracord instead of rawhide lacing.  He picks a “Blue Camo” paracord colour pattern.

I do some research on the internet and find a diagram on Mike Elliott’s (Author of “This Old Canoe”) web site.

Babiche weaving pattern from: https://canoeguybc.wordpress.com 

Mike also describes how to weave a “Babiche” seat in his book, “This Old Canoe”, pages 83 to 89, using rawhide lacing.

I test out the pattern on the stern (smaller, 10 by 10 pattern) seat:

Stern seat laced up…only a few minor “goofs”.

I have made a few minor mistakes in the weave.

Seat mistakes.

Mistake #1- should have gone over the horizontal strand, not under.

Mistake #2- should have gone over, around the horizontal and diagonal strands and then under the horizontal strand, not over, as I did at #4 arrow.

Mistake #3- same mistake as #2.

Mistakes #5- should have gone around under and down the left verticals.

I think that I have learned something from this and try the larger bow seat.

Marking the seat.

There should be an equal number of strands going vertically and across the set.  I decide on twelve (one every inch) for across and every 2/3 inch for the vertical.  I use a pair of dividers to mark the seats.

Felt pen dot where the strands go.

With my strand locations marked, I begin to weave the seat.

First knot.

You only use three knots…a Hitch to start, a whole wack of Lark’s head knots and a few half-hitches to finish.  The pattern consists of three strands.  The horizontals, the vertical slanting to the right, and the verticals slanting to the left.  Basically you go across and then down and up again in a “V” shape:

Pulling the paracord through for the first horizontal strand.  Pull it tight!

I am using about seventy-five feet of paracord.  The stern seat (10 by 10) took almost sixty feet.  From across, you go down to the middle of the seat.  Pull the paracord tight after every Lark’s head.

Larks head know at the bottom of the “V”.

Then back up again to the top.

Lark’s head at the top of the “V”.

CHECK your work to the diagram!!!!  This is a five to six hour job and you do not want to have to un-weave very far to fix your mistakes!!!!

Second horizontal.

I have tucked the extra paracord from the first knot under the Lark’s head.

To the top rail then down.

It takes a while to train your eye to spot mistakes so check against the diagram after every pass.

Wide angle look at the “V” pattern.

The up-going to the left “V” arm go under the up-going to the right “V” arms and over the horizontals.  The up-going to the right “V” arms go over the up-going to the left “V” arms and under the horizontals.

As you progress, there is less paracord to pull through but more weaving to be done.

The real weaving is starting…

The weaving in the centre begins…

The Lark’s head knots do move a bit on the seat frame.  Put them back where they belong.  Remember to pull every strand as tight as you can.

Carrying on with the pattern.

Another problem begins. pulling the paracord through the weave begins to put a real “twist” into the cord.  I have to stop after every pass and shake the twist out.

After two movies in a Space network  “Avenger’s” movie marathon.

The next day I find my mistake……see the dot?  There are only eleven Lark’s heads on this side of the frame.

Should have gone up and aground then down….

I have already trimmed the paracord…it is now too short to fix this.  Paul will have to live with it.  Maybe I just will not tell him.

Time to do something I cannot mess up…Sanding the outside of the hull for glueing on the outside gunnels.

Starting to sand. #120 grit.

We were quite careful not to get any drips or runs in the final fill coat.  Time to sand the hull really smooth for the varnishing and glueing on of the gunnels.

East side of the canoe sanded.

I am going to finish with 240 grit.

Ready for the 240 grit.

The hull ends up pretty smooth.

The 240 grit sanding dust is a little finer….

I give the canoe a wash…she looks pretty good.  If I only had some 400 grit wet/dry sandpaper!

Ready for the gunnels and maybe some varnish.

Time to work on the gunnels.

On the Weekend, Sunday, we taper the outside gunnels.  The taper will be ¼”, the gunnel will go from 1″ wide in the middle to ¾” wide at the stems.

Tapering the gunnels.

We need four passes for the planer to get a ¼” taper.  We measure and put a planer mark every nine inches.  Paul planes the gunnel, and then smooths out the taper with the belt sander.

Where the planer starts a cut, there is a “hump”.  Paul sands the “hump” smooth.

We take the gunnel over for a “test-fit”

Test-fit West gunnel.

Paul eyeballs the fit to see if the taper is sufficient.  Does the gunnel look too wide?  Is he happy with it?

Paul likes the way it looks.  The outside gunnel is ⅛”  wider that the inside gunnel.

We clamp on the East gunnel.  Paul is happy.  The width of the gunnels fit his hand for carrying.  After we glue the gunnels on, we can still plane off a little if he then decides that they are too “thick”.

Gunnel test fit.

Paul will sand off the sharp edges after the gunnels are glued on.

We do not have enough time to epoxy the gunnels on.  The weather is supposed to be much hotter in a few days.  ‘Poxy evening!

Almost done!,


Mike


Posted in Under the Keel.... | Leave a comment

The Urban Oarsman & Son build a Canoe, part nineteen…………Inside and Outside gunnels, Epoxy & cloth on the inside of the hull.

Paul has decided to “Scupper” the inside gunnels.  We cut up the 8′ oak plank to get 16′ lengths for the gunnels.  We will use a “half-clothespin” splice to get the length.

Making a scarphing jig.

With this jig, I will be able to get a consistent angle for the scarph.

The runners are the same with as the table slots.

I will have to cut a scarph in each end of the gunnel pieces and in the “half-clothespin” part.

Cutting the “half-clothespin” scarph piece.

Glueing up the pieces:

I used Titebond II glue.

A few photos of the glue-up:

Spread the glue.

Clamp the pieces.

Clamp o’mania.

All Clamped up:

I used the Shopsmith table and adjustable stands to get the two pieces level.

Carefully, we set the gunnel pieces aside to dry:

Set aside to dry.

While the glue sets, Paul and I use a cedar strip to mark the shear line.

Batten clamped in place.

Other end too!  A lot of “eyeballing” to get this right.

Other end.

Paul uses a sharpie to mark the line.

Inking in the line.

Finished line…We mark both sides.

Shear line looks pretty good.

I rough cut the shear line.

Rough cutting the shear line.

The canoe now really looks like a canoe!

Lookin’ good!

When the glue is dry, I rip the gunnels to trim the 1/2 clothespin splices:

Trimming the scarphs.

With the gunnel pieces a consistent width and height, we cut an outer and an inner one.

Setting up the Shopsmith for the inside gunnels.

Testing the width:

I have two gunnel strips.

Saw guard removed for clarity.

I end up with two outer gunnel strips, each about 7/8″ by 3/4″ and Three inner gunnel strips 1/2″ by 3/4″.

Paul and I cut one of the 1/2″ by 3/4″ into blocks and four 3′ long pieces for the bow and stern, where the inner gunnel is not scuppered.

The scuppers begin about 3′ from the stems.

Spreading the glue:

Glueing.

We cut blocks to glue to the inside of the inside gunnels:

Scupper blocks.

Time to glue them up:

We measure, evenly space the block and them glue them in.

We are using Titebond II.

Need a lot of clamps.

When the glue is dry, we test fit the inner gunnels into the hull before we put the epoxy and cloth in.

Dry fitting the inner gunnels.

Paul and I dry fit the inner gunnels, cutting them to get a close fit….

We use the Shopsmith Disk sander…

Shopsmith disk sander makes quick work of the fitting.

We are satisfied with a “Rough” fit, the dimensions will change once we put the epoxy and cloth on the inside.

We heat up the canoe using the heat lamps.  At the start, the hull is at 15 degrees.

We got the temperature up to 20 degrees Celsius.

Paul and I drape the cloth in the canoe and add resin.

We have to work quickly, We do 5 “Pumps” of resin/hardener at a time.

We do eight cups of resin/hardener.

As we did on the outside, we scrape off the excess resin to reveal the “weave”.

We reduce the heating in the garage and boatshop…trying to minimise the “off-gassing” and have the resin be drawn into the wood.

We put on the cargo tie-downs on.

Cargo tie-downs in.

We let the canoe cure overnight.  Weighs 37 lbs!  The next day we put on the first fill coat and glue on the inside gunnels while the resin is still “green”.

Dry fit West side first, then East side.

We dry fit both gunnels.

Measuring.

Paul fits the two gunnels.

Paul clamping for the dry fit.

When both gunnels fit, Paul mixes a batch of resin, and coats the gunnel blocks and then the top two inches of the East side of the hull.

We put in the East inner gunnel.

We have to clamp the gunnel at every scupper block.  We aim to see a little resin “squeeze out”.

One side clamped up, painting resin on the West side for the gunnel.

Dry fit photo of how we got the stems even with the gunnels:

Using a clamp to get the gunnels even, much the same way we used clamps to keep the hull strips even.

A lot of clamps.  Then finishing putting on the 1st fill coat.

Both gunnels clamped on, rolling on the first fill coat.  Note the wax paper at the stems.

After chasing bubbles and dry spots, it is time to walk away and let the epoxy cure:

West side.

Looks more and more like a canoe every day.

East side.

Time for tea…  Might be able to get another fill coat on today, if not then tomorrow.  The critical factor is insuring that the inner gunnel epoxy is cured enough so they do not come away from the hull.  It would be good to have the clamps out of the way for the second coat.

Well, Tonight’s the night!  The second fill coat

Clamps off West side of the canoe.

We take off all of the clamps.

Clamp off!

That clamp was on a little tight!

Damage caused by too tight a clamp…It will be covered by the outer gunnel.

We give the gunnels a quick sanding and vacuum the hull.

Quick sanding to remove clamp marks.

Paul and I remove all the green tape from the cargo tie-downs.

I brush resin into the scupper holes and he rolls out the hull.  We both roll out resin for half an hour, trying to get an even coat.  You can only do that for sooooo long.


Second fill coat on and rolled out.

Time for a cure.


The third fill coat went on just like the last one, but with more rolling out.

Cheers,


Mike


Posted in Under the Keel.... | Leave a comment

Building the dolly for Gwragedd Annwn

I have had a lot of experience with launching dollies.  Aluminum tubing seems to work the best.  No rust problems.  Plastic axles for the wheels for the same reason.  Stainless Steel bolts/washers/nuts.  I have gotten more than ten years out of Redwing’s dolly, and it is still going strong.

Gwragedd Annwn is 14’6″ long, too long to use “Redwings” launching dolly.  At 225 pounds, (102 kg.) I can use the same basic design as “Redwings” dolly, using 1½” square aluminum tubing, and 1″ solid round bar as the axle.  This will be a basic “T” shaped dolly.  The most critical part is getting the balance of Gwragedd Annwn on the dolly right.  Too far forward of the axle and the dolly is heavy to lift.  Too far aft of the axle and the boat will tip the dolly backwards and fall off.


 The first step is to design the support brackets:

The Urban Oarsman builds a dolly for Gwragedd Annwn

These are the brackets for the axle, the bow mast and the hull side supports.  The stainless steel bolt positions are marked.  I head to the metal supermarket and buy enough aluminum bar for the axle, axle supports, the centre piece and the mast piece and enough aluminum ⅛” plate for the support brackets.

I measure Gwragedd Annwn to find where the balance point is.  This gives me the distance from the mast to the axle.

Using the plans as a template, with my jigsaw and a metal cutting blade, I cut out the support brackets and cut the square tubing to length.  I use a drill press for the ss bolt holes in the brackets.  I dry-fit the pieces together and drill all of the ss bolt holes through the aluminum bar.  Photo of the partly-assembled dolly:

Bow mast of the dolly.  The bottom of the mast is cut at an angle to match the ground.

Here the bow mast is clamped to the dolly frame, ready for drilling.

Rear axle, ready to put in the square tube supports.  I am using the support brackets as a template.

The plastic-hubbed wheels (no metal to rust) are on a 1″ diameter rod, which is in a 1¼” piece of square aluminum tubing which is in the 1½” diameter square aluminum tubing. The 1¼” tubing fits neatly into the 1½” tubing and the 1″ diameter rod fits neatly into the 1¼” tubing.  This assembly is “locked” by ss bolts going through all three pieces.  A cotter pin and washer (cut from the aluminum plate) secure the wheel on.

Only a few more pieces to assemble.  Note the cotter pin and washer.

After installing the axle supports, I put on the UHD plastic hull supports.

UHD plastic supports also know as “bread boards”.

I drill a 1″ hole at the top of the mast for a handle.  The handle is a piece of 1″ aluminum rod.  A bow ring holds the handle in place.  A plastic cap finishes the handle assembly off.

Mast assembly.

Time to go and try the dolly out.

The dolly as delivered to HSC.  The axle supports are bolted in and I have replaced the bread boards with some ½” UHD plastic sheeting.  I also cut off all of the protruding bolt ends flush with the nylon nuts.

Another view:

Ready to go!

Trying the dolly out:

Bringing Gwragedd Annwn onto her dolly for the first time.

After a few launches, I find that there are better ways to do some things:

First modification, covering the Axle assembly bolt caps.

Gwragedd Annwn snaps off one of the “V” shaped keel guides.  I design new ones:

New keel guides and axle joint bolt protector plate.

A few photos of Gwragedd Annwn with her dolly:

Gwragedd Annwn on her dolly, top of the ramp at the HSC.

Gwragedd Annwn on her dolly in her storage spot at HSC.  Ready to go rowing!

Going to Burnaby Lake, transferring from road trailer to dolly.  I had put Gwragedd Annwn on her road trailer backwards, hoping to make the transfer to the dolly easier.

Launching into Still Creek, going to Burnaby Lake.


Returning from Burnaby Lake.

Deer Lake afternoon launch.  The dolly is atop her hull.  Being backwards or forwards on her road trailer does not seem to make the transfer to the dolly any easier.

Launching into Deer Lake.  Notice how the bottom of the dolly mast digs into the sand.

Tight fit between the Deer Lake bollards!

Back home at HSC.

Over all the dolly has been a success.


Good rowing to you,


Mike

Posted in Under the Keel.... | 1 Comment